color representation attribute
On this page:
The color representation attribute specifies the representative color of Data Markings that are displayed as portion markings on the elements of the project.
Important
- If you make changes to the color representation attribute, make sure to refresh the project (click F5 on the keyboard or click View > Refresh in the tool) in order to see the changes on the element portion markings.
- To see the Data Marking colors, make sure the Show Colors of Data Markings project option is set to true.
Specifying the color representation attribute
To specify the color representation attribute
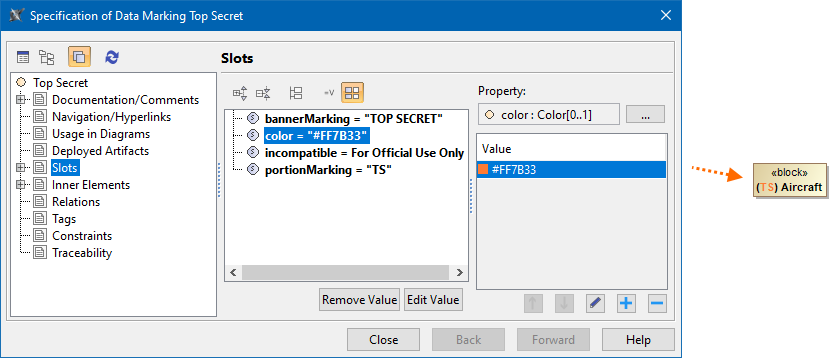
- Through the Data Marking element:
- Right-click the Data Marking element and open its Specification window.
- In the property group list, select Slots > color > and click the Create Value button. The Color dialog opens.

- Select the color you want the Data Marking's portion marking to be displayed in. Click OK.

- Click Close. The portion marking is displayed in the specified color once the Data Marking is added to an element.
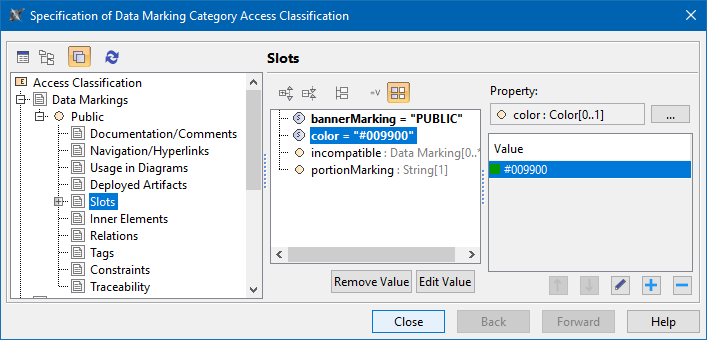
- Through the Data Marking Category element:
- Right-click the Data Marking Category element and open its Specification window.
- In the property group list, expand Data Markings. Data Marking elements that belong to the category appear.
- Expand the Data Marking element you want to edit and select Slots.

- Select color and click the Create Value button. The Color dialog opens.
- Select the color you want the Data Marking's portion marking to be displayed in. Click OK.
- Click Close.
Editing the color representation attribute
To edit the color representation attribute
- Through the Data Marking element:
- Right-click the Data Marking element and open its Specification window.
- In the property group list, select Slots > color.
- Click the
 button and select a new color. Click OK.
 - Click Close.
- Through the Data Marking Category element:
- Right-click the Data Marking Category element and open its Specification window.
- In the property group list, select Data Markings. Data Marking elements that belong to the category appear.
- Expand the Data Marking element you want to edit and select Slots.
- Click color slot and select the value you want to edit.
- Click the button and edit the selected value.
- Click Close.
Removing the color representation attribute value
To remove the color representation attribute value
- Through the Data Marking element :
- Right-click the Data Marking element and open its Specification window.
- In the property group list, select Slots > color.
- In the Value box on the right side of the dialog, select the color value you want to remove.
- Click the
 button to remove the value.
 - Click Close.
- Through the Data Marking Category element:
- Right-click the Data Marking Category element and open its Specification window.
- In the property group list, select Data Markings. Data Marking elements that belong to the category appear.
- Expand the Data Marking element you want to edit and select Slots.
- Click color slot and select the value you want to remove.
- Click the button to remove the selected value.
- Click Close.