Use theProject Optionsdialog to specify project-specific options.The dialog includes option groups, each designated for specific features. You can find the evaluation-related project options under the Evaluation option group.
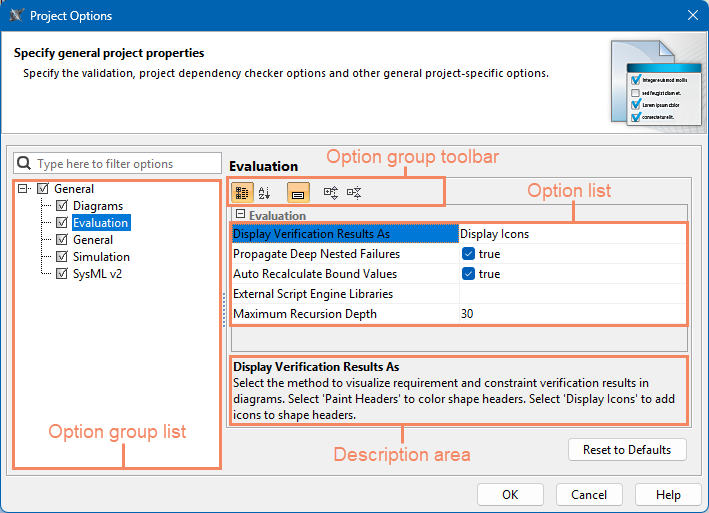
The Project Options dialog
Modifying evaluation project options
To modify evaluation-related project options
In the main menu, select Options > Project.
In the Project Options dialog, select the Evaluation option group.
In the option list, click the value cell for the option you want to change, then enter or select the new value.
Click OK to close the dialog.
Evaluation project options
The following table describes evaluation-related project options.
Option name
Description
Display Verification Results As
Select the method to visualize requirements and constraint verification results in views. Select Paint Headers to color shape headers. Select Display Icons to add icons to shape headers.
Propagate Deep Nested Failures
Set to true to indicate deep nested requirement and constraint failures on part shapes. Set to false if you want shapes to be highlighted only when they directly fail a requirement or constraint.
Autorecalculate Bound Values
Set to true to automatically recalculate bound values when an initial value is changed. Set to false to initiate recalculation by clicking Refresh or Evaluate.
External Script Engine Libraries
Add the external library files that will be loaded into the script engine. To add a file, select the option value cell, click , click the Add button in the open dialog, and select the file you want to add.
Maximum recursion Depth
Specify the maximum number of times a feature can be re-evaluated recursively before the recursion error is triggered.