You can use views to evaluate model elements displayed in a view and export the results to a CSV file.
To export the evaluation results to a CSV file
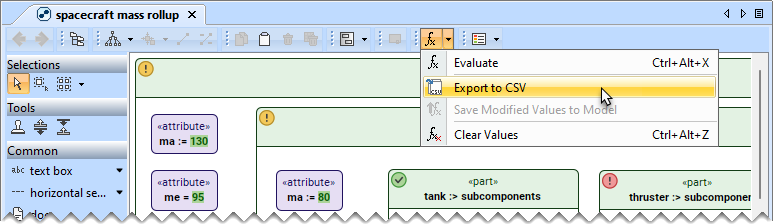
In the view toolbar, click to evaluate model elements displayed in the view.
In the view toolbar, click the arrow next to and select Export to CSV.
When the evaluation is performed on selected elements, only the results for those elements are exported. If no elements were selected, the export will include results for all elements displayed in the view.
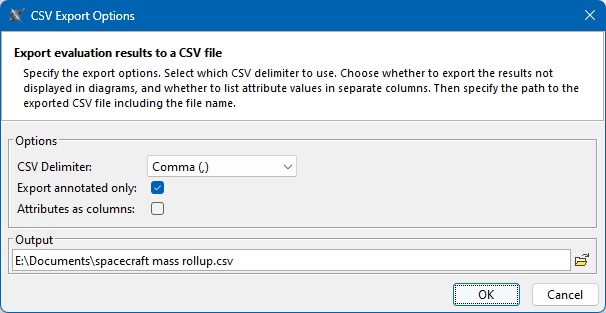
In the CSV Export Options dialog, specify the export options. To learn more, see CSV Export Options dialog.
Click OK to export the evaluation results.
The CSV file with evaluation results is saved in the specified location. You can open the file by clicking a link in the message saying that the CSV file was generated successfully.
CSV Export Options dialog
The following table describes the UI elements of the CSV Export Options dialog.
UI element
Description
CSV Delimiter
Select the character used to separate values (columns) in a CSV file. The default CSV delimiter is selected according to the machine's locale.
Export annotated only
Select the Export annotated only check box to export only annotated results in the view. Clear the check box to export all evaluation results.
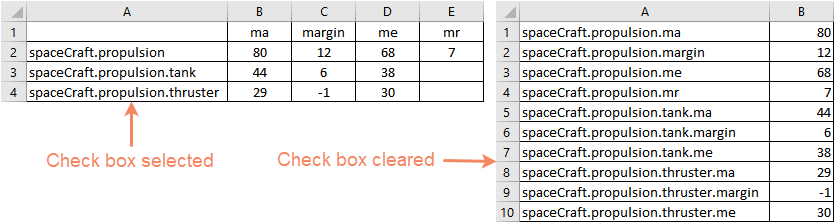
Attributes as columns
Select the Attributes as columns check box to export attributes to columns and paths to the corresponding rows. Clear the check box to print every value in a separate row.
Output
Specify the path to the CSV file. By default, the project directory is selected.