Include use case
An include use case usage is a use case usage that is also a kind of perform action usage. A use case definition or usage may contain an include use case usage to specify that the behavior of the containing use case includes the behavior of the included use case. The subject of the included use case is the same as the subject of the containing use case, so the subject parameter of the included use case must have a definition that is compatible with the definition of the containing use case. Actor parameters of the included use case may be bound to corresponding actor parameters of the containing use case as necessary.
An include use case usage can be a feature of:
- a part definition or usage, specifying that the referenced use case is included in the containing part.
- a use case definition or usage, whereby the behavior of the containing use case includes the behavior of the included use case.
There are two ways a use case can be included by another element:
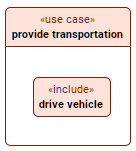
- by referencing the use case usage defined elsewhere in the model.
- The element symbol is displayed with the include keyword (unnamed element) or the include use case keyword (named element).
- See the procedures:
- The element symbol is displayed with the include keyword (unnamed element) or the include use case keyword (named element).
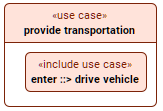
- by containing an owned include use case, i.e., the included use case is the include use case usage itself.
- The element symbol is displayed with the include use case keyword.

- See the procedures:
- The element symbol is displayed with the include use case keyword.
Including a use case by referencing a use case usage defined elsewhere in the model
Including use cases via the Textual Editor
To include use cases via the Textual Editor
- In the Textual Editor, within the body of the element that you want to include a use case, do one of the following:
- For an unnamed included use case, declare the include keyword followed by the name of the included use case.
- For a named one, declare the include use case keyword, specify the element name, then reference subset the included use case.
- Click the Synchronize button.
use case 'drive vehicle'; // referenced use case
use case 'provide transportation' {
// unnamed included use case referencing a use case defined elsewhere in the model
include 'drive vehicle' {}
// named included use case referencing a use case defined elsewhere in the model
include use case enter references 'drive vehicle' {}
include use case enter ::> 'drive vehicle' {}
}
Including use cases via the Drag and Drop handler in a view
To include use cases via the Drag and Drop handler in a view
- Drag a use case element from the Containment tree or use its symbol's Drag and Drop handler and drop it on:
- the target element symbol that you want to include the use case by referencing it using the Create Include Use Case command.
- the include use case usage symbol that you want to include the use case by referencing it using the Set Use Case Included command.
Including use cases via the Specification panel
To include use cases via the Specification panel
- Drag and drop a use case element from the Containment tree or use its symbol's Drag and Drop handler and drop it on the Included Use Case field in the Properties section of the Specification panel for the include use case element.
The appropriate use case is specified for the element.
Including a use case via the owned include use case usage itself as the included use case
Including use cases via the Textual Editor
To include use cases via the Textual Editor
- In the Textual Editor, within the body of the element that you want to include a use case, declare the include use case keyword followed by its name.
- Click the Synchronize button.
use case 'provide transportation' {
// included use case is the defined include use case usage itself contained by the parent
include use case 'drive vehicle' {}
}
Including use cases via the Create Element command
To include use cases via the Create Element command
In the Containment tree, right-click an element, and in the shortcut menu, click Create Element.
- In the Create Element dialog, select the include use case element.
- Name the element.
- Specify the included use case's features.
Including use cases via the view palette
To include use cases via the view palette
- In the view palette, under the Cases group, click the include use case button.
- Click in the view pane where you want to create the include use case symbol.
- Name the element.
- Specify the included use case's features.
Including use cases via the symbol compartment in a view
To include use cases via the symbol compartment in a view
- Do one of the following:
- Select a use case symbol and click the Create Element button on it. In the dropdown menu, click the include use case button. The element is created and displayed in the includes compartment.
- Select a use case symbol and on the right side of the includes compartment, click the Create include use case button. The element is created and displayed in the includes compartment.
Including use cases via the Specification panel
To include use cases via the Specification panel
- Open the Specification panel for the use case element.
- Do one of the following:
- In the Properties section bar, click the Create Element
 button. The shortcut menu appears. Click the include use case button in the shortcut menu.
 - In the includes compartment section's bar, click the Create include use case
 button.
The element is created in the includes compartment.
- In the Properties section bar, click the Create Element