Managing local projects
Local projects are managed via the local repository instead of working with individual files. The projects are stored in the local repository within the modeling tool’s configuration files. The local repository serves as a central storage for all your projects, their dependencies, and standard libraries. This makes it easier to keep track of your models, review your work, and smoothly transition between local and server projects. It also provides a more robust format for exchanging models in air-gapped environments between servers.
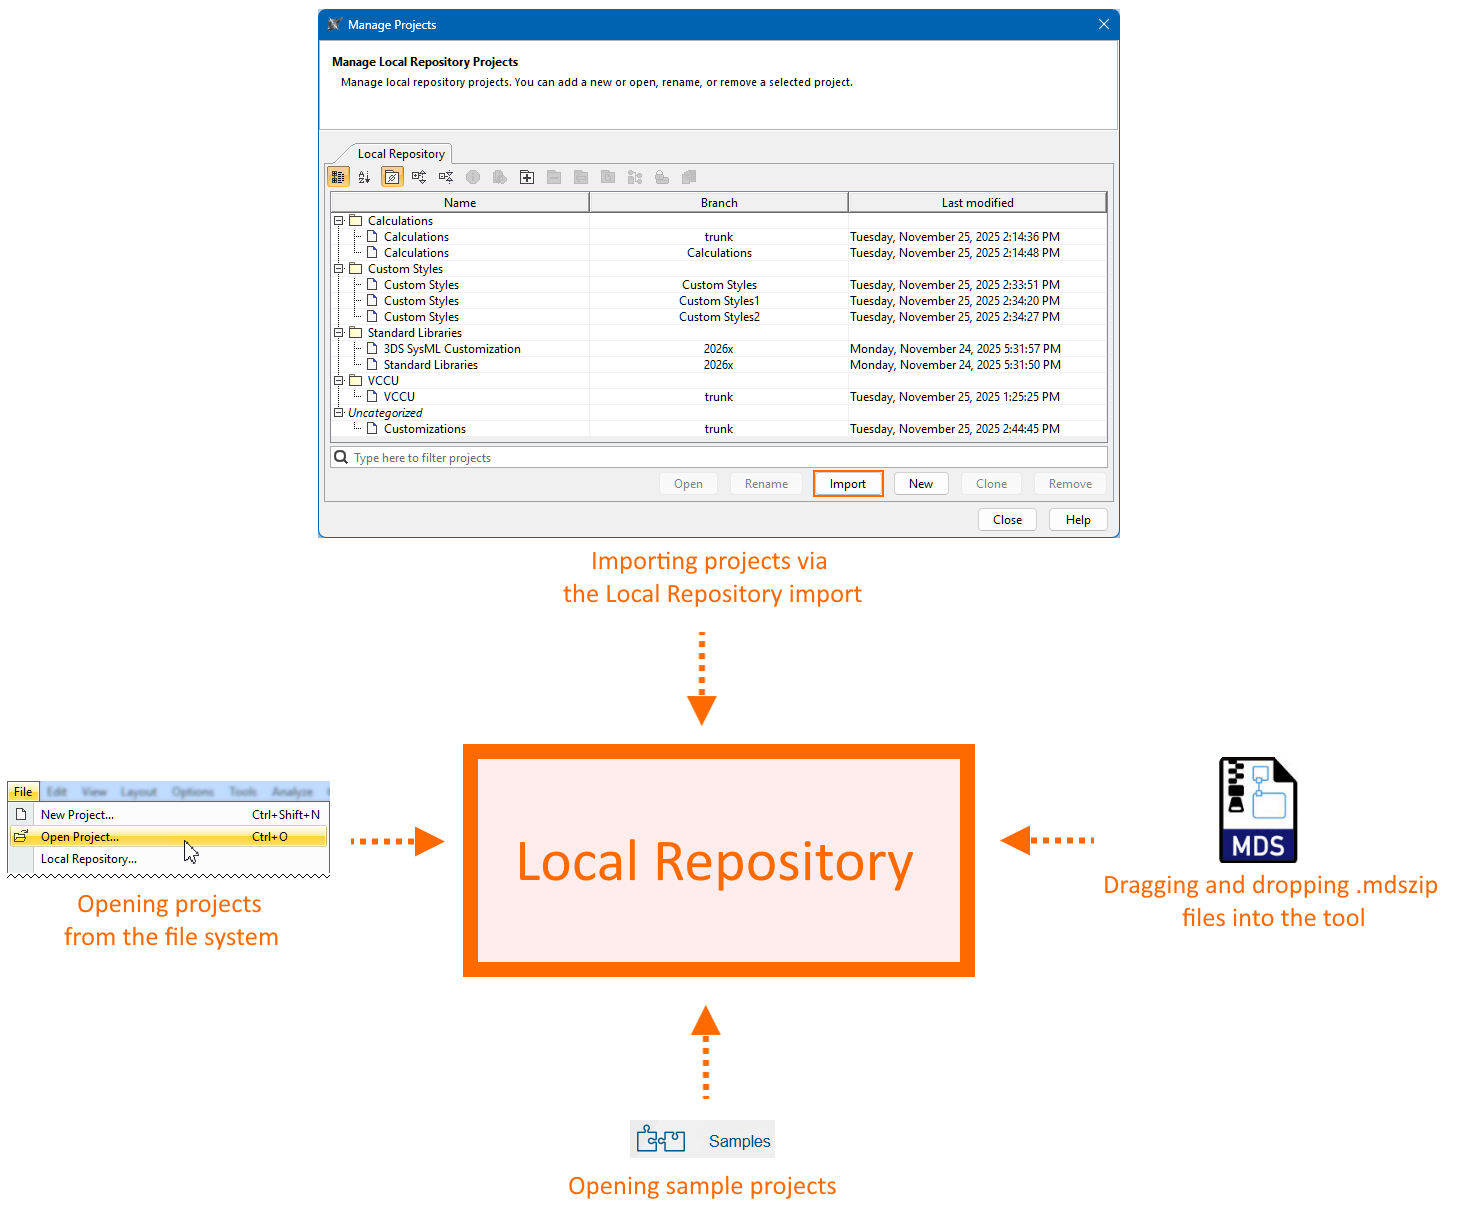
When you open a project from the file system, the tool first imports it into the local repository. After the import completes, the tool opens the project copy from the local repository, not the file in your file system. The tool handles sample projects in the same way. As a result, every project you create, open, or import is stored in the local repository, allowing you to view and modify it.
The projects can be saved in an .mdszip format, where a single file contains both the project and its used projects. This file is intended only for importing projects into your local repository or server. Once imported, all ongoing work is saved directly in the repository. You only need to export to a file again if you want to share your project or create a backup.
The Manage Projects dialog
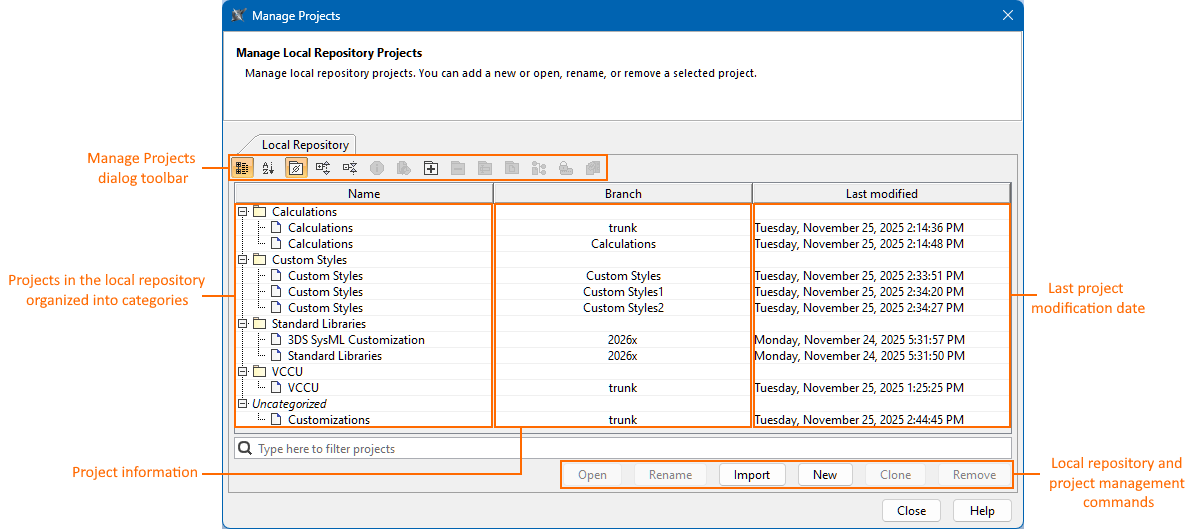
The Manage Project dialog allows you to manage projects in the local repository. It displays all the projects in the local repository and allows you to create, open, import, remove, rename, and categorize your projects.
- The Name column in the Manage Projects dialog displays projects and project categories.
- The Branches column displays the names of project and their imports.
- The Last modified column displays the last project modification date and time.
Opening the Manage Projects dialog
To open the Manage Projects dialog
- In the main menu, click File > Local Repository. The Manage Projects dialog opens.
2026x HotFix1 version
This documentation page is for the 2026x HotFix1 version of the SysML v2 Plugin. If you are working with the 2026x version, expand the section above. However, we highly advise upgrading to the 2026x HotFix1 version.
Local projects are managed via the local repository instead of working with individual files. The projects are stored in the local repository within the modeling tool’s configuration files. The local repository serves as a central storage for all your projects, their dependencies, and standard libraries. This makes it easier to keep track of your models, review your work, and smoothly transition between local and server projects. It also provides a more robust format for exchanging models in air-gapped environments between servers.
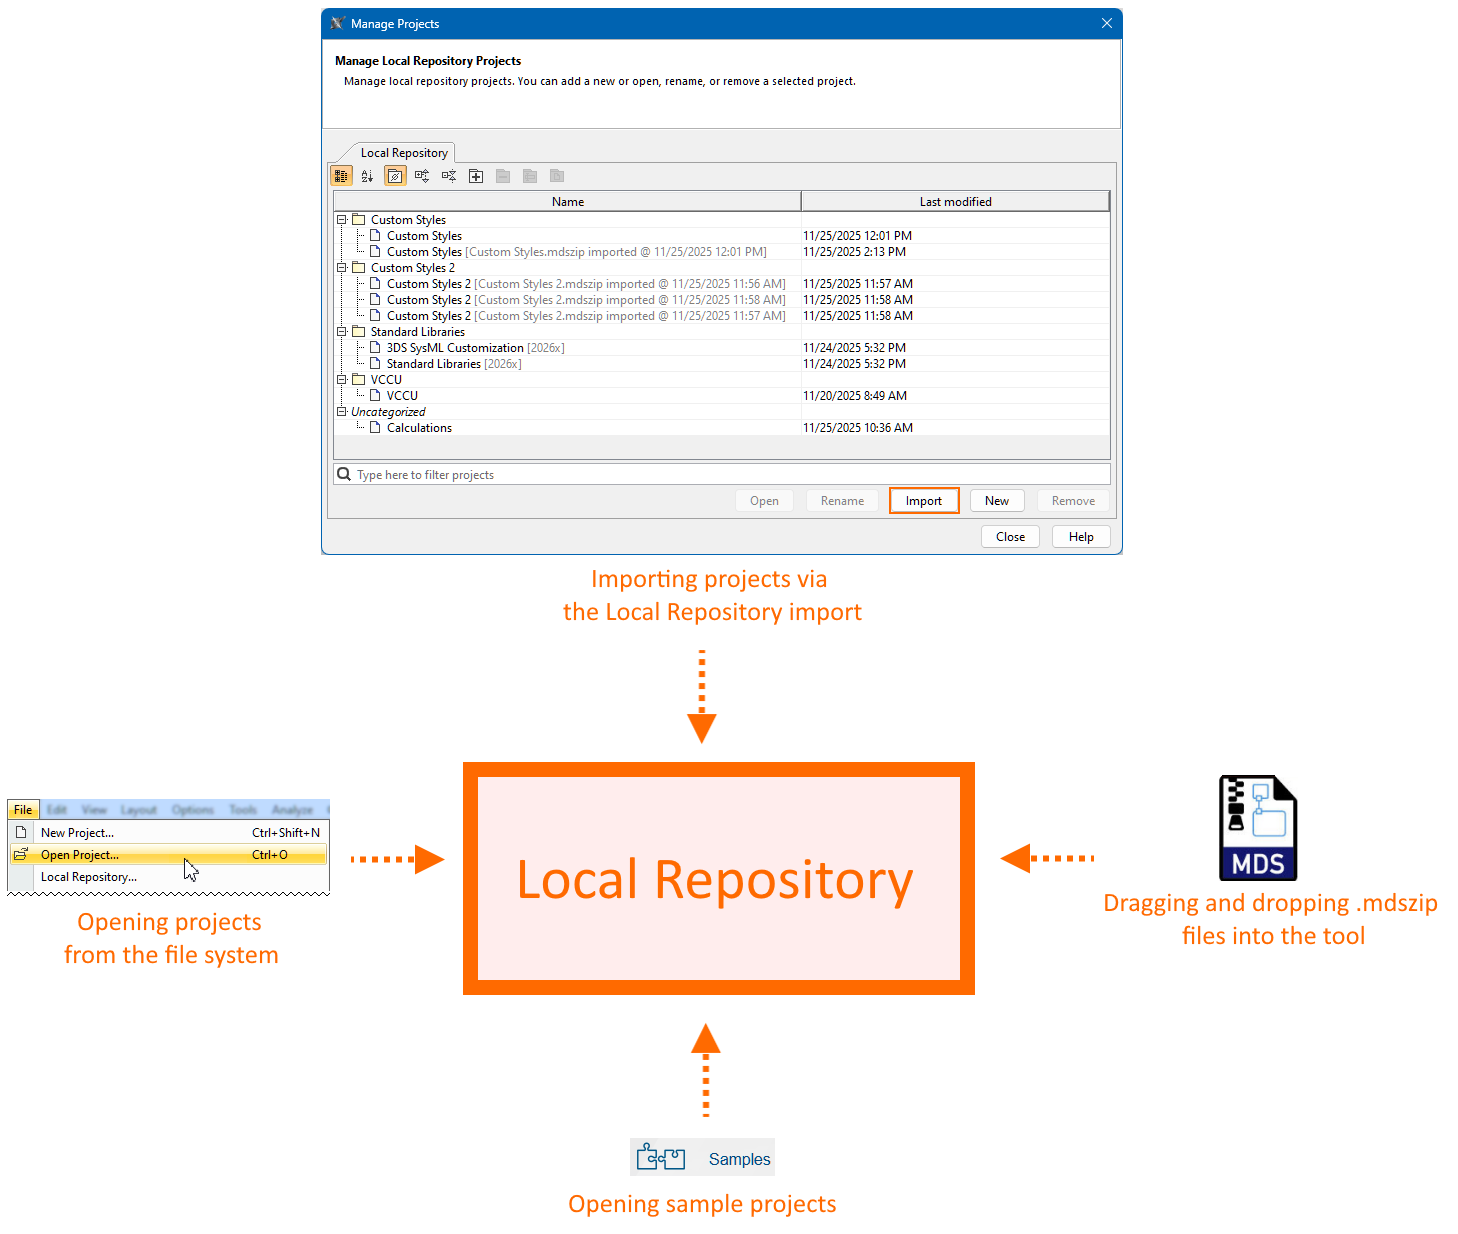
When you open a project from the file system, the tool first imports it into the local repository. After the import completes, the tool opens the project copy from the local repository, not the file in your file system. The tool handles sample projects in the same way. As a result, every project you create, open, or import is stored in the local repository, allowing you to view and modify it.
The projects can be saved in an .mdszip format, where a single file contains both the project and its used projects. This file is intended only for importing projects into your local repository or server. Once imported, all ongoing work is saved directly in the repository. You only need to export to a file again if you want to share your project or create a backup.
The Manage Projects dialog
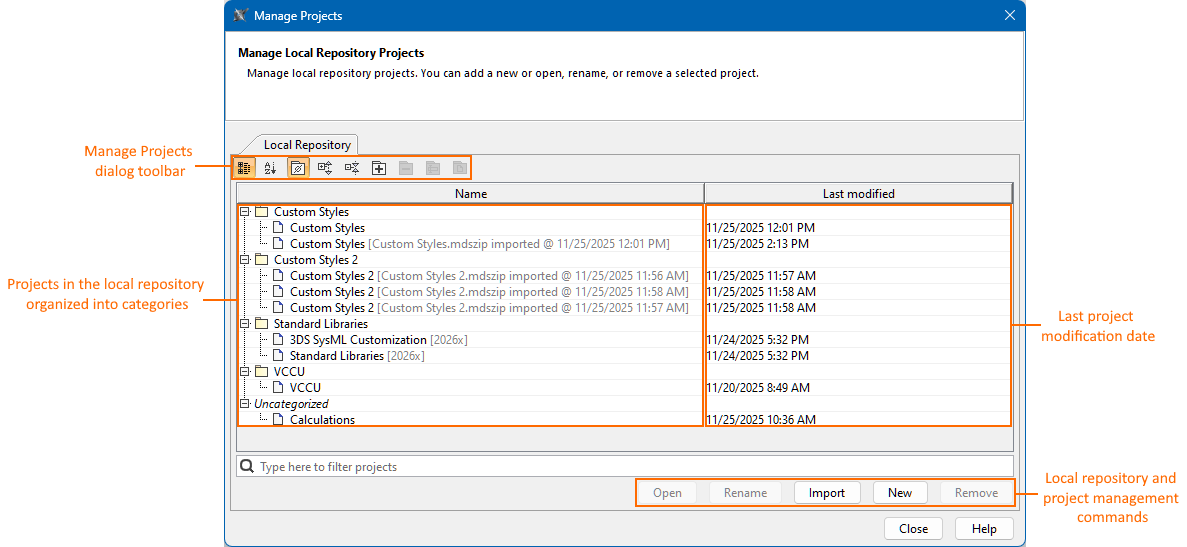
The Manage Project dialog allows you to manage projects in the local repository. It displays all the projects in the local repository and allows you to create, open, import, remove, rename, and categorize your projects.
- The Name column in the Manage Projects dialog displays projects and project categories. Additionally, projects are displayed with the information about their imports.
- The Last modified column displays the last project modification date and time.
Opening the Manage Projects dialog
To open the Manage Projects dialog
- In the main menu, click File > Local Repository. The Manage Projects dialog opens.