Resource Manager functionality allows you to manage local resources (installed with a modeling tool or downloaded separately) and resources available on the web.
With Resource Manager you can manage different types of resources, such as Profiles, Plugins, Templates, Language resources, Case studies/examples, Custom diagrams, and others.
The Resource Manager functionality allows you to:
- Download and install the resources
- Update the resources
- Distribute needed resources internally (including company's developed resources)
- Check dependency of a resource.
The Resource/Plugin Manager helps you manage the resources. You can add the resources (.zip or .rdzip) to your modeling tool from the following locations:
- Local file system
- Network share
- Web server
To open the Resource/Plugin Manager dialog
- From the Help menu, select Resource/Plugin Manager.
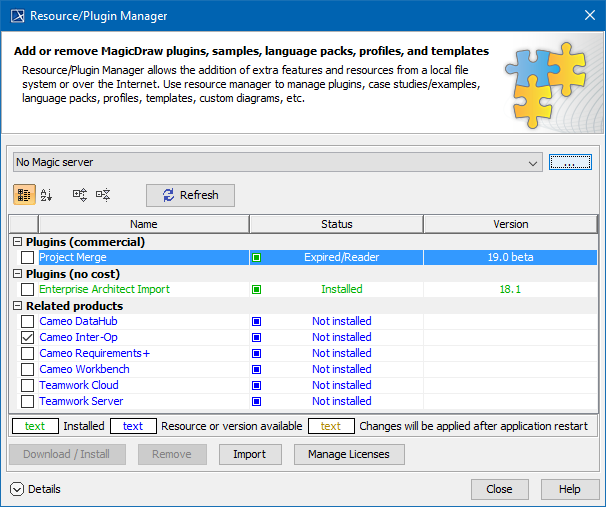
The Resource/Plugin manager dialog.
To see the resource details
- In the Resource/Plugin Manager dialog, select the necessary plugin or other resource.
- Click Details. The dialog expands with the resource description at the bottom.
Distributing resources
You can bundle your resources into one .rdzip file and then distribute that file on a local file system, network share, or web server.
To build the resources file, you need the Development Tools plugin to be installed. The Development Tools plugin can either be installed from the No Magic Server in the Resource/Plugin Manager, or can be found in the no-cost resource distribution file.
Manage Resource Locations
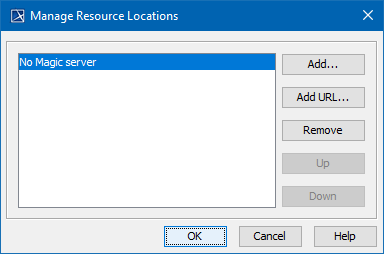
The Manage Resource Locations dialog is used for defining the locations from which the resources will be added to the Resource/Plugin Manager.
To open the Manage Resource Locations dialog
- In the Resource/Plugin Manager dialog, click the ... button.

In the Manage Resource Locations dialog, you will be able to see the defined resource locations. You can manage this locations list by adding, removing, or reordering the resource locations.
To add location of resources
- In the Manage Resource Locations dialog, click Add button. The Select Resource Location or Distribution File dialog opens.
- In the open dialog, select one of the following:
- A location from the local file system or a network share, where the resources and their descriptor file are located.
- Resource distribution file (.rdzip)
The resources from the Resource Distribution File will be listed in Resource/Plugin Manager dialog.
To specify the server where the resources and their descriptor file are located
- In the Manage Resource Locations dialog, click Add URL. The Resource Server URL dialog opens.
- In the open dialog, type or paste the server address.
- Click OK.
The resources from the selected location will be listed in the Resource/Plugin Manager.
If you need to add the No Magic server, enter <nomagic.resource.server> in the Resource Server URL dialog.
- The No Magic server is not available for the Magic Software Engineer, Magic Systems of Systems Architect, and Magic Cyber Systems Engineer modeling tools.
- The resource distribution file (.rdzip) is added to a specific folder (<install.root>/data/resourcemanager/distribution>) for the Magic Software Engineer, Magic Systems of Systems Architect, and Magic Cyber Systems Engineer modeling tools. This location is set by default for all the new modeling tools.