Page History
Migrating older models to use relative IRIs improves model refactoring. First, you need to add the macro. Second, you need to execute that macro. Lastly, you need to use that macro to migrate your older model to use relative IRIs.This can be done using the Macro Engine. The modeling tool comes with the macro file installed in the tool's directory. Instructions on how to find the file are described in this page.
To add the macro
...
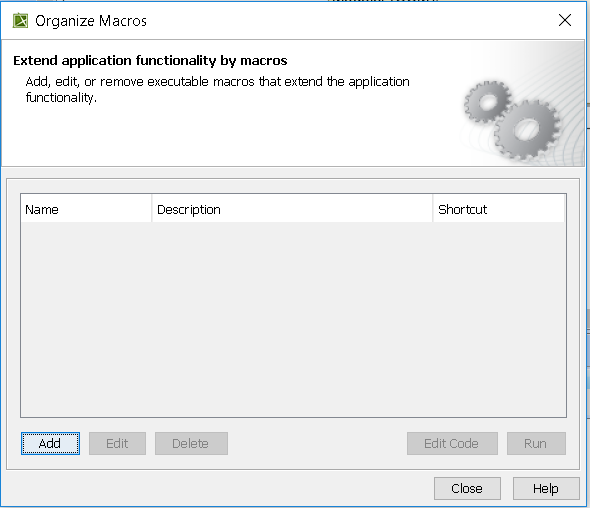
In your Concept Modeling Project, click click Tools > > Macros > > Organize Macros... or or use shortcut key key Ctrl+Alt+M.
 Figure 1: Showing the steps to open the Organize Macros dialog. The
 The Organize Macros
dialog dialog opens.
 Figure
 Figure 2: Showing the Organize Macros that holds the application's macros.
Click Click Add. The The Macro Information dialog dialog opens. Fill out the the Name, Macro Language, and and File containing containing the macro's description.
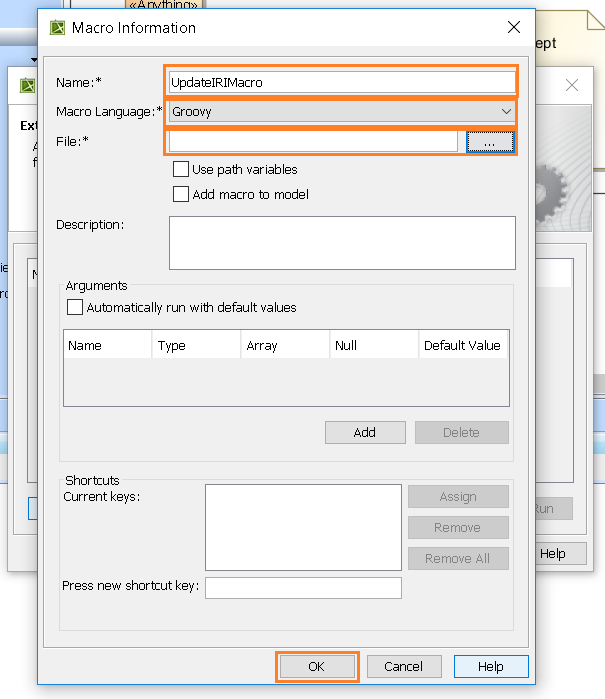
Figure 3: Showing the Macro Information dialog where you can insert the macro file.
Info title Macro Language The Macro Language is the macro's file extension. The modeling tool supports BeanShell, Groovy, JRuby, JavaScript, JavaScript Rhino, and Jython.
To find the appropriate file, click on the three dots at the end
of of File
fieldfield. Your local directory opens. Find the application folder and
select select data
> > Concept Modeler
> > scripts
> > UpdateIRI.groovy.
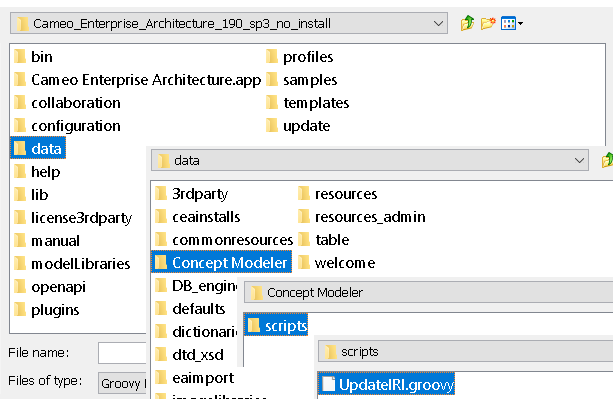 Figure 4: Showing the steps to find the
 the .groovy
filefile
- Now that you have selected the file, click click Ok. Now you should see the macro added in the Organize Macros dialog.
- Click Close.
| Info | ||
|---|---|---|
| ||
The Macro Language is the macro's file extension. The modeling tool supports BeanShell, Groovy, JRuby, JavaScript, JavaScript Rhino, and Jython. |
To execute the macro
...
Click
on on Tools
> > Macros
> > Macro Name e.g. UpdateIRIMacro.
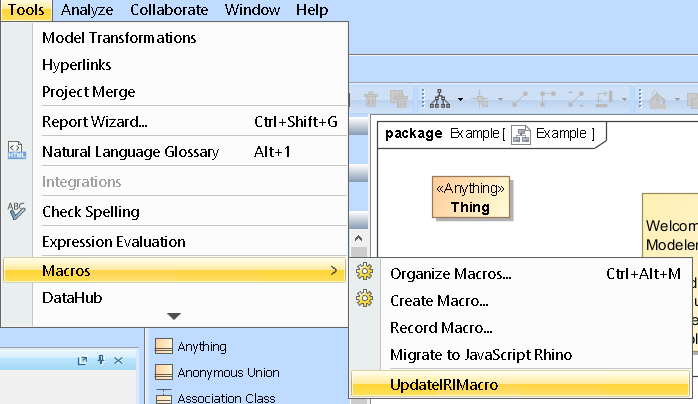 Figure 5: Showing the steps to execute the newly added macro.
- The The Notification Window will will notify you when the macro was executed.

To use the macro for your older modelexisting project
...
Right - click on your model that you would like to update IRIs on as shown in Figure 6.
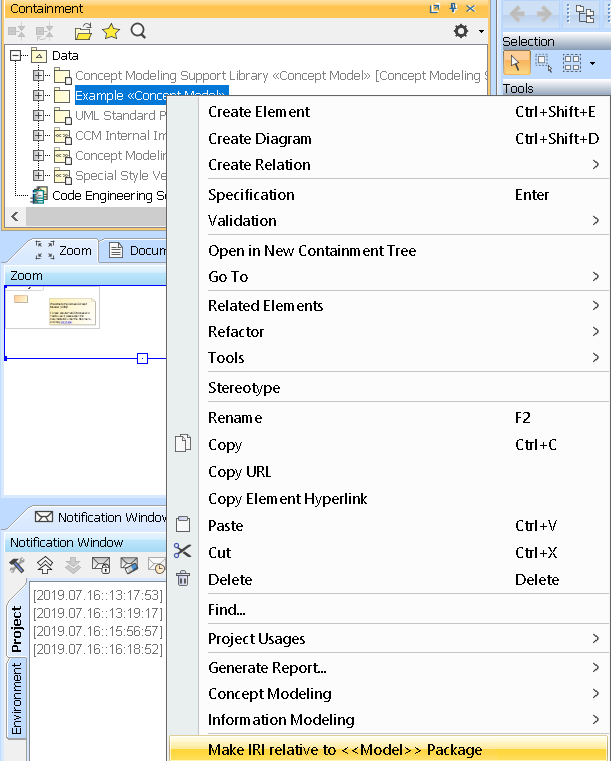 Figure 6: Showing the option to make IRI relative to the model package. This prompts for you to select
 A dialog will open asking where to save
the results in .csv
file generated from this optionformat.
After selecting the file, the progress bar shows the progress of the migration.
The notification window notifies you when the migration is done and where the results are stored.

- Find the Update IRI results in your designated location and view the Excel document containing
- the CSV file showing which elements were looked at and updated. The CSV file describes the "Element ID", "Old IRI","New IRI", and "Updated".
| Note | ||
|---|---|---|
| ||
|
| Note | ||
|---|---|---|
| ||
|