Page History
Once a third-party has modified the locally saved project and sent it back to you, you can update your server project with local changes. To update your project, you need to import the received file back to the Teamwork Cloud server as a new version of the project.
| Warning | ||
|---|---|---|
| ||
|
| Note |
|---|
The branch selected for update cannot contain any locks. They must be released before updating the project. |
...
- Do one of the following:
- Open the server project. In the main menu, click Collaborate > Update from Local Project.
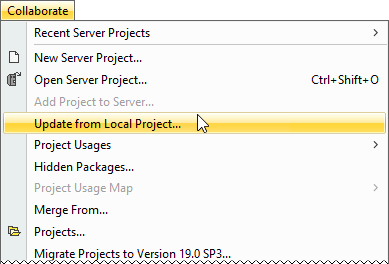
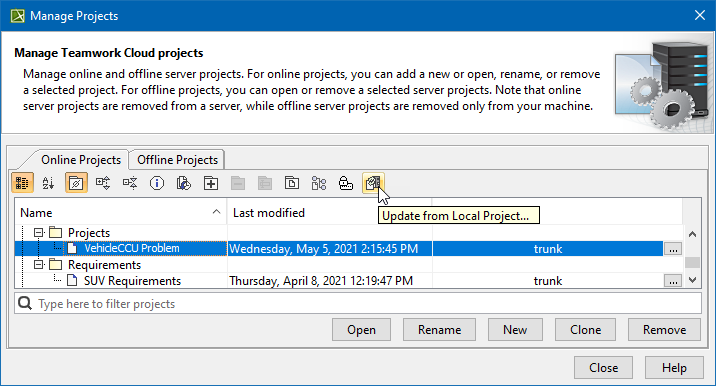
- On In the main menu, click Collaborate > Projects. The Manage Projects dialog opens. Right-click the project you need to update under the Online Projects tab, and then select Update from Local Project.


- On In the main menu, click Collaborate > Projects. The Manage Projects dialog opens. Select the project you need to update and then click .

- Open the server project. In the main menu, click Collaborate > Update from Local Project.
When the Update from Local Project dialog opens:
select a local file exported from the server project you are working on
specify the branch to update
Tip It is highly recommended that you create a new branch from the locally exported version of the server project. This will ensure that the changes made in Teamwork Cloud can be merged with local changes by using a correct common ancestor.
If the Question dialog appears, click Yes to automatically create a new branch from the locally exported version.
If you click No, the branch that is opened or selected in the Manage Projects dialog is specified automatically.

Disable the Maintain Mount Points of Used Projects option if you do not want Mount relationships to be automatically created upon the project update.
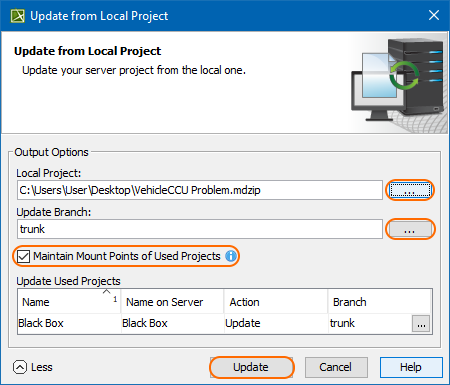
Click Update when you are done. An updated version of the project with the contents of the local project is created in the selected branch.
...