The Product Line Engineering plugin is installed into your modeling tool.
The 3DEXPERIENCE ENOVIA Model Definition Integration plugin is installed into your modeling tool.
DataHub is installed into your modeling tool.
Content block
id
1348047621
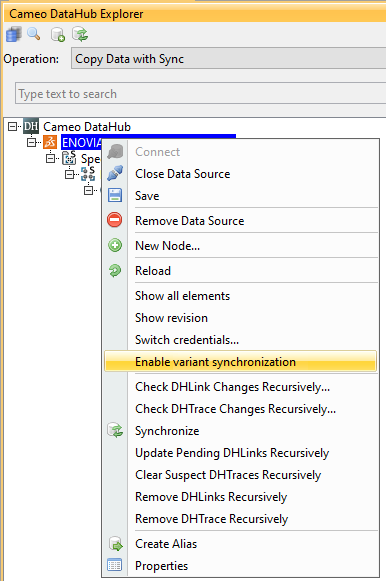
Requirements from the TRM application on the 3DEXPERIENCE platform can be imported/synchronized into the modeling tools using Cameo DataHub.
DataHub can also import the effectivity markings of the requirements as equivalent variation points in the modeling tools. The MagicDraw PLE mechanisms (variant highlight, variant realization transformation) can then be applied to these variable requirements.
Note
The effectivity import is unidirectional. You can import from the 3DEXPERIENCE platform to the modeling tools.
Before starting the ENOVIA effectivity expressions import:
The Model Version variability and configurations have to be imported into your modeling tool project beforehand. Learn more >>
There are requirements in your Requirement app on the 3DEXPERIENCE platform and they have Effectivity Expressions defined.
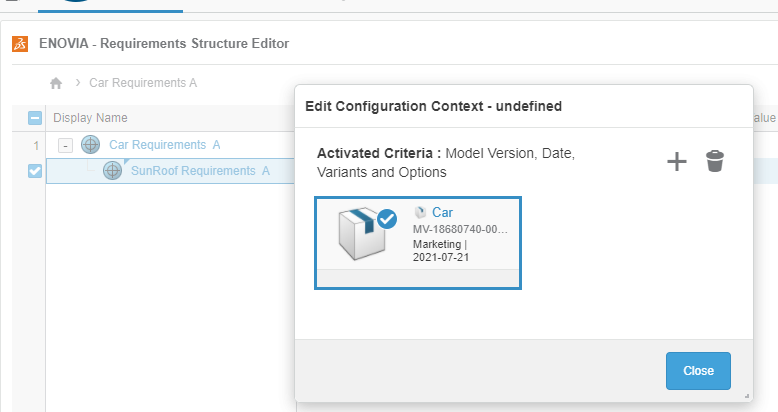
The context of requirements you choose to import must be the same Model Version from which the variability data is For successful requirement variability data import, the imported requirements must have the same Model Version in the configuration context for which variability and configuration data has been imported.
The requirement configuration context in the 3DEXPERIENCE platform
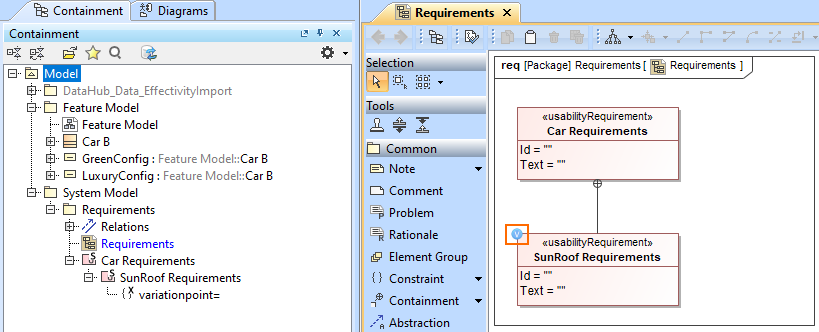
When the requirements with effectivity data are imported , the requirements with effectivity expressions are adorned with a into the modeling tool, they are decorated with equivalent variation points. This is indicated with Variation Point icon adornment.
The requirements imported from DataHub are adorned with a Variation Point icon
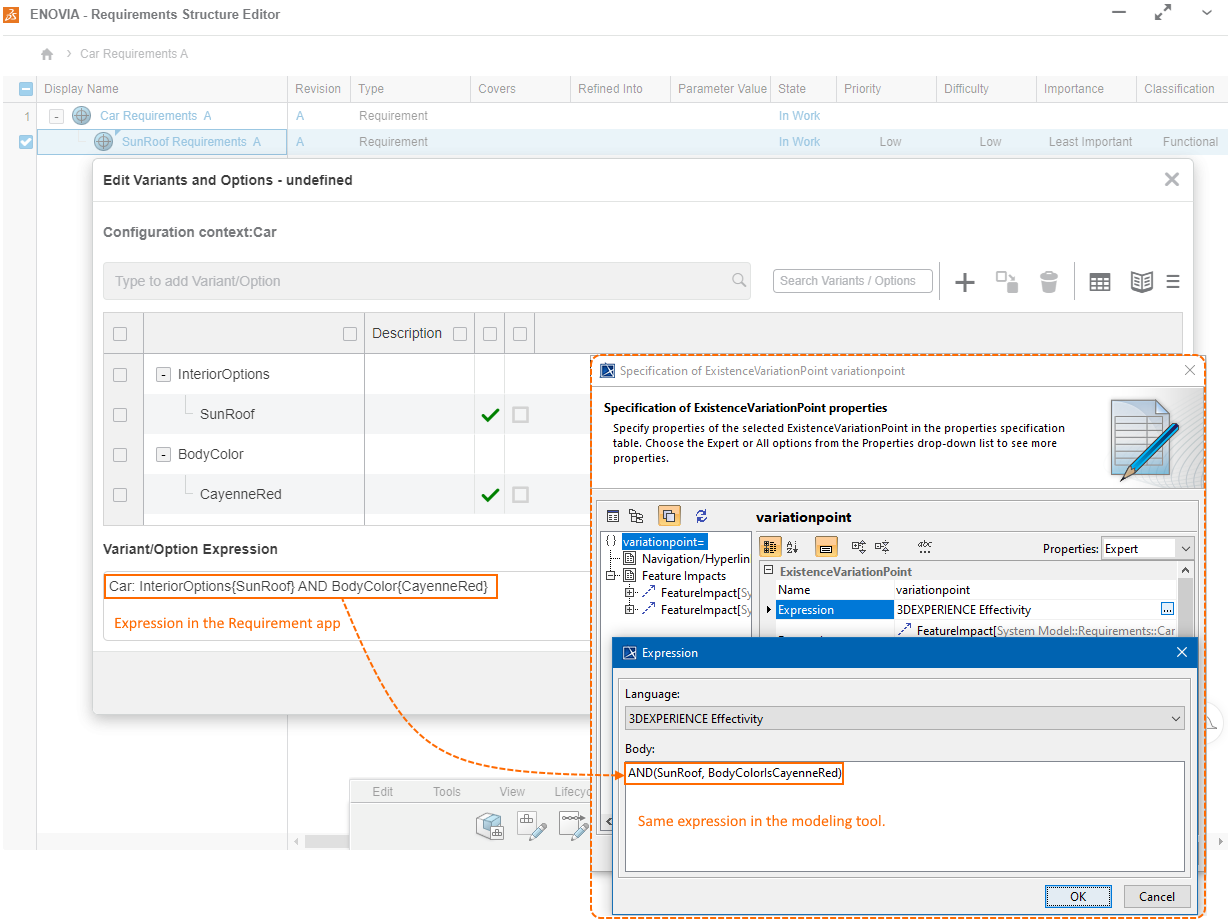
After the requirement is imported into the modeling tool project, the Variant/Option Expression is converted into the 3DEXPERIENCE Effectivity expression and saved in the variationpoint expression property The effectivity expression data, consisting of the selected variants and options, is converted into the variation point expression. This expression is visible (but not editable) in the Expression field of the variation point. The language of the expression is set to “3DEXPERIENCE Effectivity” (see the following image).