Page History
| Warning |
|---|
You need to have the Project Merge plugin license key to use the merge functionality in MagicDraw, Cameo Enterprise Architecture, and Cameo Systems Modeler. |
| Note | ||
|---|---|---|
| ||
To create, remove, or rename a branch, you need to have an Administer ProjectResources permission assigned. |
Project branching duplicates versions of a project and enables users to work simultaneously on them. Branching increases productivity for those, who have several development teams working on a single product and have to merge several development branches before releasing the product.
...
- From the main menu, select Collaborate > Projects. The Manage Projects dialog opens.
- Select a project you want to branch.
- On the toolbar of the Manage Projects dialog, click the Select Branches button . The Select Branch dialog opens.
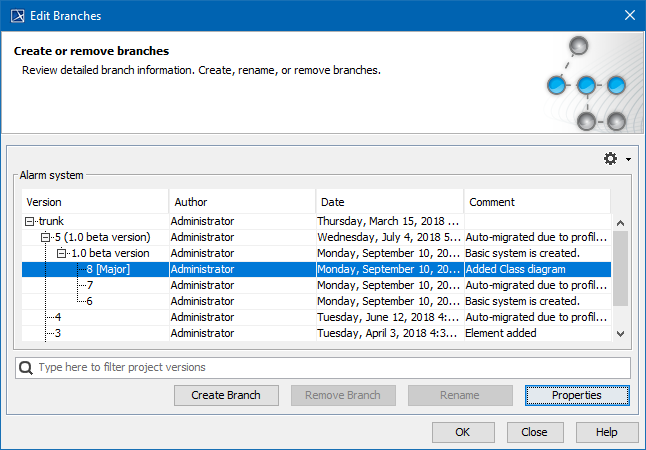
- In the open dialog, click the Edit Branches button. The Edit Branches dialog opens.
- Select a project version you want to branch.
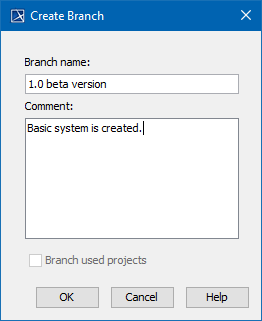
- Click the Create Branch button. The Create Branch dialog opens.
- In the open dialog, type the branch name and comment.
- Click OK. The new branch is created, and the dialog closes.
The Edit Branches dialog displays the new branch of the project.
Tip title Search bar
Use the search bar to filter projects according to:Status colour Green title Available from 19.0 SP1 - Project Version (together with the commit tags)
- Author
- Comment
- Click OK. The dialog closes.
- If you want to open the newly created branch, do the following:
- Select it in the Select Branch dialog and click OK. The dialog closes.
- In the Manage Projects dialog, see that branch instead of the branched project.
- Click Open. The branch opens.
...
- .
...
- The
...
| Note |
|---|
Branches are hidden only graphically and performance or disk space are not affected. |
To archive a project branch
- From the main menu, select Collaborate > Projects. The Manage Projects dialog opens.
- Select a project you want to archive
- branch
- On the toolbar of the Manage Projects dialog, click the Select Branches button . The Select Branch dialog opens.
- In the open dialog, click the Edit Branches button. The Edit Branches dialog
- opens.
- Right-click the branch you want to archive and, on the shortcut menu, click Mark as Archived.
The archived branches can be recognized from the grayed out text. Same way you can uncheck archived branch and it will be no more archived.
To hide archived branches from dialog
- Click button and uncheck Show Archived Branches. This action can be done in two dialogs - Edit Branches and Select branch.
...


