Once your template has a container, you can start creating or modifying its content.
Anchor
embedded
embedded
Embedding a custom template in a model
To embed a template in a model, you need to create the Package for storing the template.
To create the package for storing a custom template
In the Containment tree, right-click on the Model element, and select Create Element > Package.
In the open text box, enter the package name (e.g. Company templates).
Now that you have the container for your embedded template, you can start to define its content.
Anchor
separate
separate
Creating the model for storing a custom template
If you want to reuse a custom template in multiple models, the best option is to create the template as a separate .mdzip file. Using this method allows you to create your template from scratch as a completely new model, or make a copy of a predefined or another existing template, and then modify its content.
Tip
title
Recommendation
Although you can create a completely new custom template, it is highly recommended that you modify the copy of a predefined template instead. It is a quicker method, since you can reuse the elements that are already created, and easily remove the elements that you don't need.
To create a new model for storing a custom template
Save the model in the modelLibraries folder of the installation directory of your modeling tool (recommended option), or another location dedicated for storing custom templates.
To create the copy of a predefined template for storing a custom template
Open the desired predefined template from the modelLibriaries folder located in installation directory of your modeling tool.
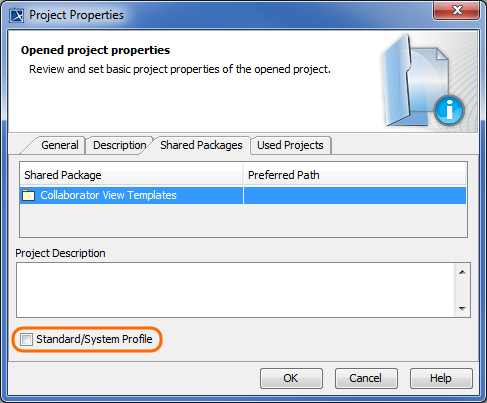
Clear the Standard/System Profile check box in the Project Properties dialog, or a warning will appear regarding changing system files.
Expand
title
How to clear the Standard/System Profile check box?
In the main menu, go to File > Project Properties.
In the Project Properties dialog, select the Shared Packages tab.
Clear the Standard/System Profile check box.
Click OK and save the template.
In the main menu, select File > Save Project As, enter a new name for your template, and then click the Save button.
Warning
title
Important
DO NOT change a predefined template. If you want to customize a predefined template, first create a copy of this template with a different name, and then modify the newly created template file.