Page History
When you specify define a scope for the row or a column, you can choose from one of the following options:
- Containment
- Structure
- Custom
...
:
...
...
- , dragging selected packages on the scope box
- Define expressions for building personalized hierarchy trees
- Specify the row/column scope query, building a list of elements related through the defined criteria
| Anchor | ||||
|---|---|---|---|---|
|
For more advanced cases you can choose the Structure or Custom options.
By selecting Structure, you can build a custom tree-like view for the rows and columns of the matrix. Currently it is possible to build a tree hierarchy by specifying your own criteria. You can select the predefined Structure criteria which builds the same hierarchy as in the Structure Tree in Model Browser.
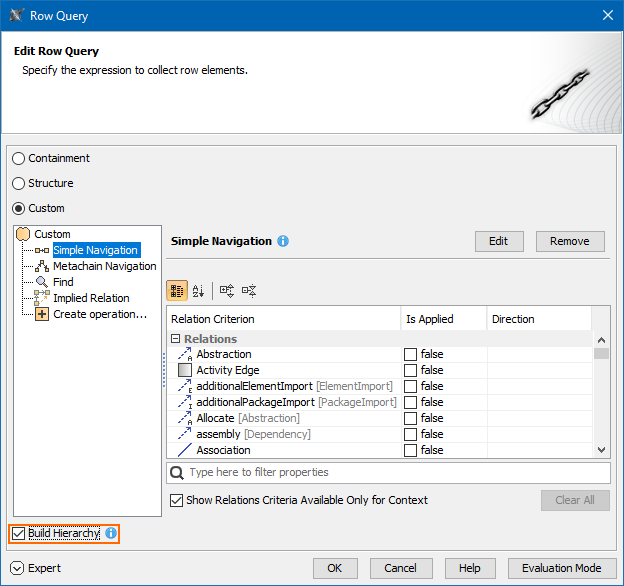
Select Custom, if you need to collect elements that are not necessarily owned by the same package, you can specify the query in the Row/Column Query dialog, and see the results added to it immediately.
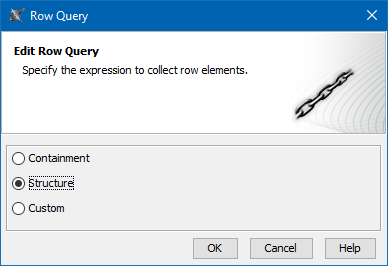
An example of the Row Query dialog
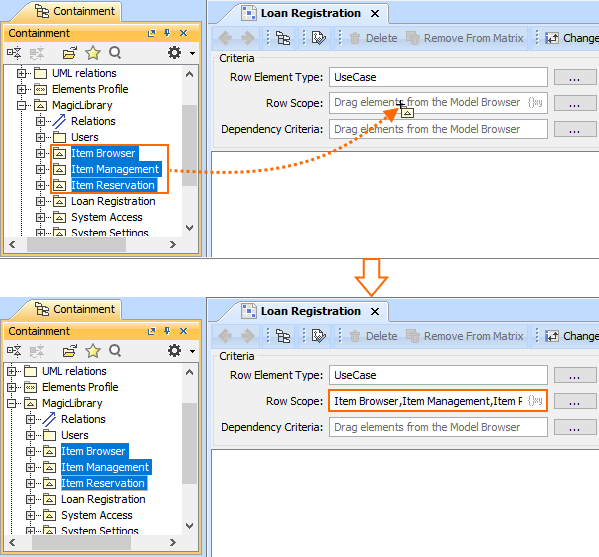
To specify the row/column scope
...
- In the Model Browser, select one or more elements which types you wish to see on your matrix and packages and drag them to the Row/Column Scope box in the Criteria area.
| Info |
|---|
|
Click the
 button next to the Row/Column Scope box and in the opened the open dialog select what element types you wish to see on your matrixthe needed packages. Click OK.
- Open the matrix Specification window, click the Row/Column Scope property value cell, then click the button, and in the opened dialog select what element types you wish to see on your matrix. Click Close.open dialog select the needed packages. Click Close.
| Anchor | ||||
|---|---|---|---|---|
|
You can specify the criterion for building a personalized Row/Column hierarchy tree in matrices by choose from the following tree-view options:
- Select Containment to display the decomposition of elements related through the Containment relationship.
- Select Structure to display the decomposition of Part Properties related through the Composition relationship.
- Select Custom to display the decomposition of elements related through any criteria of your choice.
By selecting Structure, you can build a custom tree-like view for the rows and columns of the matrix. Currently it is possible to build a tree hierarchy by specifying your own criteria. You can select the predefined Structure criteria which builds the same hierarchy as in the Structure Tree in Model Browser.
Select Custom, if you need to collect elements that are not necessarily owned by the same package, you can specify the query in the Row/Column Query dialog, and see the results added to it immediately.
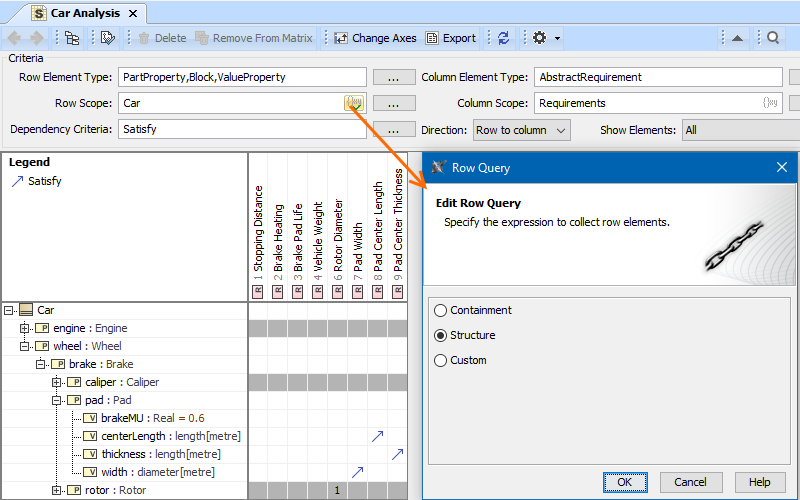
Specifying criteria for building a personalized tree-view in a matrix
| Anchor | ||||
|---|---|---|---|---|
|
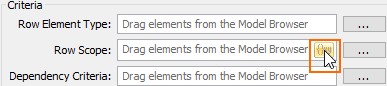
To specify the row/column scope query (Advanced)
...
- Click the Specify Row/Column Query icon in the Row/Column Scope field.
- In the Row/Column Query dialog, select one of the following:
- Containment. Select if you want that the row/column elements would be displayed as in the Containment tree. Owned elements will be collected recursively starting from the elements specified as scope values.
- Structure. Select if you want that the row/column elements would be displayed as in the Structure tree. This option is available only when the SysML Plugin is installed.
Custom. Select if you want to make your own adjustments. Select the Build Hierarchy check box to recursively execute the specified expression for building multilevel hierarchy starting from the scope as the root.
Note If you have selected Custom, specify the expression.
- Click OK.