Extending Data Markings
You can extend custom and/or DoD Data Marking Categories with additional Data Markings from separate Categories without modifying the existing Categories. This is done by applying the «permissiveSubDataMarkingCategory» stereotype to a custom-created Data Marking Category and specifying its groupWith tag. The Data Markings created in the new Category are then grouped under the Data Marking from another Category specified in the groupWith tag.
As a result, the new Category’s Data Markings function as submarkings of the specified Data Marking in the other Category. The new Category exists only to provide these submarkings and does not act as a standalone Category. Therefore, the Category is not displayed in the Sensitive Element Redaction Preview menu or in the Add/Remove Data Markings submenu. The Category's Data Markings can only be applied through the parent Data Marking they are grouped with. Note that in this case, the parent Data Marking cannot be applied to elements on its own; you can only apply it together with the selected submarking. If you apply multiple submarkings for the same element, the submarkings are separated with commas.
The (2026x Refresh1) Sensitive Element Redaction functionality works differently for elements marked with extended submarkings. If you select such submarkings in the preview menu, elements marked with them are highlighted in green instead of red. The elements highlighted in red are removed during model transformation.

Extending Data Markings
The following procedure encapsulates the following main steps:
- Creating a custom Data Marking Category
- Specifying the «permissiveSubDataMarkingCategory» stereotype for the new Data Marking Category
- Customizing the new Data Marking Category and creating its Data Markings
- Specifying the Data Marking you want the custom Category's Data Markings to extend
To extend Data Markings
- Create a custom Data Marking Category:
Create a new project for the Data Marking Categories.
Right-click the root package in the Containment tree. In the shortcut menu, select Data Markings & Classification > under Specification, click Create.

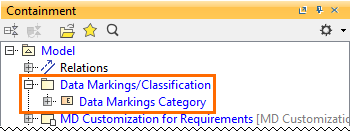
Once the Data Marking Category is created, a new package called Data Markings/Classification, containing the Data Marking Category element, is created in the Containment tree.
- Change the applied stereotype:
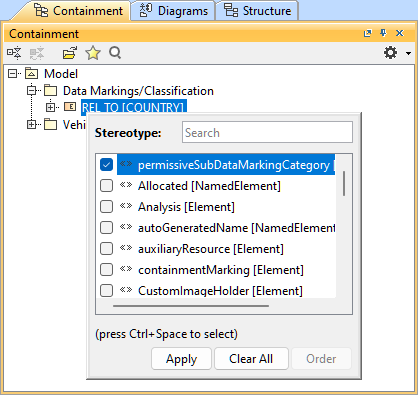
- Right-click the Data Markings Category element. In the shortcut menu, click Stereotype > deselect the «dataMarkingCategory» from the menu, and click Apply.
- Right-click the Data Markings Category element again. In the shortcut menu, click Stereotype > select the «permissiveSubDataMarkingCategory» from the menu, and click Apply.
- Customize the Data Marking Category and create Data Markings:
- Double-click the custom-created Data Marking Category in the Containment tree. The Specification of Data Marking Category dialog opens.
- In the Specification of Data Marking Category dialog, specify the Name for the new Data Marking Category in the Name field.
- Specify the Data Markings for the new category.
- Specify the representation attributes for the new Data Markings.
- Specify the representation attributes for the new Data Markings.
- Specify the Data Marking you want the custom Category's Data Markings to extend:
- In the Specification of Data Marking Category dialog's property group list, select Tags > groupWith > and click the Create Value button. The Select Enumeration Literal dialog opens.
Select the Data Marking(s) that you want the current Data Marking Category's markings to extend. Click OK.
- (Optional) Click the
 button to add another Data Marking that you want the current Category's Data Markings to extend.
The Data Markings available for selection do not include Data Markings that belong to ranked Data Marking Categories.

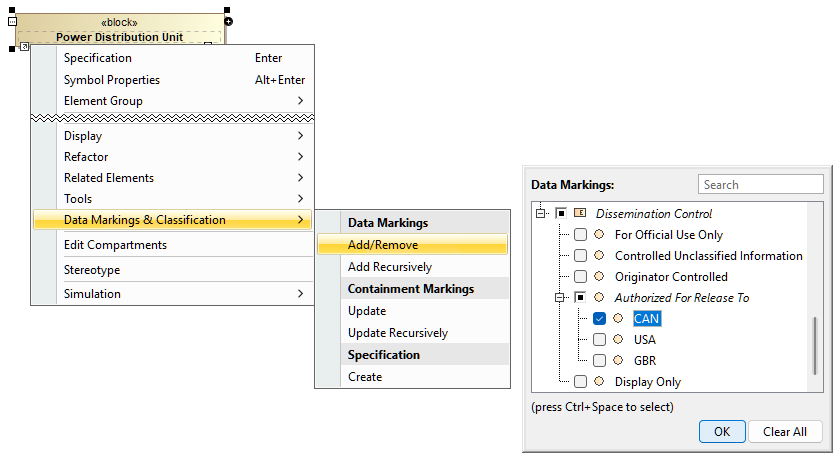
- Click Close. The submarkings are available in the Sensitive Element Redaction Preview menu and the Add/Remove Data Markings submenu.