Branching projects
Creating a project branch duplicates a specific project version and enables users to work on the project simultaneously. Branching increases productivity if several development teams are working on a single product. Branches can be created from any version/iteration of a project or its branch. The branch holds the information about the project version/iteration it is derived from.
Permissions
To create, remove, rename, archive, or unarchive a branch in Teamwork Cloud, you must have the Administer Resources permission.
Creating project branches
To create a project branch
- In the main menu, select Collaborate > Projects.
- In the Manage Projects dialog, select the project you want to branch and click
 .
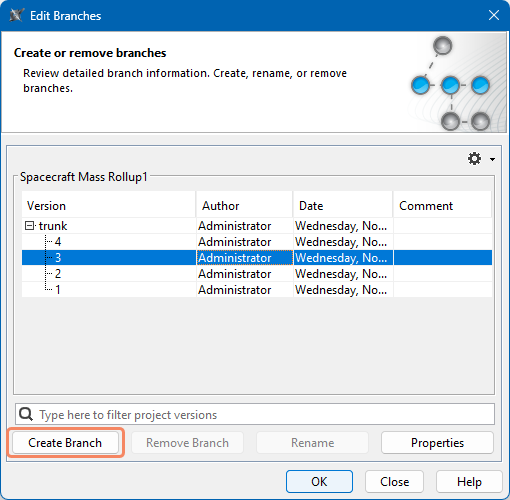
. - In the Select Branch dialog, click the Edit Branches button.
- In the Edit Branches dialog, select the project version/iteration you want to branch and click the Create Branch button.
- In the Branch name box of the open dialog, enter the branch name.
- In the Comment box, optionally enter the branch description.
- (For Teamwork Cloud only). If you want to branch project usages together with the main project, select the Branch used projects check box.
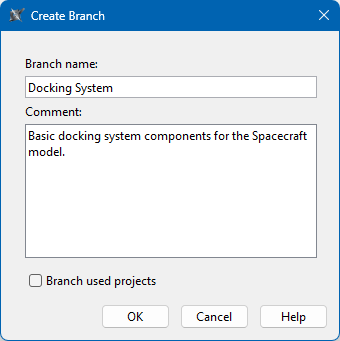
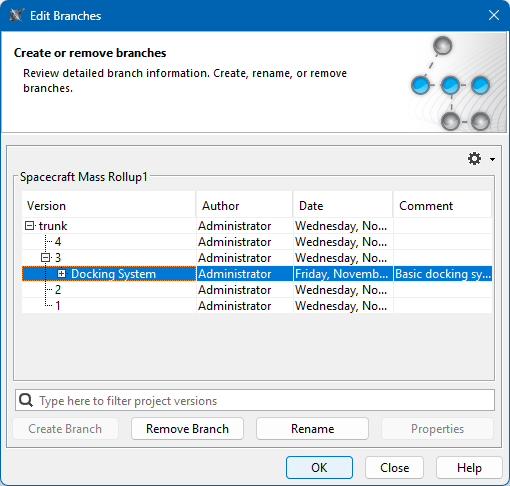
- Click OK. A new branch is created and displayed in the Edit Branches dialog.
Opening project branches
To open a project branch
- In the main menu, select Collaborate > Projects.
- In the Manage Projects dialog, select the project whose branch you want to open and click .
In the Select Branch dialog, select the desired project branch and click OK. You can see the selected branch in the Branch column of the Manage Projects dialog.
- Click the Open button to open the project branch.
The selected branch is displayed in the Manage Projects dialog. The branch name is displayed in the Branch column and you can open it as any other project.
Archiving project branches
You can hide the project branches that you do not work with anymore and maintain only for historical purposes.
To archive a project branch
- In the main menu, select Collaborate > Projects.
- In the Manage Projects dialog, select the project whose branch you want to archive and click .
- In the Select Branch dialog, click the Edit Branches button.
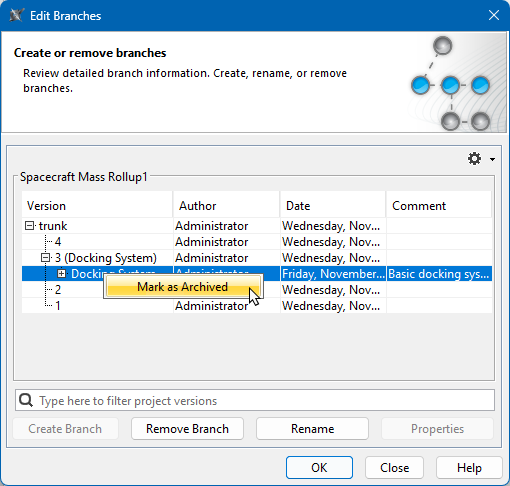
- In the Edit Branches dialog, right-click the branch you want to archive and select Mark as Archived.
By default, archived branches are hidden in the project version tree.
- To show/hide archived branches, click
 in the Edit Branches or Select Branch dialog and select or deselect the Show Archived Branches command.
 - To unarchive an archived branch, right-click the archived branch in the Edit Branches dialog and deselect the Mark as Archived command.