Using projects from the local repository
Used projects employ the sticky versions approach. Once a specific version of a project is used, the main project continues to use that exact version until you update it manually. This means that even if you modify a used project and save it as a new version, the main project will still use the previously added version. This prevents unexpected changes or damage to the main project.

A project must be stored in the local repository before it can be used locally.
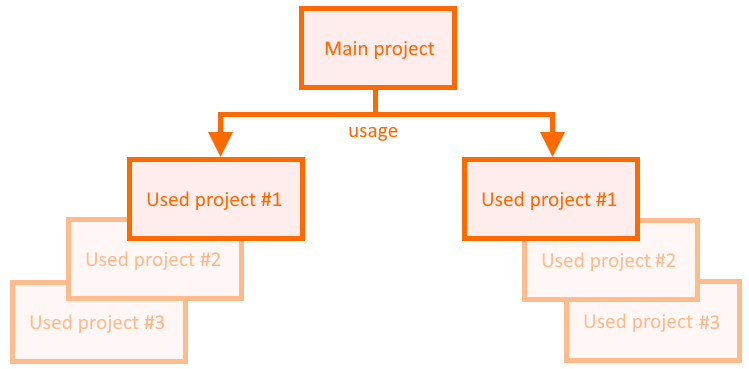
The main project uses only the specified versions of the used projects, despite the newer versions they may have.
Using a project from the local repository via the Use Local Project command
To use a project from the local repository via the Use Local Project command
- In the main menu, select File > Use Project > Use Local Project. The Use Project dialog opens.
If there are no other projects in the local repository or all of them are already used in the open project, the Use Local Project command is disabled.
- In the Use Project dialog, select the project you want to use and click the Next button.
- Select the project version you want to use and click the Finish button.
Used projects are displayed under the Used Projects node in the Containment tree of your model.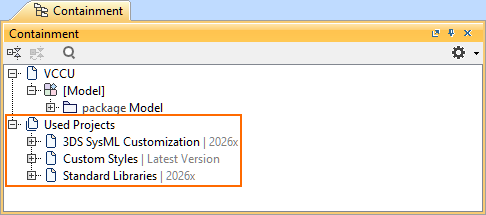
Using a project from the local repository via the Project Usages dialog
To use a project from the local repository via the Project Usages dialog
- Open the Project Usages dialog.
- In the Project Usages dialog's toolbar, click the Use Project
 button. The Use Project dialog opens.
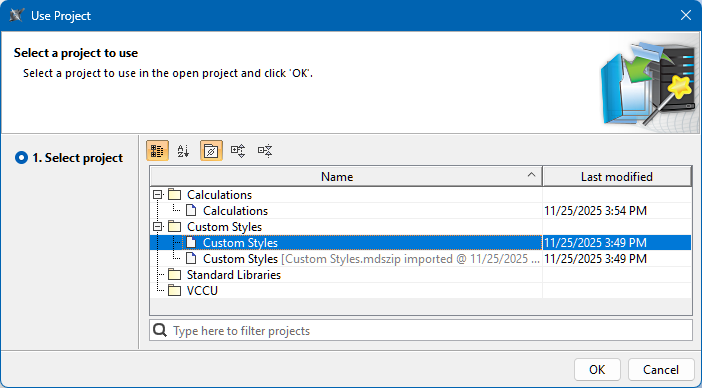
 - In the Use Project dialog, select the project you want to use and click the OK button.
- Click the OK button to close the Project Usages dialog.
Used projects are displayed under the Used Projects node in the Containment tree of your model.
Using a project from the local repository via the Advanced Project Usages Configuration dialog
To use a project from the local repository via the Advanced Project Usages Configuration dialog
- Open the Advanced Project Usages Configuration dialog.
- In the Advanced Project Usages Configuration dialog's toolbar, click the Add
 button, and in its dropdown menu, click Use Project. The Use Project dialog opens.
 - In the Use Project dialog, select the project you want to use and click the OK button. The cell in the Action column for the added used project states 'Add'.
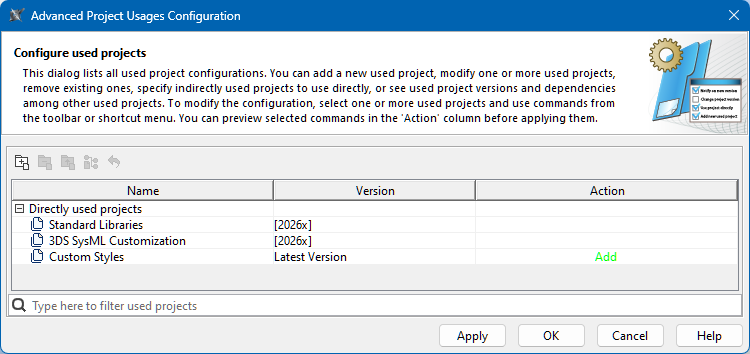
- (Optional) To undo the action, do one of the following:
- In the dialog's toolbar, click the Reset Changes for Selection
 button.
 - Right-click the used project and in the shortcut menu, click the Reset Changes for Selection command.
- In the dialog's toolbar, click the Reset Changes for Selection
- Do one of the following:
- To save changes and keep the dialog open, click the Apply button.
- To save changes and close the dialog, click the OK button.
- To discard changes and close the dialog, click the Cancel button.
- Click the OK button to close the Project Usages dialog.