Managing tabular view cells
Tabular view cells are the intersections of every row and column, representing the appropriate element values. Tabular view cells may contain singular or multiple values.
You can modify a table cell either directly through the cell or via the Review and Modify dialog; however, the availability of these functionalities depends on the feature displayed by the cell's column. For more information, see the notes in Modifying a table cell directly via the cell and Managing cells via the Review and Modify dialog subsections.
Tabular view cells are modeled via the tabular view column modeling.
Modifying a table cell directly via the cell
You can modify a table cell directly via the cell if it is a ColumnByFeatureView column primitive-type cell (String, Integer, Boolean, Real) or a cell with Element or Enum values. E.g., declared name, ID, etc. It doesn't apply to cells listed in the note for the Managing cells via the Review and Modify dialog subsection.
Modifying a table cell value directly via the cell
To modify a table cell value directly via the cell
- In a tabular view, double-click the cell whose value you want to modify.
- Specify the new value.
- Click elsewhere on the table to save the changes.
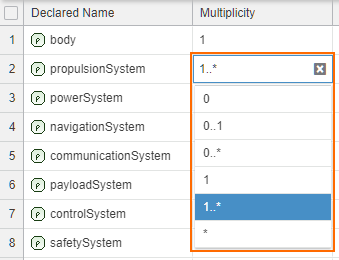
Modifying a table cell multiplicity value directly via the cell
To modify a table cell multiplicity value directly via the cell
- In a tabular view, double-click the cell whose value you want to modify and do one of the following:
- Input the new value.
- Click the value field to display the dropdown menu with suggested applicable multiplicity values.
- Click elsewhere on the table to save the changes.
Managing cells via the Review and Modify dialog
You can review and modify all values in the cell through the Review and Modify dialog.
You can modify a table cell via the Review and Modify dialog if it is:
- Element-type cell of a column representing the following meta-features:
- SysML::Definition::owned<ElementKind>, e.g., SysML::Definition::ownedAction
- SysML::Usage::nested<ElementKind>, e.g., SysML::Usage::nestedAction
- KerML::Element::ownedElement
- KerML::Type::ownedFeature
- KerML::Namespace::ownedMember
- Multi-primitive-type cell of a column representing the following meta-features:
- KerML::Element::aliasIds (multi-string)
- KerML::Element::documentation (multi-string) - allows you to edit the owned documentation body's text, not the documentation element itself. For example, creating a new string creates a new documentation element for the rowElement with the specified documentation body.
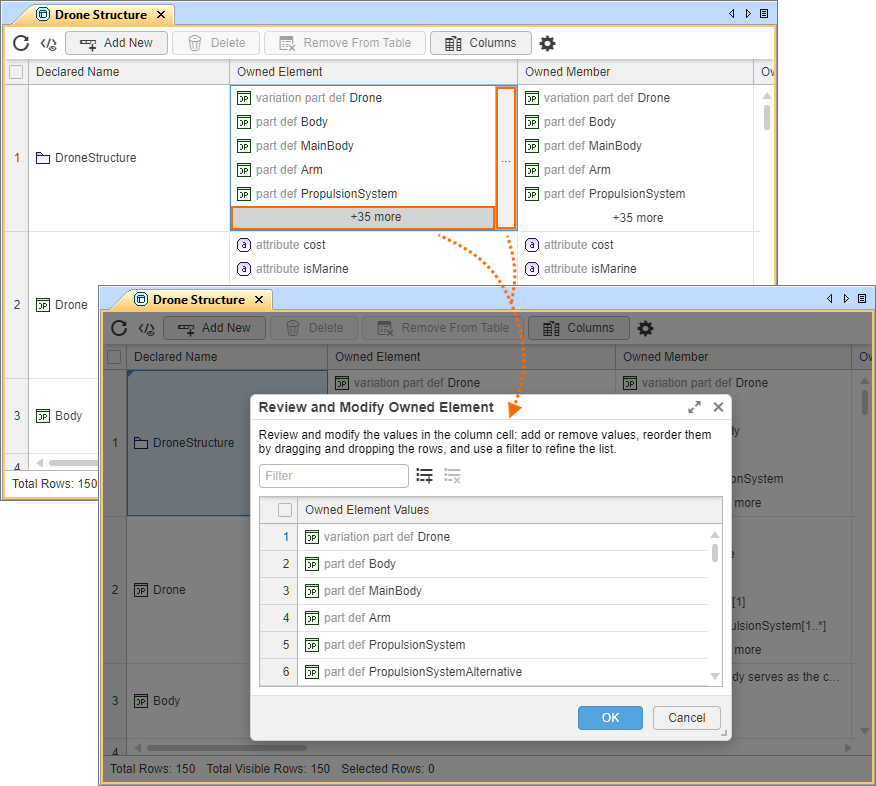
Opening the Review and Modify dialog
To open the Review and Modify dialog
Do one of the following:
- Double-click the cell or an element in the cell. The More button appears. Click the button.
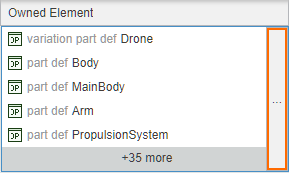
- In a tabular view, click the +<number> more button at the bottom of the cell. Applicable only for multi-valued cells.
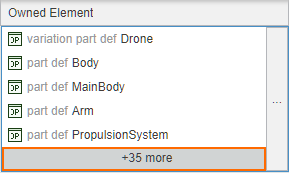
The Review and Modify dialog opens, displaying all values of the cell.
Creating new elements in multi-valued cells via the Review and Modify dialog
To create new elements in multi-valued cells via the Review and Modify dialog
- Open the Review and Modify dialog for the multi-valued cell.
- Click the Add New
 button. The Create Element dialog opens.
 - In the dialog, click the needed element. The element is created in the cell at the bottom of the list.
- Click OK. Otherwise, to discard changes, click Cancel.
Deleting elements in multi-valued cells via the Review and Modify dialog
To delete elements in multi-valued cells via the Review and Modify dialog
- Open the Review and Modify dialog for the multi-valued cell.
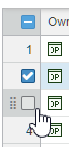
- In the numbering column, hover the cursor over the row number of the element you want to delete, and select the check box. You can select multiple elements.
- (Optional) To select all elements, select the check box in the header of the numbering column.
- (Optional) To select all elements, select the check box in the header of the numbering column.
- Click the Delete
 button.
 - Click OK. Otherwise, to discard changes, click Cancel.
Renaming elements in multi-valued cells via the Review and Modify dialog
To rename elements in multi-valued cells via the Review and Modify dialog
- Open the Review and Modify dialog for the multi-valued cell.
- Click the row of the element and rename as needed.
- Click OK. Otherwise, to discard changes, click Cancel.
Managing multi-valued cells
Tabular view cells may contain multiple values. By default, multi-valued cells display up to 10 values. You can review and modify all values in the cell through the Review and Modify dialog.
Filtering elements in multi-valued cells via the Review and Modify dialog
To filter elements in multi-valued cells via the Review and Modify dialog
- Open the Review and Modify dialog for the multi-valued cell.
- At the top of the dialog, input the filter keyword. The filter updates as you type.
- To reset the filter, click the Clear
 button.
- To reset the filter, click the Clear
- Click OK or Cancel.
Reordering elements in multi-valued cells via the Review and Modify dialog
To reorder elements in multi-valued cells via the Review and Modify dialog
- Open the Review and Modify dialog for the multi-valued cell.
- In the numbering column, hover the cursor over the row number of the element you want to move and click the Move
 icon. Drag and drop the row element to the needed position.
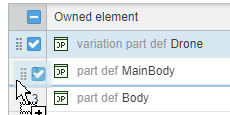
- Click OK. Otherwise, to discard changes, click Cancel.
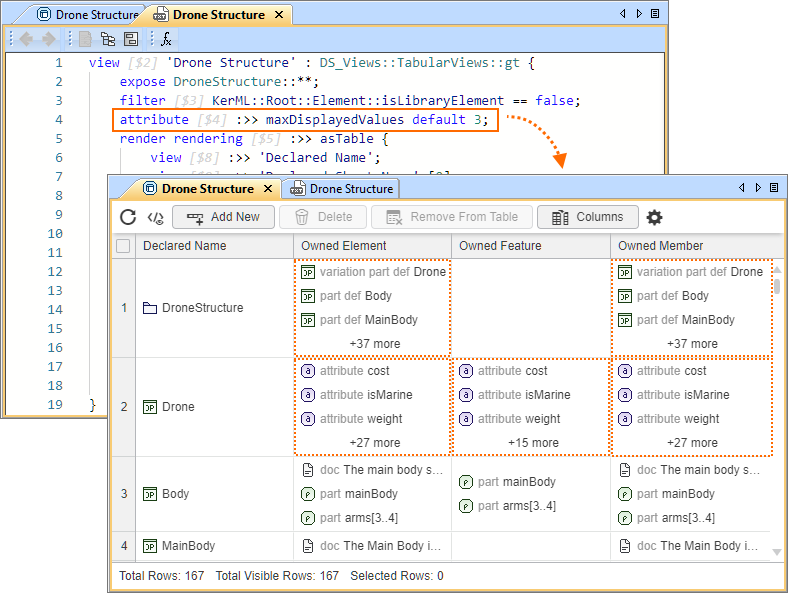
Modifying the value count in multi-valued cells
By default, multi-valued cells display up to 10 values. You can modify the limit via the maxDisplayedValues attribute specified for the DS_Views::CoreViews::Base Table, which is reused by all predefined tabular views.
To modify the value count in multi-valued cells
- Within the body of a view, declare an attribute redefining the maxDisplayedValues attribute and set the default limit.
- Click the Synchronize button.
view 'Drone Structure' : DS_Views::TabularViews::gt {
expose DroneStructure::**;
filter KerML::Root::Element::isLibraryElement == false;
attribute :>> maxDisplayedValues default 3; // the default value limit is set to 3 for the table's multi-value cells
render rendering :>> asTable { ... }
}
Tabular view cell errors
You may encounter the following icons and buttons in tabular view column cells:
| Icon / Button | Message | Description |
|---|---|---|
| Click to load the cell. | Cell loading was canceled after exceeding 1000 ms. Click the button to restart loading; the modeling tool will wait until the cell has finished loading. If the table is only partially loaded and its data is modified (e.g., via the Containment tree, Textual Editor, etc.) without refreshing the table afterward, the icon is displayed in the cells that were not loaded. In this case, the cell cannot be reloaded; click the Refresh button in the table toolbar to refresh the entire table. |
| Failed to evaluate expression. | Resolve model errors related to the column expression. The error may also appear if the expression specified for the tabular view column does not apply to the specific element. |
| Filtering or sorting applied on partially loaded cells. | Tabular views load only the content that is immediately visible; additional rows and cell data are loaded as you scroll. If you filter or sort partially loaded column cells, a notification icon appears in the column header. To resolve the issue, see the Tabular view loading warning box in the Filtering tabular view column cells subsection on the (2026x Refresh1) Modeling tabular view columns page. |
