Modeling tabular view columns
See the procedures on this page for modeling tabular view columns.
Prerequisites
Ensure the following steps are done:
- The view is defined by the needed tabular view definition.
- The view has an expose relationship.
- (Optional) The view has filters.
Proceed to model table columns.
Adding table columns
For more information, see the Column kinds table on the (2026x Refresh1) Tabular view columns page.
Adding table columns by feature
Adding table columns by feature via the Configure Table Columns dialog
Generally, only inherited columns or those that redefine inherited ones are available for selection in the Configure Table Columns dialog.
- If the needed column by feature is not available for selection in the Configure Table Columns dialog, you need to add it via the Textual Editor. See the Adding table columns by feature procedure on the (2026x Refresh1) Creating custom tabular view definitions.
- If the needed columns by feature for a metaclass or metadata, and their meta-features, are not available for selection in the Configure Table Columns dialog, you need to add them via the Textual Editor. See the (2026x Refresh1) Customizing the suggested column list in the Configure Table Columns dialog page.
To add table columns by feature via the Configure Table Columns dialog
- In a tabular view's toolbar, click the Columns button, and in its dropdown menu, click Configure Table Columns. The Configure Table Columns dialog opens.
- In the Configure Table Columns dialog, in the Column Name column, under the Element node, locate the column you want to add to the table, then select its check box in the Added To Model column.
- Click OK.
The column is added to the model and displayed in the diagrammatic representation of the tabular view.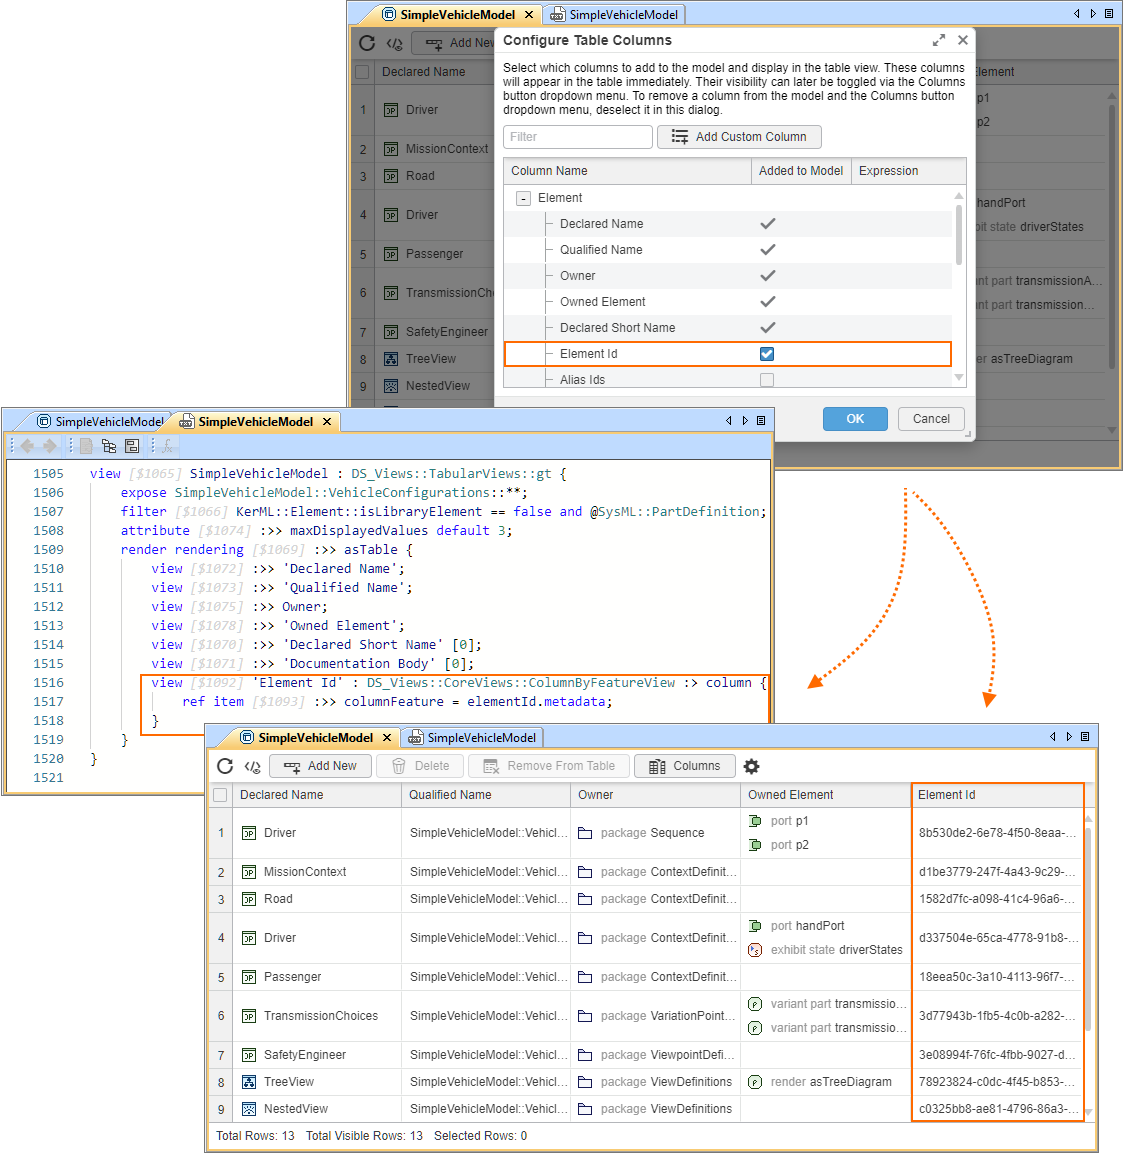
Adding table columns by expression
Adding table columns by expression via the Configure Table Columns dialog
To add table columns by expression via the Configure Table Columns dialog
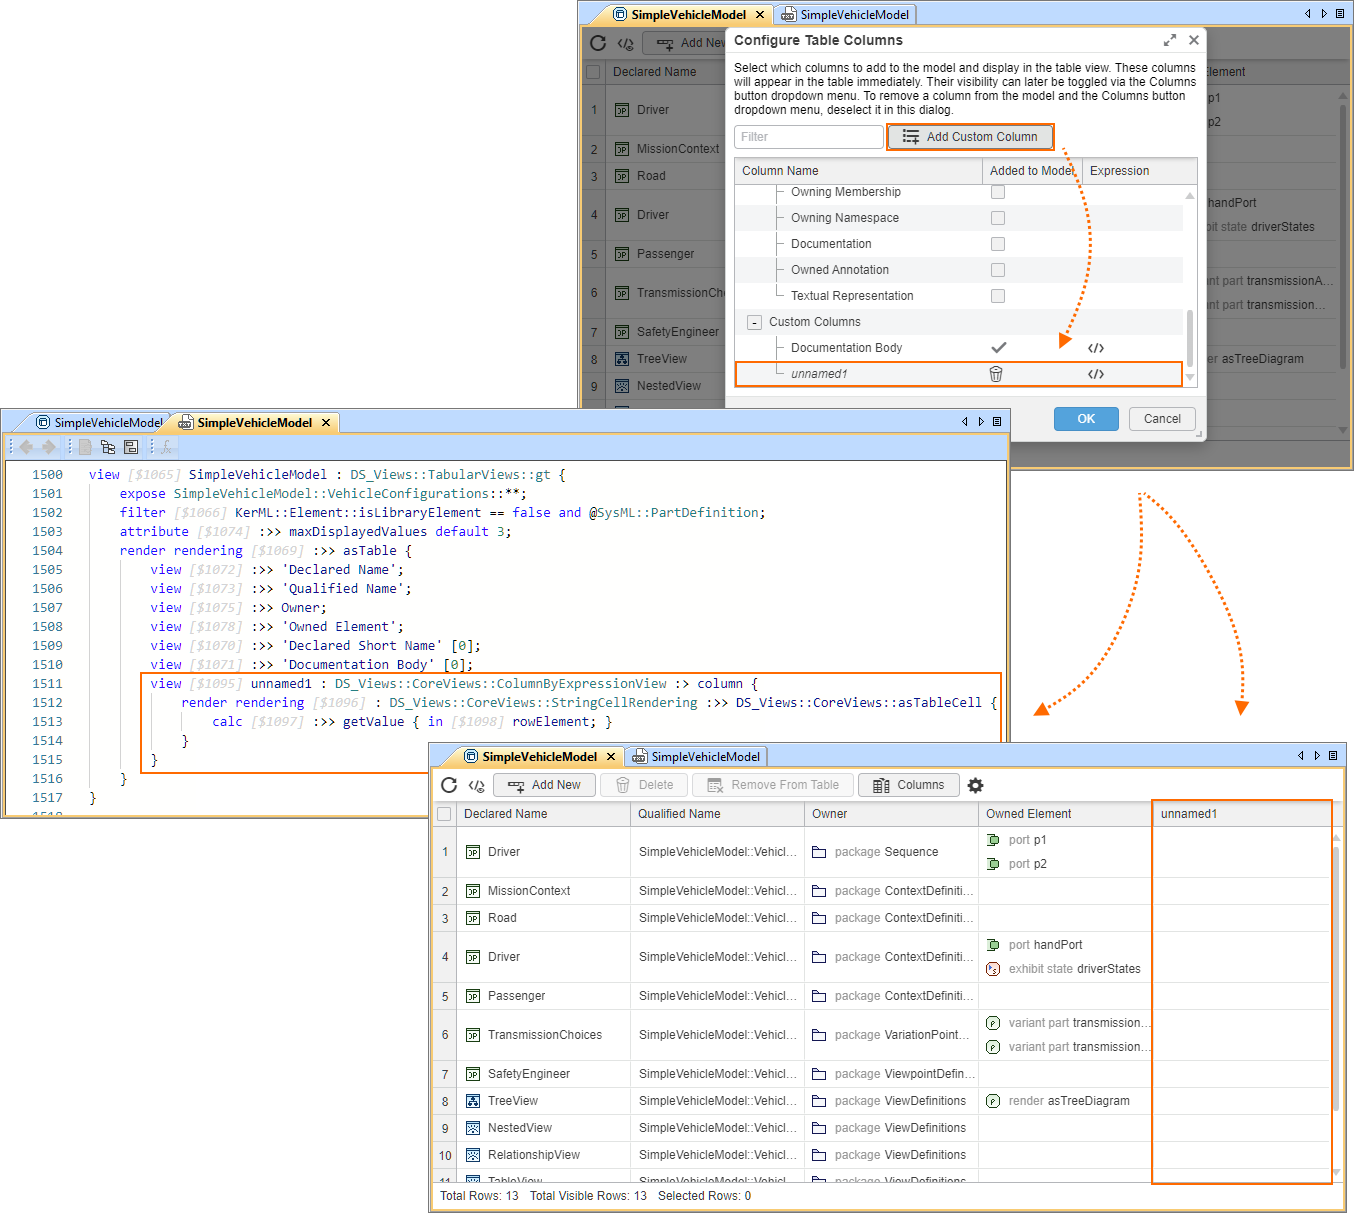
- In a tabular view's toolbar, click the Columns button, and in its dropdown menu, click Configure Table Columns. The Configure Table Columns dialog opens.
- In the Configure Table Columns dialog, click the Add Custom Column button. A new custom column is added under the Custom Columns node.
- (Optional) You can also do the following:
- Click the column title to rename it.
- Click the Delete
 button in the Added To Model column to delete the column from the model.
 - Click the
 button in the Expression column to open the Column Expression dialog and view the expression specified for the column.
- Click OK.
A template is created in the model for custom column creation. You can specify the expression for the template via the Textual Editor.Custom column templateview unnamed1 : DS_Views::CoreViews::ColumnByExpressionView :> column {
render rendering : DS_Views::CoreViews::StringCellRendering :>> DS_Views::CoreViews::asTableCell {
calc :>> getValue { in rowElement; }
}
}
Modifying table columns
Hiding table columns
Hiding table columns via the column headers in tabular views
To hide table columns via the column headers in tabular views
- Right-click the header of the column you want to hide from a tabular view, and in the shortcut menu, click Hide Column.
The table column is hidden.
Hiding/displaying table columns via the Columns button in tabular views
To hide/display table columns via the Columns button in tabular views
- In the tabular view's toolbar, click the Columns button.
- In the dropdown menu, click the column you want to hide from or display in the table.
The displayed columns are highlighted in the dropdown menu.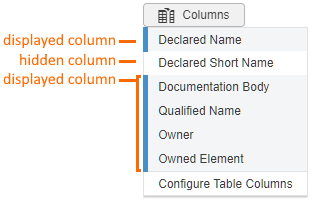
Deleting table columns
Deleting table columns via the column headers in tabular views
The Delete Column command is not available for inherited columns or for columns that redefine inherited ones.
To delete table columns via the column headers in tabular views
- Right-click the header of the column you want to delete from a tabular view, and in the shortcut menu, click Delete Column.
The column is deleted from the model.
Deleting table columns via the Configure Table Columns dialog
The Delete button is not available for inherited columns or for columns that redefine inherited ones.
To delete table columns via the Configure Table Columns dialog
- In a tabular view's toolbar, click the Columns button, and in its dropdown menu, click Configure Table Columns. The Configure Table Columns dialog opens.
- In the Configure Table Columns dialog, under the Column Name node, locate the column you want to delete from the table, then click the Delete button in the Added To Model column.
- Click OK.
The column is deleted from the model.
Sorting table rows
Sorting table rows via column headers in tabular views
If the column header displays a ![]() notification after attempting to sort tabular rows via column headers, see the explanation and resolution in the Tabular view loading warning box in the Filtering tabular view column cells subsection.
notification after attempting to sort tabular rows via column headers, see the explanation and resolution in the Tabular view loading warning box in the Filtering tabular view column cells subsection.
To sort table rows via column headers in tabular views
- In the tabular view, click the header of the column according to which you want to sort table rows. The Sorting icon is displayed in the header, indicating the current sorting direction. Click the column header to change the sorting direction:
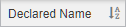 indicates that cells in the column are sorted in ascending order. This is the default mode.
 indicates that cells in the column are sorted in descending order.
To sort according to multiple columns, hold Shift when clicking the column header.
Pinning table columns
Pinning table columns via column headers in tabular views
To pin table columns via column headers in tabular views
- In the tabular view, right-click the header of the column you want to pin.
- In the dropdown menu, click Pin Column, and in its submenu, click one of the following:
- Pin to the Left
- Pin to the Right
- No Pin
Modifying table column width
Modifying table column width via column headers in tabular views
To modify table column width via column headers in tabular views
- In the tabular view, do one of the following:
- In the table header, drag the vertical grid lines separating the columns and adjust the width as needed.
- Right-click the header of a column and in the shortcut menu, click one of the following:
- Size Column to Fit to resize the column width, adjusting it to its content.
- Size All Columns to Fit to resize the width of all columns, adjusting them to their content.
Displaying string cells in multiline format
Displaying string cells in multiline format via the Textual Editor
The isMultiline attribute is predefined in DS_Views::CoreViews::ColumnView. It allows you to specify whether single-valued string cells should be displayed in a multiline format.
To display string cells in multiline format via the Textual Editor
- Within the column view's body, redefine the isMultiline attribute and set its value to true or false.
- Click the Synchronize button.
view 'Drone Structure' : DS_Views::TabularViews::gt {
expose DroneStructure::**;
render rendering :>> asTable {
view :>> 'Declared Name' {
attribute :>> isMultiline default true; // setting multiline to true to wrap a long qualified name
}
}
}
Filtering tabular view column cells
Tabular view loading
Tabular views load only the content that is immediately visible; additional rows and cell data are loaded as you scroll. If you filter or sort partially loaded column cells, a notification icon  appears in the column header.

To resolve this, do one of the following:
- Right-click the column header and in the shortcut menu, click the Load All Cells command.
- Scroll through the entire table to load all content.
Once the cells are fully loaded, retry to filter or sort.
Filtering does not persist and resets automatically once you reopen the tabular view.
Filtering tabular view column cells
To filter tabular view column cells
- In the tabular view, right-click the header of the column whose cells you want to filter and click Filter Column in the shortcut menu.
- Do one of the following:
- Expand the Filter by Values section. Do one of the following:
- In the Values column, select the check boxes for the values you want to display in the column.
- Type the value name in the input field to narrow the search, select the Apply filter on refined values check box, and select the check boxes for the values you want to display in the column.
- Expand the Filter by Conditions section.
- Select the condition from the dropdown menu and type the value you are looking for in the input field.
- Expand the Filter by Values section. Do one of the following:
- Click OK.
- (Optional) To reset the filter, right-click the column header with the applied filter. In the shortcut menu, do one of the following:
- Click Reset Column Filter.
- Click Filter Column, then Reset. Click OK.