The StopWatch class is now ready to be executed. You can execute the StopWatch class either from the Model Browser or from the Class diagram.
To run the StopWatch Class
- Right click on the StopWatch class in the Model Browser and select Simulation > Run (see the following figure).

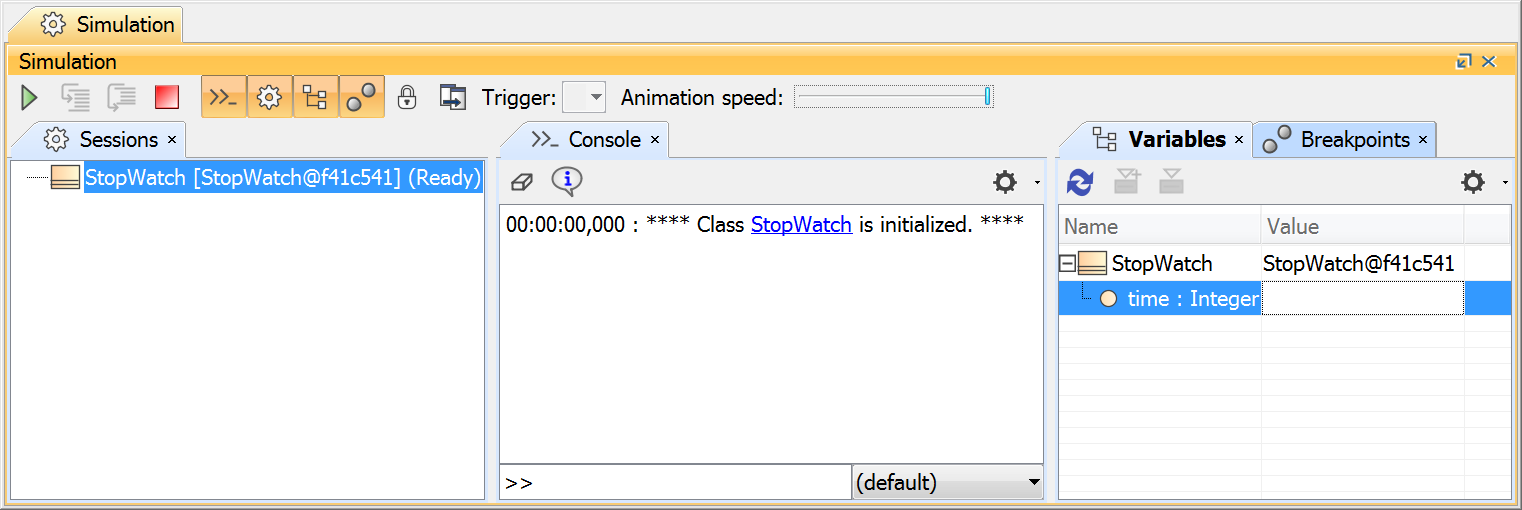
- The Simulation window will open. It contains four tabs: Sessions, Console, Variables, and Breakpoints. At this point, an instance of the StopWatch class is created, which you can see in the Variables tab. In addition, a simulation session to execute the StopWatch class is created, which you can see tn the Sessions tab of the Simulation window. (See the following figure.)
- Move the Animation speed slider all the way to its rightmost position (even if it looks like it is already at its rightmost position, make sure it is).
- Click the Start button
 on the Simulation window toolbar.
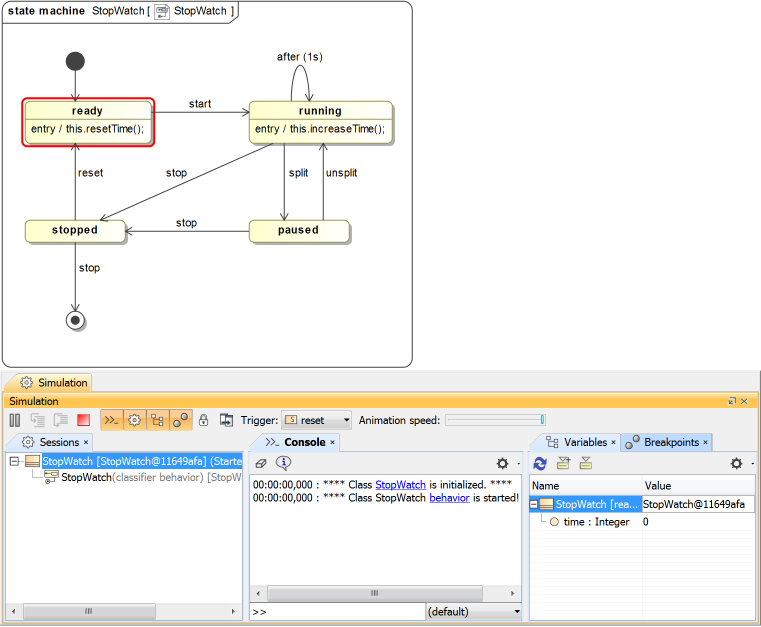
Once you have clicked the Start button, the classifier behavior of the StopWatch Class, which is the StopWatch State Machine, starts executing. A new session to execute the StopWatch state machine is created under the simulation session of the StopWatch class, and the StopWatch state machine diagram will be open and ready for the simulation.
The StopWatch State Machine execution will start from the initial Pseudostate and automatically move to the ready state because the Transition that connects the initial Pseudostate to the ready State does not have a defined trigger. When the ready State is entered, its entry Behavior is executed, which calls the resetTime operation. After this, the StopWatch State Machine is in the ready State, and the time attribute is set to 0 (see the following figure).
Now we want to trigger the StopWatch object to move from the ready State to the running State. To do this, we need to send a start signal to the StopWatch object.
To send an start Signal to the StopWatch object
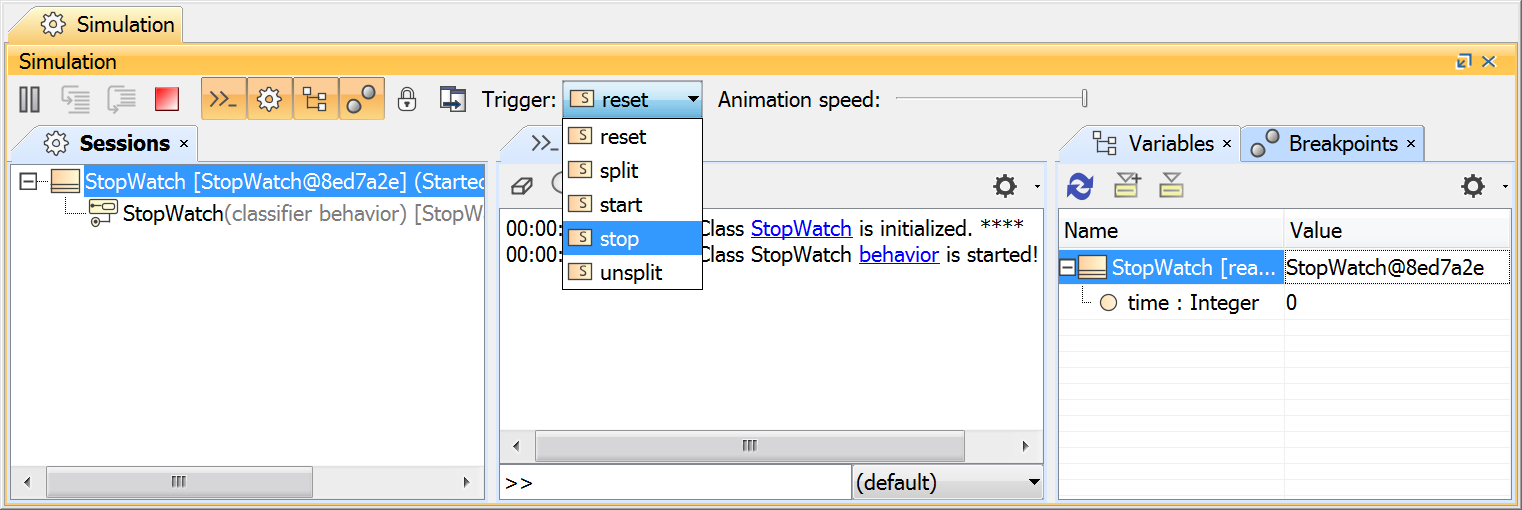
- Select the StopWatch node in the Variables tab. The signals that can be sent to the StopWatch will be listed in the Trigger drop-down menu.
- Select the start signal from the Trigger drop-down menu (see the following figure).
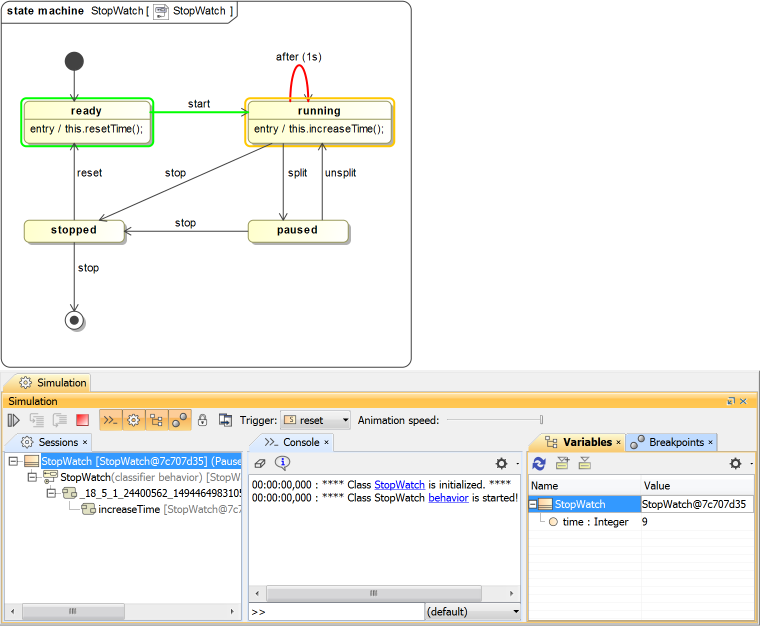
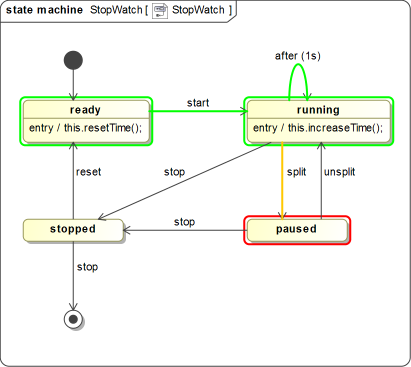
Once the start Signal has been sent, the StopWatch enters the running State. On entry to the running state, its entry Behavior is executed, which calls the increaseTime operation, incrementing the time attribute by 1 (as shown in the Variables tab in the figure below).

The StopWatch object stays in the running State, and the Time Event is triggered in this State every second. Therefore, a new simulation session will be created to call the increaseTime operation every second, and the time value will increment by one every time the operation is executed (see the following figure).
While the StopWatch object is in the running state, we can send a split signal to trigger a transition to the paused state or send a stop signal to trigger a transition to the stopped state.
To send a split Signal to the StopWatch object
- Select the StopWatch object in the Variables tab.
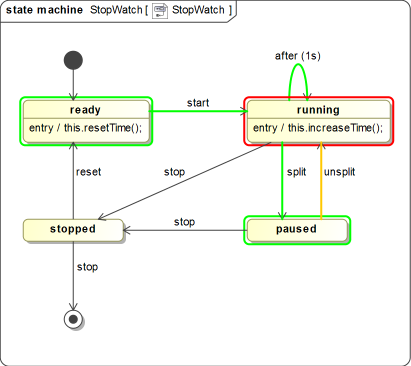
- Select the split Signal from the Trigger drop-down menu on the Simulation window toolbar. (You may have to temporarily reduce the animation speed in order to be able to select a trigger before the Time Event fires.) The state of the StopWatch object will be changed to the paused state (see the following figure).
You can transition the paused StopWatch object to the running state by sending an unsplit Signal to the object.
To send an unsplit Signal to the StopWatch object
- Select the StopWatch object in the Variables tab.
- Select the unsplit Signal from the Trigger drop-down menu on the Simulation window toolbar. The state of the StopWatch object will be changed to the running state (see the following figure), and the time value will start to continuously increase again.
To send a stop Signal to the StopWatch object
- Select the StopWatch object in the Variables tab.
- Select the stop Signal from the Trigger drop-down menu on the Simulation window toolbar. (You may have to temporarily reduce the animation speed in order to be able to select a trigger before the Time Event fires.) The state of the StopWatch object will be changed to the stopped state (see the following figure).
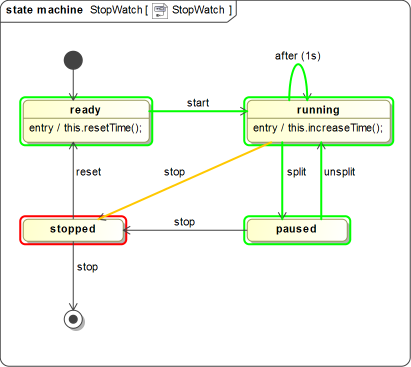
In the stopped state, if the reset Signal is sent to the StopWatch object, the object will go to the ready State, and the time value will be reset to zero by calling the resetTime operation. If, instead, the stop Signal is sent to the object again, the object will go to the Final State, the simulation will stop, and all of the simulation sessions will be closed.
From this point, you can also explore additional features of Cameo Simulation Toolkit for executing the StopWatch model, as described in the CST Tutorial:
- Alf Plugin
- Cameo Simulation Toolkit