On this page
To safeguard the connection between Cameo Collaborator (Alfresco Community) and the client software, i.e, your modeling tool, you have to encrypt it using the Secure Sockets Layer (SSL) mechanism.
Integrating Cameo Collaborator with Apache HTTP Server using SSL
Integration with Apache HTTP Server allows you to access Cameo Collaborator via a standard HTTPS port, which means that the SSL certificate is managed within Apache, and not Tomcat.
To integrate Cameo Collaborator (Afresco Community) with Apache using SSL
For Windows
- Install Alfresco Community with default settings (the http port is 8080, the https port is 8443).
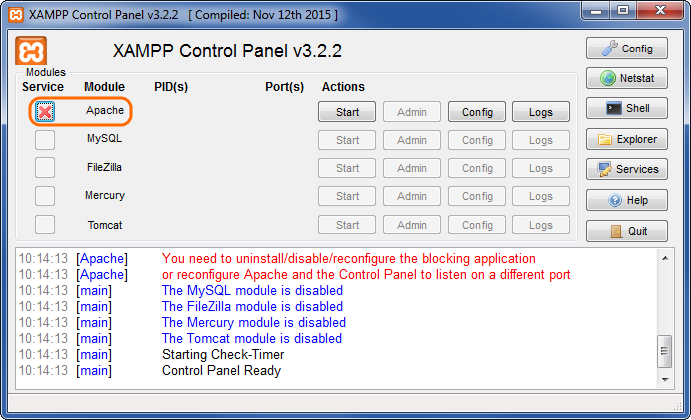
- Install the latest version of XAMPP with only the Apache and PHP components selected.
- Start XAMPP Control Panel as administrator.
In Service list, click
 next to Apache to Install the Apache module as a Windows service. After successful installation, the button changes to
  .
.
After installing the Apache service, in the Apache line, click Config > Apache (httpd.conf). The httpd.conf file opens for editing. Remove the commenting sign # from the beginning of the following line:
LoadModule proxy_http_module modules/mod_proxy_http.so
Save and close the file.
In the same line, click Config > Apache (httpd-ssl.conf). The httpd-ssl.conf file opens for editing. In the file, replace all the text with the following data:
Listen 443
<VirtualHost *:443>
# replace alfsslwin.example.com with your FQDN
ServerName alfsslwin.example.com
ErrorLog "C:/xampp/apache/logs/error.log"
TransferLog "C:/xampp/apache/logs/access.log"
SSLEngine on
ProxyRequests           Off
ProxyPreserveHost       On
SSLProxyEngine On
SSLProxyVerify none
SSLProxyCheckPeerCN off
SSLProxyCheckPeerName off
SSLProxyCheckPeerExpire off
# Specify the location of your SSL certificate
SSLCertificateFile "C:\certs\example.com.crt"
# Specify the location of your SSL certificate key
SSLCertificateKeyFile "C:\certs\example.com.key"
# replace alfsslwin.example.com with your FQDN
ProxyPass /share https://alfsslwin.example.com:8443/share
# replace alfsslwin.example.com with your FQDN
ProxyPassReverse /share https://alfsslwin.example.com:8443/share
# replace alfsslwin.example.com with your FQDN
ProxyPass /alfresco https://alfsslwin.example.com:8443/alfresco
# replace alfsslwin.example.com with your FQDN
ProxyPassReverse /alfresco https://alfsslwin.example.com:8443/alfresco
</VirtualHost>
Save and close the file.
Go to C:\<Alfresco Community installation directory>\tomcat\shared\classes\alfresco\web-extension and open the share-config-custom.xml file. To activate the CSRFPolicy config, remove commenting signs from the following lines:
<config evaluator="string-compare" condition="CSRFPolicy" replace="true">
   <filter/>
</config>
Save and close the file.
If needed, redirect all http requests to https as follows:
In the Apache line, click Config > Apache (httpd.conf). The httpd.conf file opens for editing. Remove the commenting sign # from the beginning of the following line:
LoadModule rewrite_module modules/mod_rewrite.so
Save and close the file.
In the same line, click Config > Apache (httpd-xampp.conf). The httpd-xampp.conf file opens for editing. In the beginning of the file, add the following lines:
<IfModule mod_rewrite.c>
RewriteEngine On
RewriteCond %{HTTPS} off
RewriteRule ^(.*) https://%{SERVER_NAME}$1 [R,L]
</IfModule>
For Linux and OS X
SSL certificate format
Make sure that the SSL certificate you are going to use for encryption is in the PEM format.
- Install the Apache HTTP Server.
Activate the proxy_http and ssl modules.
Example on Linux Debian/Ubuntu
$ sudo a2enmod proxy_http ssl
Create a virtualhost configuration file in /etc/apache2/sites-available/alfresco-reverse-proxy with the following content:
<IfModule mod_ssl.c>

<VirtualHost *:443>

ServerName collaborator.example.com
SSLEngine On
SSLCertificateFile /opt/alfresco-5.0.d/ssl/example.com.pem
SSLProxyEngine On
SSLProxyVerify none
SSLProxyCheckPeerCN off
SSLProxyCheckPeerName off

ProxyRequests Off
ProxyPreserveHost On
RewriteEngine On

ProxyPass /alfresco https://localhost:8443/alfresco/
ProxyPassReverse /alfresco https://localhost:8443/alfresco/

ProxyPass /share https://localhost:8443/share/
ProxyPassReverse /share https://localhost:8443/share/

</VirtualHost>

</IfModule>
Important
Update lines 5 and 7 with your own data.
Disable the default website, and, if necessary, enable the proxy, and restart Apache.
Example on Linux Debian/Ubuntu
$ sudo a2dissite 000-default
$ sudo a2ensite alfresco-reverse-proxy
$ sudo /etc/init.d/apache2 restart
Installing SSL certificate in the client software
To install the SSL certificate in your modeling tool
In the command-line, execute the following command to create a KeyStore for the SSL certificate, and enter the required information when you are asked to:
keytool -keystore collaborator.keystore -genkey -alias collaborator -storetype "JCEKS"
KeyStore type
Be sure the KeyStore type is JCEKS.
In the command-line, execute the following command to import the SSL certificate to the created KeyStore:
keytool -import -alias ALIAS_NAME -keystore collaborator.keystore -file CERTIFICATE_NAME -storepass KEYSTORE_PASSWORD -storetype "JCEKS"
Important
Make sure that you type actual values instead of the following variables:
- ALIAS_NAME - The name of the server or the name of the certificate used to access that server.
- CERTIFICATE_NAME - The full path to the certificate.
- KEYSTORE_PASSWORD - The password that you specified when creating a KeyStore in step 1.
Open the installation directory of your modeling tool, and create a new folder named collaboratorCerts in it.
Move the collaborator.keystore file created in step 1 to the newly created folder.
Within the same folder, create the cert.pass file using Notepad or another similar program, and add the password of the KeyStore as its contents.
Password information
If the password consists of two or more words, be sure all the words appear in the first line of the file.
Related pages