When you select this operation, a DHLink for synchronization is added to the data. It maintains the structure and data of the elements within the node. During data synchronization, DataHub searches for any new nodes and deleted nodes. If it finds any new nodes or deleted nodes within the scope on one side, DataHub copies them to the other side and create a synchronization relation between them or deletes them from the other side.
To Copy Data with Sync
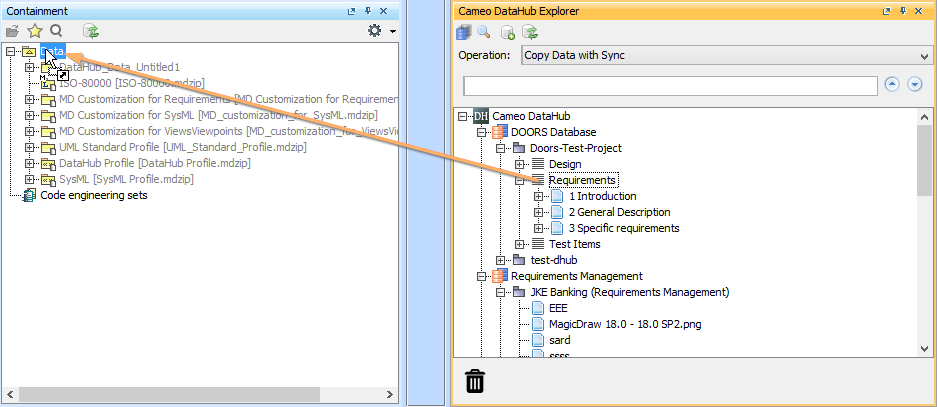
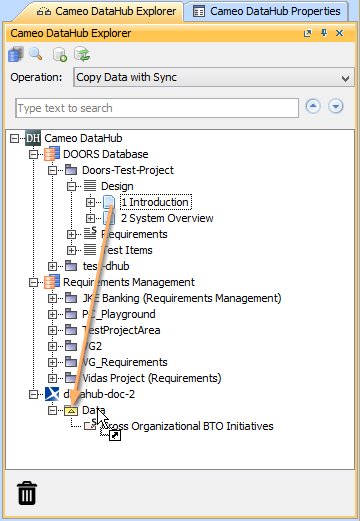
- From the Operation drop-down list in Cameo DataHub Explorer, select Copy Data with Sync.
- Drag a source node to a target node.
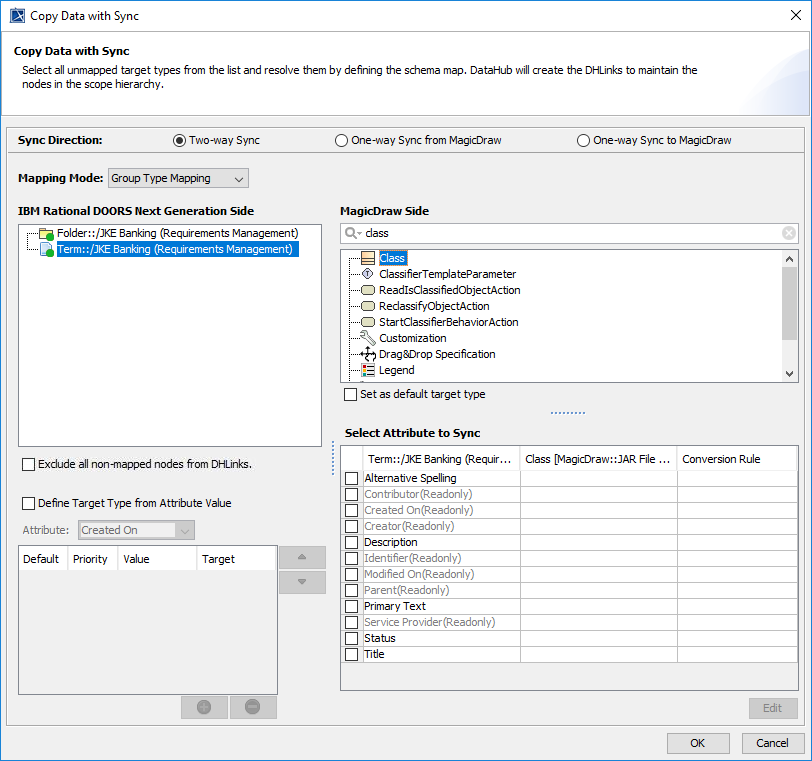
3. The Copy Data with Sync dialog opens. When the nodes and their attributes have been mapped to their respective target types, click OK.
Note
The mapping process also includes two target types:
 and
and  .
.The
target type is available for the Individual Type Mapping mode only. You can see the type in the Target Type tree in the Copy Data with Sync dialog.The
target type is available for both the Individual Type Mapping mode and Group Type Mapping mode. You can see the type in the Target Type tree only in the Copy Data with Sync dialog.You can exclude nodes in the Copy Data with Sync dialog by selecting the
 option and selecting the target type. This target type marks the unmapped nodes with an Exclude status that will not be copied.
- Alternatively, you can create the schema mapping for the selected nodes as Exclude by selecting the target type.
- If you want to include unmapped nodes, go to the DH Links panel, right-click in the panel, and select Include Node.
The table below summarizes the components of the Copy Data with Sync Dialog.
| Component | Function |
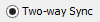
| Sync Direction | Selects which direction to synchronize data from, either unidirectional or bidirectional:
|
| Mapping Mode | Switches between Individual Type Mapping and Group Type Mapping. The Mapping Mode drop-down list always shows the default type that you have selected through the Cameo DataHub Options dialog. |
| Source Type tree | Specifies a data tree of the source that is to be copied. You must specify a target type for every source type. |
| Identifies a node whose source type has already been resolved. |
| Identifies a node whose source type needs to be resolved before copying. It refers to either a node that needs to be mapped or a node that needs to be excluded from the DHLink. |
| Identifies the following
|
 | Identifies the copied node having its parent copied as a node that has already been mapped and is now locked since it has a DHLink sync relation. |
| Define Target Type from Attribute Value | Maps by using the Define Target Type from Attribute Value mode. If you select this mode, you must define the property values and specify the target types of each value in the provided table. Note The Define Target Type from Attribute Value mode is enabled in Group Type Mapping only. |
| Attribute | Selects an attribute of a source node to define its values and a target type. Note The selected attribute is not available to be mapped for the Source Attribute in the provided schema map table. |
| Define Value table (below the Attribute drop-down list) | Defines the values of the selected attribute and the target type of each value. The table has four columns as follows:
|
| Exclude all non-mapped nodes from DHLinks | Excludes all nodes that you select from data synchronization. |
| Quick search text box | Finds a particular type containing specific text. |
| Target Type tree | Shows all types allowed to be added according to the type you have selected in the Source Type tree. The tree comes from the driver and a Cameo DataHub client shows the tree accordingly. |
| Unmaps the selected nodes in the Source Type tree. Unmapped nodes is displayed in red. |
| Skips and creates the schema mapping for the selected nodes as Exclude. |
| Set as default target type | Allows a Cameo DataHub client to create the same type of the target when a source type is selected. Note If the mapping has already existed in the system, the new target type overwrites the old one, and the Schema Map dialog does not open. |
| Edits a schema mapping by selecting the attributes in the provided schema map table. |
| Starts copying with the selected target type and schema mapping. |
| Cancels the copying operation. |


To copy data from DataHub Explorer to the MagicDraw® Containment tree
- From the Operation drop-down list in DataHub Explorer, do one of the following
- Select Copy Data to copy data only.
- Select Copy Data with Sync to copy data and create synchronization.
Drag a node from DataHub Explorer to an element in the MagicDraw Containment tree. The Copy Data dialog opens and shows the mapping mode and options for mapping the source and target types.
Note
You can also drag a node from DataHub Explorer into the MagicDraw® diagram pane. The dragged node is displayed as an element. Any nodes that have not been mapped to a type in the target tool is shown with a red circle.
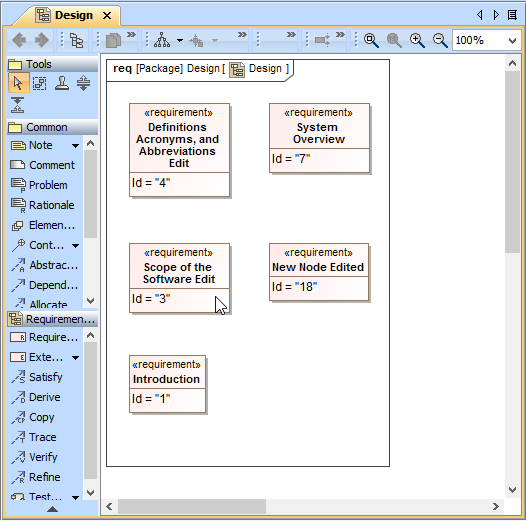
The dragged nodes from DataHub Explorer into the MagicDraw diagram pane are displayed as elements.
Information
If you want to copy a DHLink (a MagicDraw® relation or a DOORS link), you must copy all the parent nodes in this relation. If only one parent node is copied, the DHLink will not appear.
Tip
You can get a properly arranged diagram by using the MagicDraw® Layout menu. From the MagicDraw main menu, click Layout > Quick Diagram Layout to rearrange or reorganize the diagram.
To resolve an unmapped node (a node with a red circle), select it from the Source Type tree and choose a target type that is available on the list on the right side of the dialog.
Tip
- Due to the DataHub support of stereotypes, if you have the same MagicDraw® data type with different stereotypes, you can map these two nodes using a different schema.
- You can also map customized stereotypes. When you have created the nodes, reload the Data Sources. The customized stereotypes becomes visible in DataHub Explorer.
- Select the
 check box if you want your nodes to be automatically mapped to target types for the same type of data, without mapping them again in the Copy Data dialog.
 - Click any cells of the target attribute and select the target attribute from the provided drop-down list to be mapped with the source attribute. When the type and attributes are mapped, the color of the circle on the source node changes from red to green.
Continue mapping all the types of the source node, and then click OK to copy them.
Tip
- The Copy Data and Copy Data with Sync operations use the default templates in Schema Map Manager. If you want to map a source node with other element types, you must edit the default schema mapping.
- DataHub supports mapping multi-valued attributes by using the multiplicity of models. Therefore, if you map the multiple attribute values to the multi-valued target attributes, you must create customized stereotypes and properties to apply to the particular target nodes.
- To map the source node’s attribute to the multi-valued attribute of the target node, you must select the target node that uses the stereotype node and select the stereotype property.
- When the data has been copied successfully, the Copy Data with Sync Summary dialog opens and shows a list of all the copied data.

Warning
- If you select the Copy Data operation, DataHub allows you to leave unresolved nodes when copying data.
- If you select the Copy Data with Sync operation, you must map all nodes to maintain the data hierarchy, or select the Exclude all unmapped nodes from DHLinks option to ignore any unmapped nodes.
To copy data or create a DHLink from a Data Source within DataHub Explorer
- From the Operation drop-down list in DataHub Explorer, do one of the following
- Select Copy Data to copy data only.
- Select Copy Data with Sync to copy data and create synchronization links.
- Drag a node from any Data Source to a node within DataHub Explorer. Either the source or target node must be a MagicDraw® node.
- The Copy Data dialog opens, prompting you to choose either Individual or Group Type Mapping mode. Choose a mode and map the source types to appropriate target types. Click OK.
Tip
The following rules apply to the Copy Data with Sync operation:
- All nodes under the dragged source root node must be able to create the synchronization links.
- A node cannot have more than one Sync relation with one Data Source. For example, node a has a Sync relation with Data Source D1. Therefore, node a cannot create another Sync relation within D1, but it can create a Sync relation with any node under Data Source D2 or other Data Sources.
- You can drag a node whose child has a Sync relation. However, all the nodes under the Sync node are locked in the Copy Data with Sync dialog and the existing Sync relations are moved to a new parent node.
- You cannot move an object across the Formal Module in DOORS.
- You cannot change the type of the node that will be moved or has been moved, e.g., from a module to an object and vice versa.
To copy data from a CSV Data Source to MagicDraw Data Source
- From the Operation drop-down list in DataHub Explorer, do one of the following
- Select Copy Data to copy data only.
- Select Copy Data with Sync to copy data with synchronization.
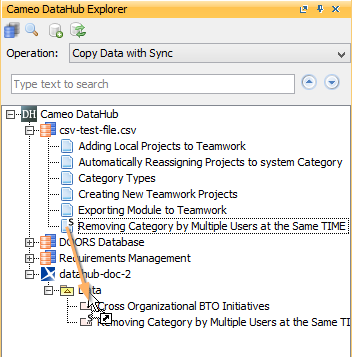
- Drag the nodes from the CSV Data Source to MagicDraw Data Source. A dialog appears confirming you want to add the nodes recursively. Select one of the following
- If you want to copy the selected node with data hierarchy, select Yes.
- If you want to copy only the selected node without data hierarchy, select No.
The Copy Data dialog opens to allow you to choose Individual or Group Type Mapping mode. Choose a mapping mode and map the source types to appropriate target types.
Note
- A CSV Data Source supports the Copy Data with Sync operation, and DataHub excludes all child nodes for CSV automatically since a CSV file has no data hierarchy.
- You cannot copy links (a MagicDraw® or a DOORS link) to a CSV Data Source since links always have data hierarchy with their parent nodes.
- You cannot synchronize relations with a CSV Data Source if you change the attribute synchronized with a CSV key field because DataHub uses the CSV key field to indicate the synchronization target.