The requirement always contains two properties: id and text. This section describes how to modify the text property of the requirement.
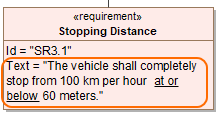
The Stopping Distance Requirement shape with filled Text property.
Editing the requirement text
You can edit the requirement text directly on shapes and in cells, or use the Text dialog.
To open the edit mode of the requirement text, do one of the following
- On the diagram pane, select the Text box on the Requirement shape. Click the text box again. The edit mode opens on the shape.
- In the Requirements table, double-click the Text cell. The edit mode opens on the cell.
- In the Requirements table, double-click the Text cell, and select
 . The Text dialog opens.
 - Open Specification window of the Requirement, select the Text property, and click . The Text dialog opens.
Switching the requirement text to HTML or Plain text
You can change the requirement text to HTML or Plain text directly on the Requirement shape or in the Text dialog.
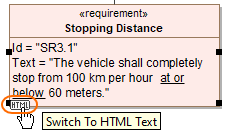
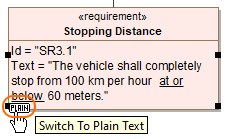
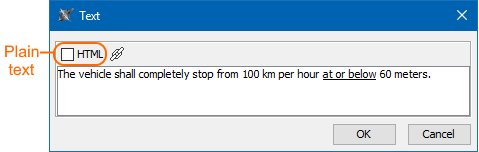
To switch the requirement text to HTML or Plain text directly on the Requirement shape
- On the diagram pane, select the text box on the Requirement shape.
- Click one of the following buttons appearing on the lower left corner of the shape:
- HTML - converts the text to HTML text.
- Plain - converts the text to plain text.
- HTML - converts the text to HTML text.
To switch the requirement text to HTML or Plain text in the Text dialog
- Open the Text dialog:
- In the Requirements table, double-click the Text cell, and select
 .
. - Open Specification window of the Requirement, select the Text property, and click .
- In the Requirements table, double-click the Text cell, and select
- In the Text dialog tootbar, do one of the following:
- Select the HTML check box to convert the text to HTML text.
- Clear the HTML check box to convert the text to plain text.
- Select the HTML check box to convert the text to HTML text.
- Click OK.
Modifying the requirement text
You can modify the Requirement text in the following ways:
Rich text formatting
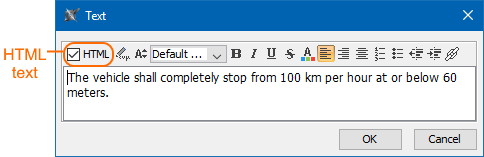
If you switch the requirement text to HTML, you can use the toolbar in the Text dialog to format it as rich text.
To open the rich text formatting toolbar
- On the diagram pane, select the Text box on the Requirement shape. Click the text box again.
- In the Requirements table, double-click the Requirement Text cell, and select .
- Open Specification window of the Requirement, select the Text property, and click .
If the Requirement text is in HTML format, the rich text formatting toolbar appears as shown in the following image.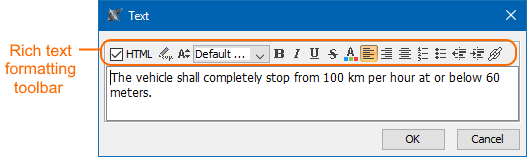
HTML text editors
Learn more about how to work with HTML texts:
Using Glossary terms
You can use the terms from the Glossary Table to ensure the same definitions of the concepts. How to work with Glossary table >>
If you want to extract a Constraint from a Requirement, you must use the special condition terms when defining the Requirement text.
The full procedure for extracting a Constraint from a Requirement is provided in the section Extracting Constraint from Requirement.
The Extracting Constraint from Requirement functionality provides the ability to verify Requirements easier when trying to prove the assertion is true (or false). A glossary mechanism extracts the constraint directly from the Requirement text. If you want to create constraints and associate them with requirements automatically, you can use the extract Constraint from Requirement text functionality.
To extract Constraint value from Requirement text
- Use the Requirements term glossary in Requirement text.
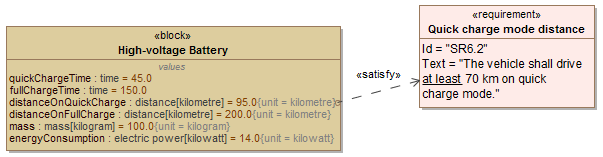
- Create the satisfy relationship between the specific value of design element and requirement.
Creating the satisfy relationship
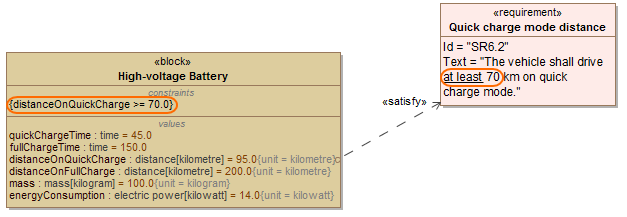
The specific value of the design element must satisfy the Requirement. As shown below, the distanceOnQuickCharge value of the Hight-voltage Battery Block satisfies the Quick change mode distance Requirement.
To extract a Constraint from a Requirement
- Right-click a value property in the compartment area of the design element shape.
- Select Tools > Extract Constraint From Requirement.
The constraint is created automatically with a value and condition term defined in the Requirement.
In the example below, the text "at least 1500" of the Quick change mode distance Requirement is automatically parsed to "distanceOnQuickCharge >= 70" and solved as a constraint.
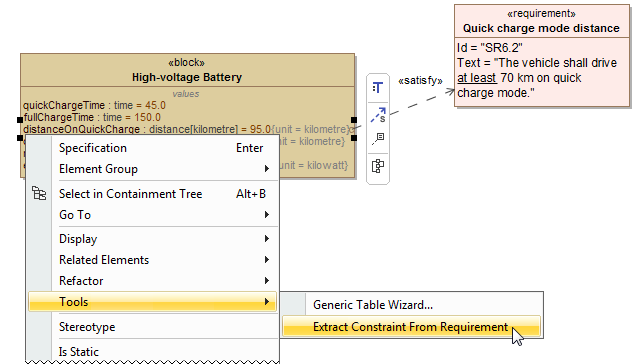
After selecting the Extract Constraint From Requirement command, the constraint {distanceOnQuickCharge >=70.0} is automatically created. It satisfies the requirement text "at least 70".
Defining hyperlinks
You can add a hyperlink on the requirement text. How to add hyperlinks in text read in the Hyperlinks in text page.
Inserting images into HTML text
To insert an image into HTML text
- Open the Advanced HTML Editor.
- On the toolbar, click Insert Image button
 , then click one of the following:
 - From File – to browse the image in your file system or paste the attached image file URL into the Picture source field.
 From Attached File – to open the Select Elements dialog and select the appropriate parent element to which the AttachedFile image should be attached.
 From Image Library – to use images from a bundled image collection or your own added sets of images.
- Click OK twice to close both dialogs.
To insert multiple image files
- Open the image files location, select the files you want to insert, then do either:
- copy/paste them to the HTML Editor. In the Paste Special menu, select Image to paste images and attach them to the project or Image (without attaching) to paste them only for referencing in the diagram.
- drag them to the HTML Editor. In the Select Image Owner, select the appropriate parent element to which the AttachedFile images should be attached.
- Click OK to close the dialogs.
This feature works on both HTML Editor and Advanced HTML Editor.