On this page:
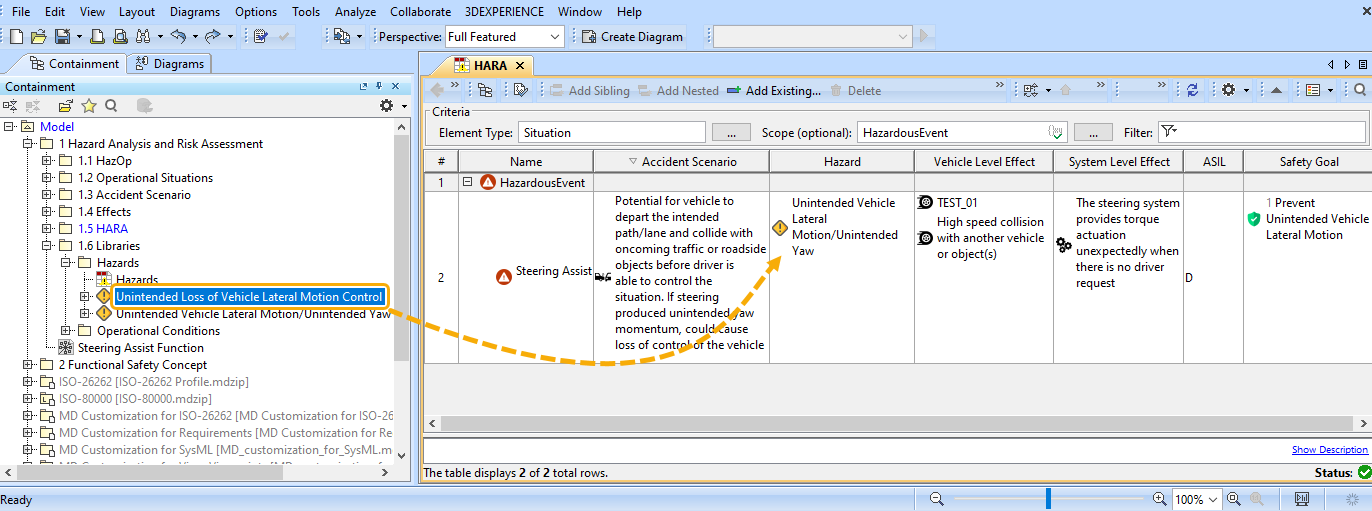
A HARA Table allows you to define Hazardous Events as a combination of Hazards, Effects and an Accident Scenario. By default, the table shows seven columns. The rest of the columns are hidden, but you can show them if needed.
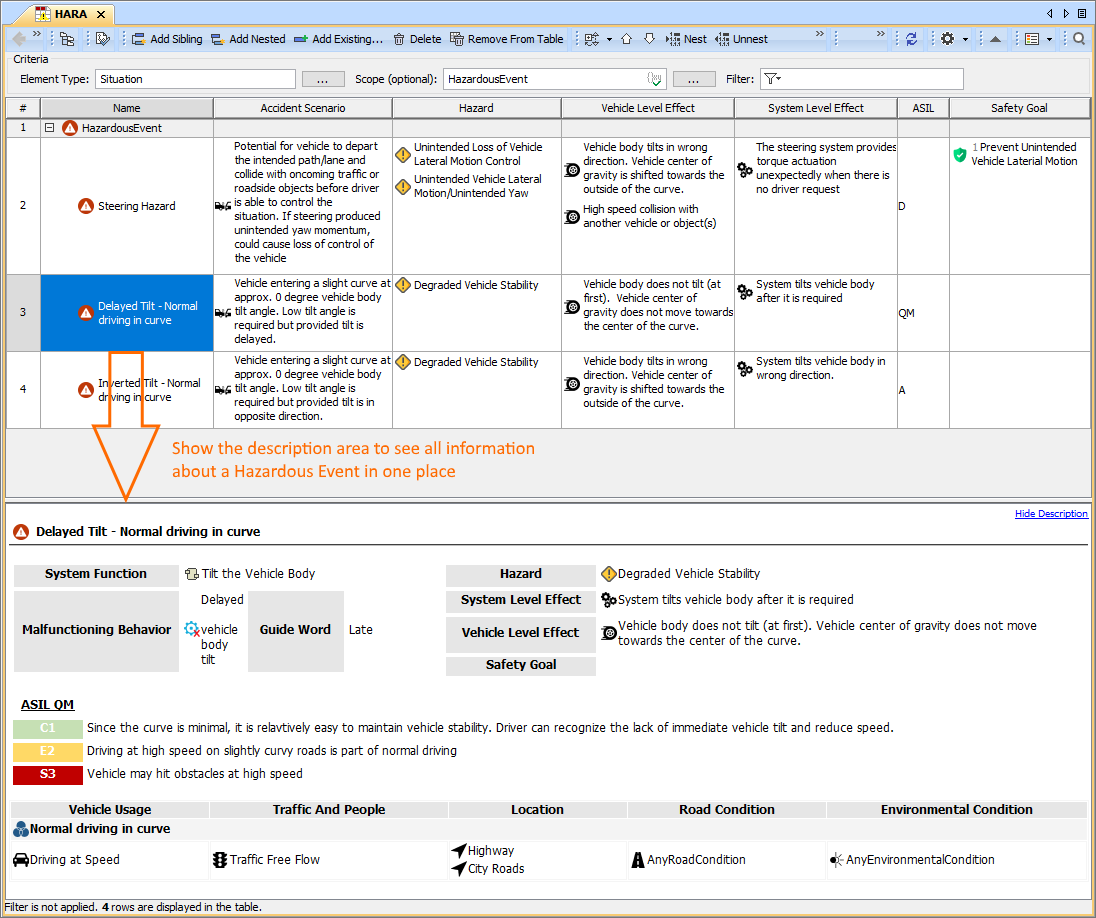
An example of a HARA Table.
ASIL returns a calculated value according to the specified values of Exposure, Controllability and Severity. If there are more than one values of Severity or Exposure then take the higher value (single value).
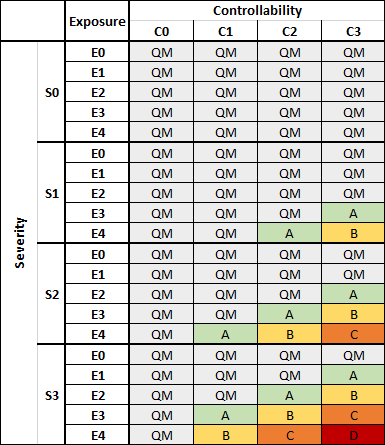
ASIL Table
Creating HARA Table
You can create a HARA Table as described below.
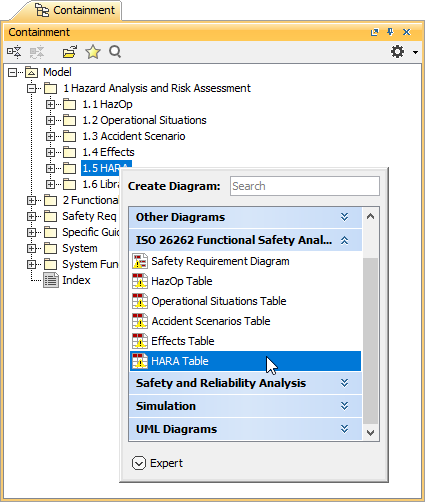
To create a HARA Table
- In the Containment tree, select the element that you want to be the owner of the table.
- Do one of the following:
- In the main menu, go to Diagrams > Create Diagram, then select HARA Table in the open dialog.
- In the Containment tree, right-click the owner of the table, select Create Diagram and select HARA Table in an open dialog.
- When the table is created, type the name of the table and press Enter.
After completing the above steps, a HARA Table is created. The scope and element type of the table are already specified for you.
Creating Hazardous Events
There are two ways to create a Hazardous Event: you can do it right in a HARA Table or in the Containment tree.
To create a Hazardous Event in the Containment tree
- In the Containment tree, right-click the owner of a new element and select Create Element.
- In the open window, select Hazardous Event.
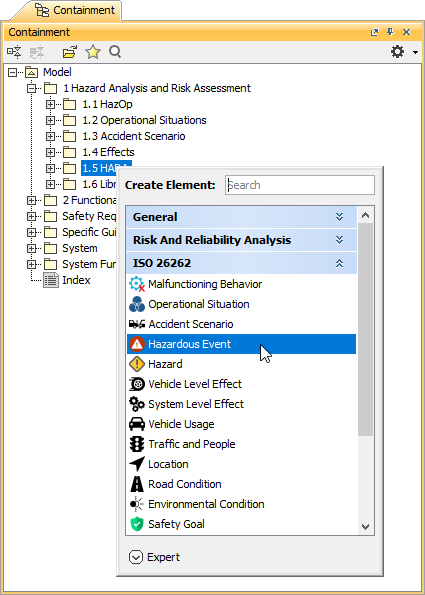
- When a Hazardous Event is created, type the name of the element and press Enter.
When you create a Hazardous Event in the model browser, it is automatically added to a HARA Table if it exists.
To create a Hazardous Event in a HARA Table
- In a HARA Table, select a table row.
- Do one of the following:
- In the table toolbar, click
 to create an element of the same level as the one you have selected.
 In the table toolbar, click
 to create an element nested under the selected element.
- In the table toolbar, click
- Type the name of the new element and press Enter.
When you create a Hazardous Event and add it to a HARA Table, you need to define the element as described in the section below.
Defining Hazardous Events
After creating a Hazardous Event, you need to define it by assigning an Accident Scenario, Hazards, and Effects to the element. You also need to create and assign a Safety Goal. The Accident Scenario, Hazards, Effects and Safety Goal also can be dragged from the Containment tree.
Dragging and dropping the Hazard in the HARA Table
To assign an Accident Scenario
- In a HARA Table, double-click the cell the Accident Scenario column and click
 .
. - On the left side of the Select Element dialog, open the List tab.
- Select the Accident Scenario you want to assign.
Click OK.
Use filters to find elements quicker
When you assign a Accident Scenario, use a filter after step 2 to find elements quicker:
- In the Select Elements dialog, click
 next to the Filter by ISO properties box.
 - In the Select Properties dialog, click the Value box of a property and select the desired property value from the list.
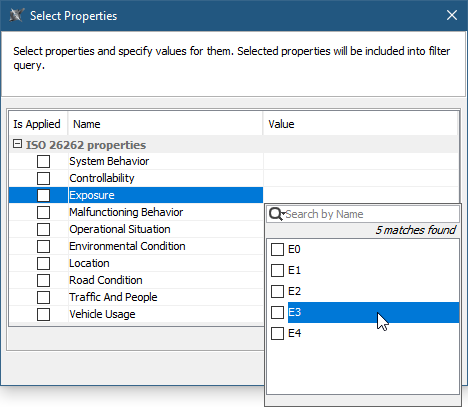
- Click OK.
Now the List tab displays the elements with the selected property value.
- In the Select Elements dialog, click
After assigning an Accident Scenario to a Hazardous Event, the Automotive Safety Integrity Level (ASIL) is calculated automatically.
Assigning Hazards
- In a HARA Table, double-click the cell of the Hazard column and click .
- On the left side of the Select Element dialog, open the List tab.
- Double-click the Hazards you want to assign. The elements should be added to the selected elements area.
- Click OK.
To assign an Effect
- In a HARA Table, double-click the cell of the column representing the group of Effects (Vehicle Level Effects or System Level Effects) you want to assign an click .
- On the left side of the Select Element dialog, open the List tab.
- Double-click the Effects you want to assign. The elements should be added to the selected elements area.
- Click OK.
To create and assign Safety Goal
- In a HARA Table, double-click the cell of the Safety Goal column and click .
- In the Select Elements dialog, enable the Creation Mode if it is not enabled yet.
- In the element tree on the left side of the dialog, select the owner of a Safety Goal and click the Create button.
When the Specification window of the created element opens, enter the element name and close the Specification window. The element is created and automatically added to the selected elements area on the right side of the Select Elements dialog.
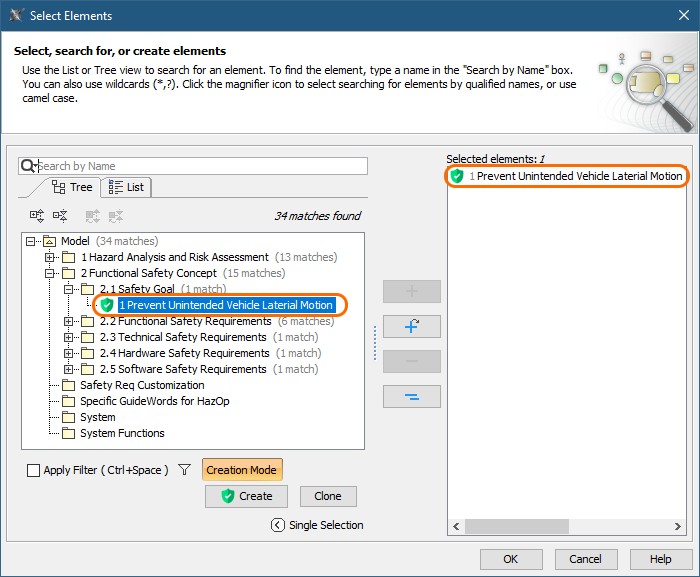
Click OK to close the Select Elements dialog.