On this page
A Hazards Table allows you to define and manage potential sources of harm that have an effect on something or someone under certain conditions at work. Essentially, the Hazards table acts as a library for the functional safety analysis.
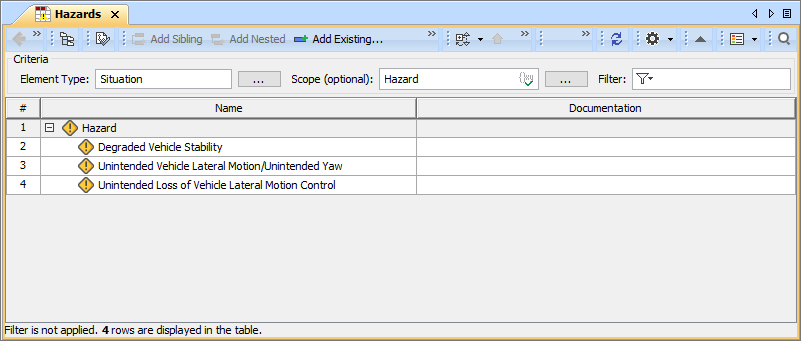
An example of a Hazards Table.
Creating Hazards Table
You can create a Hazards Table as described below.
To create a Hazards Table
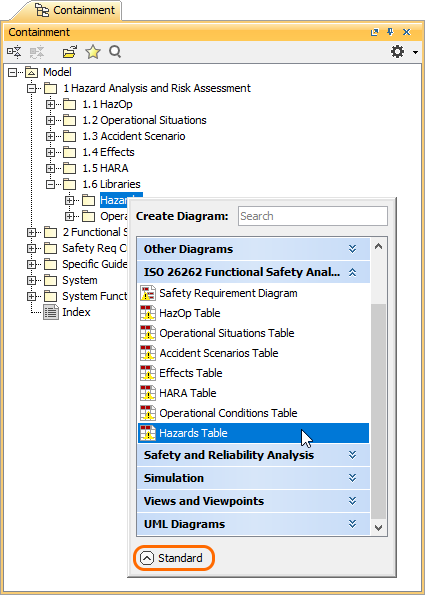
- In the Containment tree, select the element that you want to be the owner of the table.
- Do one of the following:
- In the main menu, go to Diagrams > Create Diagram, then select Hazards Table in the open dialog.
In the Containment tree, right-click the owner of the table, select Create Diagram and select Hazards Table in the open dialog.
Enable the Expert mode
To be able to create a Hazards Table, you need to enable the Expert mode.
- When the table is created, type the name of the table and press Enter.
After following the above steps, a Hazards Table is created. The scope and element type of the table are already specified for you.
Creating Hazards
There are two ways to create a Hazard: you can do it right in a Hazards Table or in the Containment tree.
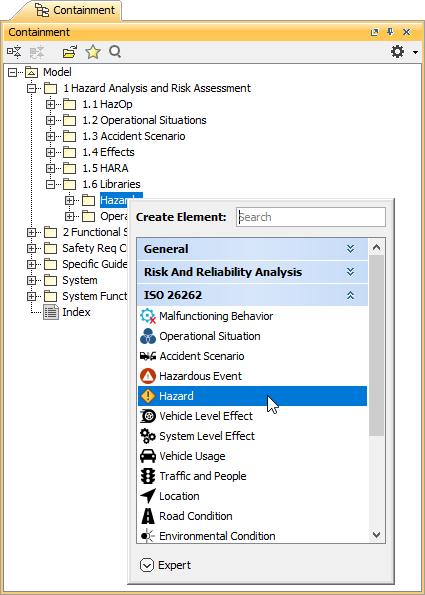
To create a Hazard in the Containment tree
- In the Containment tree, right-click the owner of a new element and select Create Element.
- In the open window, select Hazard.
- When a Hazard is created, type the name of the element and press Enter.
To create a Hazard in a Hazards Table
- In a Hazards Table, select a table row.
- Do one of the following:
- In the table toolbar, click Add Sibling to create an element of the same level as the one you have selected.
In the table toolbar, click Add Nested to create an element nested under the selected element.
- Type the name of the new element and press Enter.