Simulation supports the integration of custom HTML widgets through the build-in model library named UI Widgets Library.mdzip. You can see its usage in WebUIWidgets in Samples on the Welcome screen under Simulation.
For further technical details, please see also the tutorial for integrating widgets for simulation.
Note
HTML widgets work with most web browsers such as Google Chrome, Microsoft Edge (Chromium), Mozilla Firefox, and Opera. However, if you use older versions of Internet Explorer, e.g., IE 11, you must set the document mode to 11 by doing the following:
- Open Internet Explorer.
- Press F12. Go to the Emulation menu.
- Under the Mode group, select the Document mode list and choose 11.
To use the HTML widgets model library
- From the main menu, click File > Use Project > Use Local Project. The Use Project dialog opens.
- In the Use Project dialog, do the following:
- Click the From predefined location option.
- Choose <install.root>\modelLibraries.
- Select UI Widgets Library.mdzip.
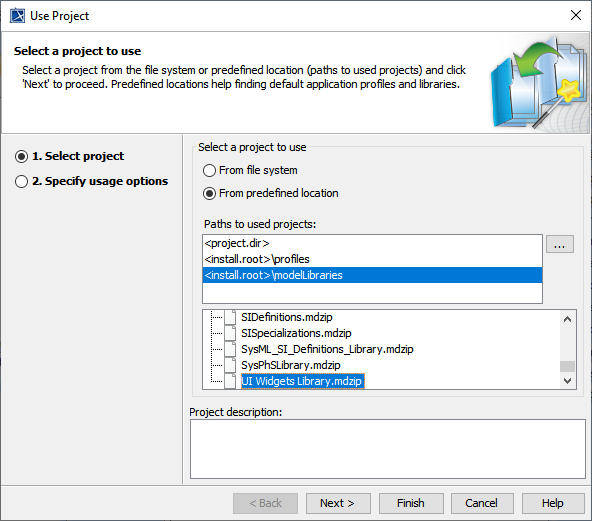
- Click Next. UI Widgets Library will be shown as the shared Package.
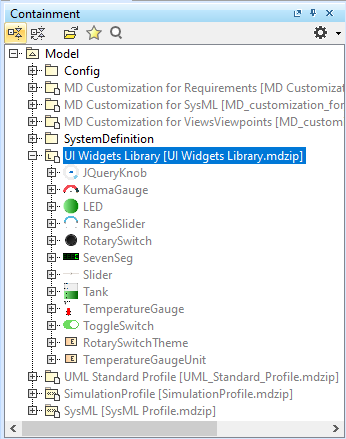
- Click Finish. A question dialog about auxiliary resources will appear.
- Click Yes. UI Widgets Library.mdzip will be shown in the Containment tree. There are build-in widgets in the Package, e.g., JQueryKnob, LED, and KumaGuage. Those widgets are ready to be customized and used as user interfaces.
Note
- HTML widgets are self-containing, owned properties (not references to any model elements except only themselves).
- To further customize «Widget», open the UI Widgets Library.mdzip library and modify, save, and reattach the zip file of «Widget».
You can use widgets only in diagrams that are based on the Composite Structure Diagram with the conditions applied as follows
Drag the widget from a UI Widgets Library and drop it into the IBD/Composite Structure diagram of the simulation context. Then use a Binding Connector to connect between the value property of the system and Port of the widget with the same Type. The widget can be resized as needed.
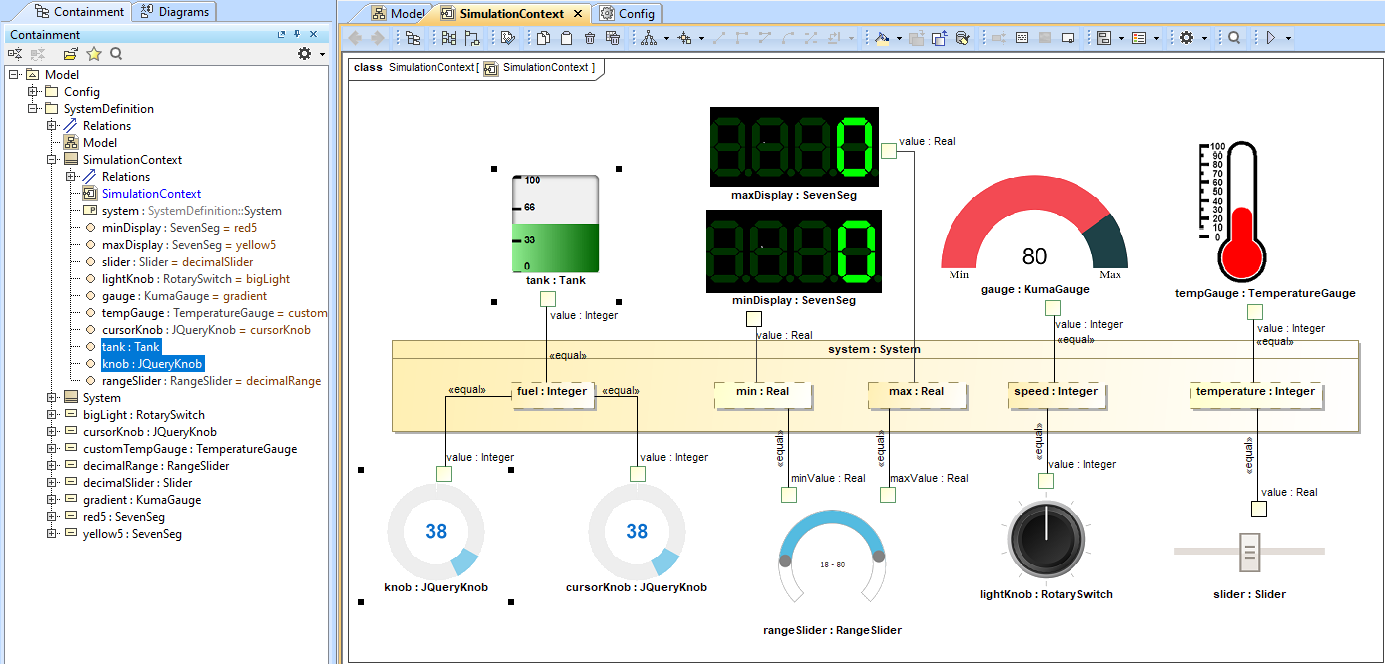
HTML widgets used as Type of Property in the IBD diagram of the simulation context.
You can customize properties of any widgets, e.g., changing colors of cursorKnob, through the following steps:
- Create an Instance Specification of the widget by right-clicking the widget and selecting Tools > Create Instance. Then select a Part and Package to save.
Open the Specification window of the created Instance Specification. In the left pane of the window, click Slots and choose either Create Value or Edit Value.
- Use the modified Instance Specifications as Default Value of the Part properties in the simulation context, as shown in the following figure.
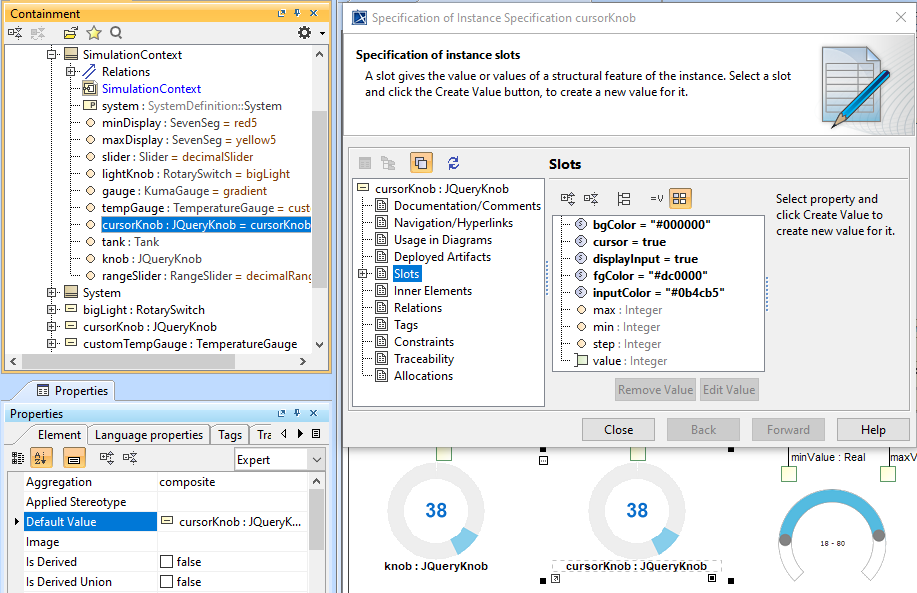
Customizing values through creating instances of the widget, setting values of properties in Slot of widgets, and using them as Part properties.
- When running from a «SimulationConfig», you must set the executionTarget of the «SimulationConfig» to the simulation context, and the following Events will occur as shown in the next figure below:
- «Widget» Parts in the executionTarget, found at any Package levels, will be automatically generated as HTML files. All generated HTML files will be stored in the project's working directory with the same name as the project.
The Web Server will automatically start.
Note
If the Web Server plugin is not installed, a warning message with a link to install the plugin will be printed in the Console panel. Widgets on the IBD will not work until the plugin has been installed.
- The Console pane will print all generated HTML files, the generated folder, and URL of the Web UI with links.

Running simulation with HTML widgets from a «SimulationConfig».
You can also run the simulation directly from the IBD/Composite Structure diagram that contains widgets either from the right-click menu of the diagram or the Containment tree, or the Simulation toolbar of the diagram. Then the simulation will automatically generate HTML files, and the Web Server will be automatically started, similar to Step 3.
Depending on the circumstances, you can manually regenerate HTML files for further customization of the web UI. Manually regenerating HTML files is possible by right-clicking a «SimulationConfig» and selecting Simulation > Generate HTML.

Manually regenerating HTML files through the Generate HTML command for HTML widgets.Note
- The Generate HTML command is available only when there is «Widget» as Part (either Class or Block) in the executionTarget of a «SimulationConfig».
- If HTTP ERROR 404 ... occurs in the IBD/Composite Structure diagram, you must use the Generate HTML command. This is because the error from HTML files is not generated, but the startWebServer of the «SimulationConfig» is false.
However, if the HTML files already exist, a question dialog will be shown to prevent you from accidentally overwriting them as shown in the figure below.
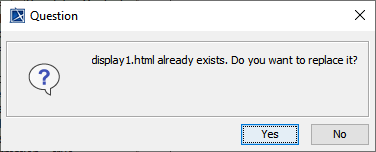
The question dialog to prevent accidentally overwriting the HTML file.