Once you have successfully created a Class Diagram, the next step is to import Classes into your diagram. The following example shows you the steps to import classes into the class diagram.
To import classes into a diagram
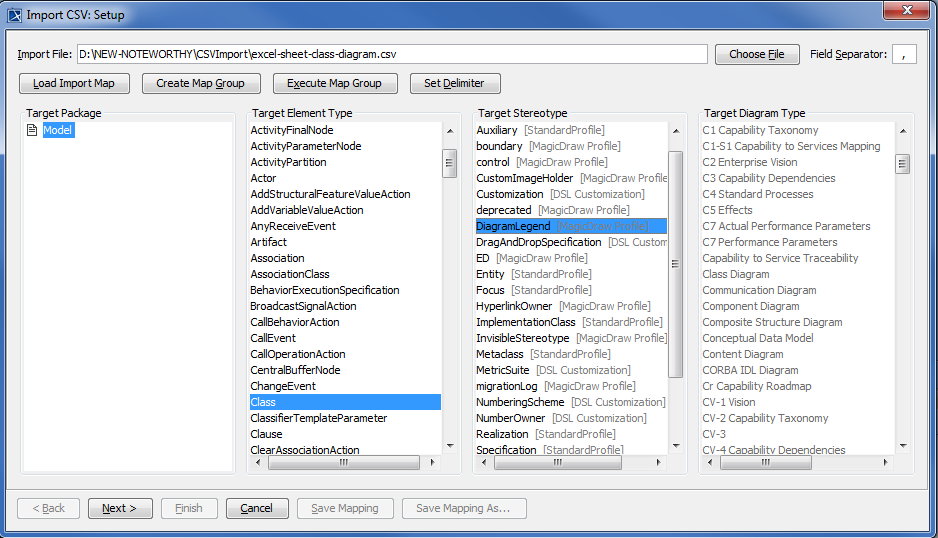
- Open up the CSV Import plugin by clicking File > Import From > Import CSV. The Import CSV: Setup screen will open, see figure below.
- Click
 to browse and select your CSV file.
 - Select a Target Package for the classes.
- Select Class as a target element type.
- Click
 to move onto the Import CSV: Mapping dialog, see figure above.
 - Select the ClassName column from the CSV Data table and select Name attribute from the Properties list, and then click
 to map them.
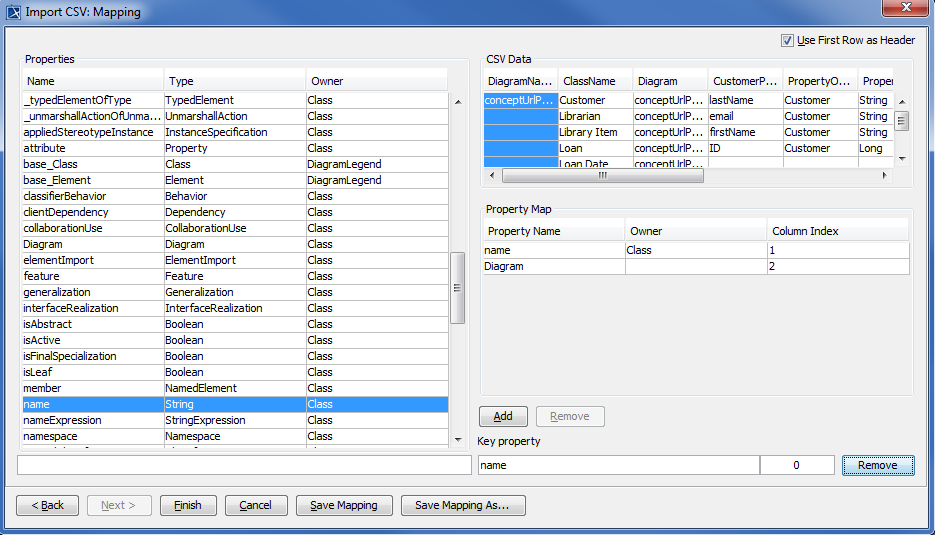
- Select the Diagram column from the CSV Data table and select a row of Diagram and type Diagram from the Properties list, and then click .
- Keep the name property from the Properties list selected, and also keep the ClassName column from CSV data source selected, then click the button beside the Key Property textboxes. The Key Property textboxes should populate as shown in figure above.
- Click
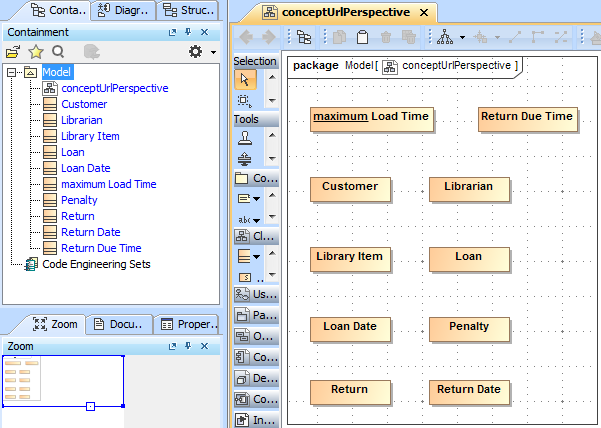
 . Your MagicDraw containment tree should now be populated as shown below in figure below.