On this page:
You can add selected Data Markings to your project elements, as well as remove individual or all Data Markings added to an element via the Data Markings shortcut menu. The Data Markings in the shortcut menu are displayed as their portion markings.
Adding a Data Marking to an element
To add a Data Marking to an element
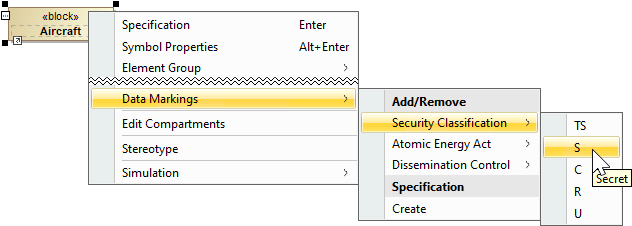
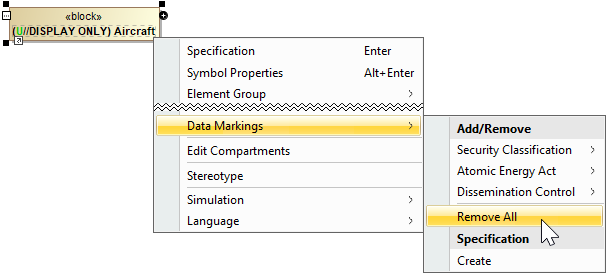
Right-click an element or its symbol > select Data Markings in the shortcut menu > in the Add/Remove section, select the Data Marking Category > select the Data Marking you want to add.
Adding a Data Marking to multiple elements
To add a Data Marking to multiple elements
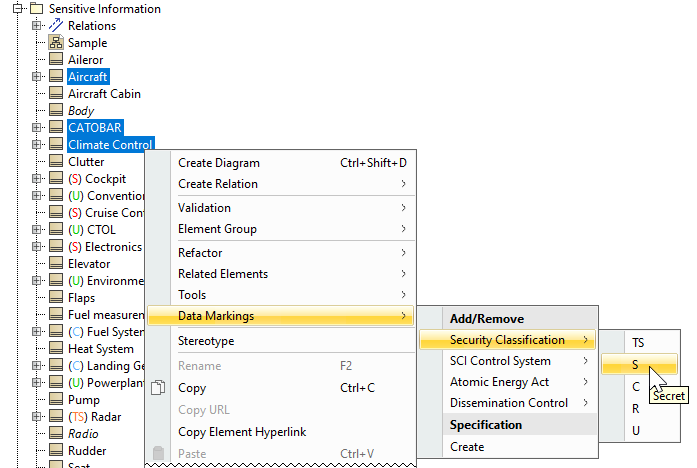
- Hold the Ctrl key and select the elements or their symbols you want to add a Data Marking to.
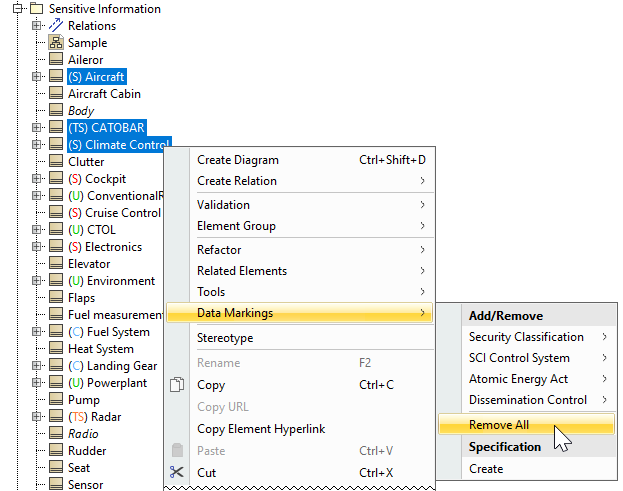
Right-click one of the selected elements/symbols, and in the shortcut menu, select Data Markings.
In the Add/Remove section, select the Data Marking Category and click on the Data Marking you want to add.
Removing a Data Marking from an element
To remove a Data Marking from an element
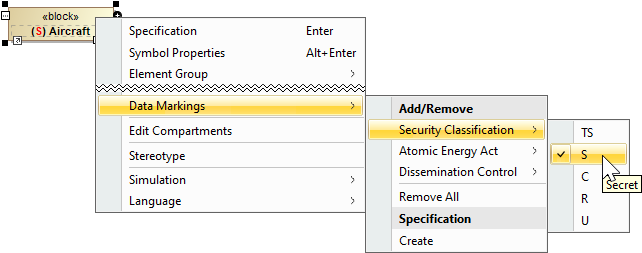
- Right-click an element or its symbol > select Data Markings in the shortcut menu > in the Add/Remove section, select the Data Marking Category > select the Data Marking you want to remove.
Removing a Data Marking from multiple elements
To remove a Data Marking from multiple elements
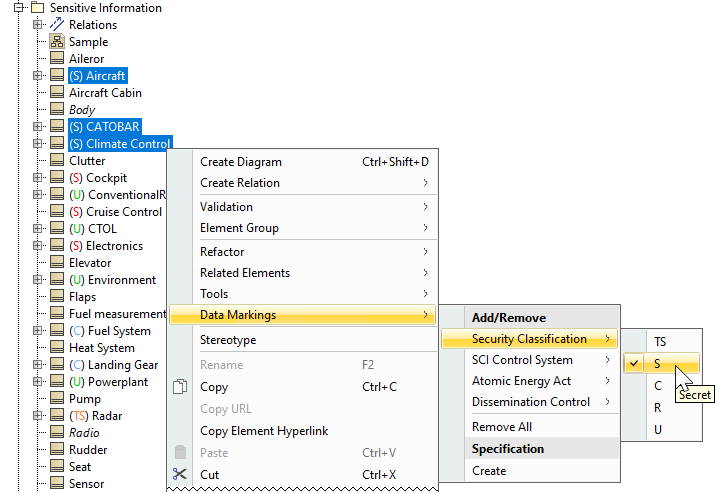
- Hold the Ctrl key and select the elements or their symbols you want to remove a Data Marking from.
Right-click one of the selected elements/symbols, and in the shortcut menu, select Data Markings.
In the Add/Remove section, select the Data Marking Category and click on the Data Marking you want to remove.
Removing all Data Markings added to an element
To remove all Data Markings added to an element
- Right-click an element or its symbol > select Data Markings in the shortcut menu > in the Add/Remove section, select the Data Marking Category > click Remove All.
Removing all Data Markings from multiple elements
To remove all Data Markings from multiple elements
- Hold the Ctrl key and select the elements or their symbols you want to remove a Data Marking from.
Right-click one of the selected elements/symbols, and in the shortcut menu, select Data Markings.
In the Add/Remove section, click Remove All.
Displaying element Data Markings in documentation hyperlinks
To display element Data Markings in documentation hyperlinks
- Open the Specification window of an element.
- Select the Documentation/Comments property group.
- Write the information you want to document.
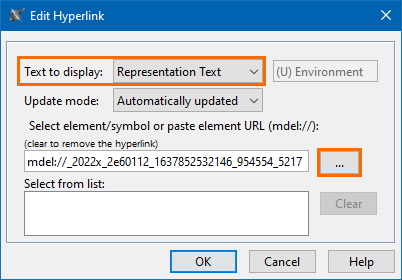
- Click the Insert Hyperlink button. The Edit Hyperlink dialog opens.
- For the Text to display option, select Representation Text.
- In the Select element/symbol or paste element URL field, click the three dots button.
- Select the element/symbol in the Select Model Element/Symbol dialog. Click OK.
- Click Close.
