On this page:
You can specify your own custom Diagram Banners by creating Diagram Banner configurations; thus, you can specify the display position (Header/Footer/Both) for specific markings based on their categories and/or have them displayed on separate banners. To create Diagram Banner configurations, ensure the working project already has Data Marking Categories created in it.
Important
Before creating Diagram Banner configurations, make sure to review the information provided on the Specifying Diagram Banners page.
Creating a Diagram Banner configuration
To create a Diagram Banner configuration
- Create a new package (e.g. 'Diagram Banner Configuration').
Inside the package, create a Class element and name it (e.g. 'Diagram Banner Customization').
- Right-click the Class element. In the shortcut menu, click Stereotype > select «bannerConfiguration» from the menu, and click Apply.

- Right-click the Class element and open its Specification window.
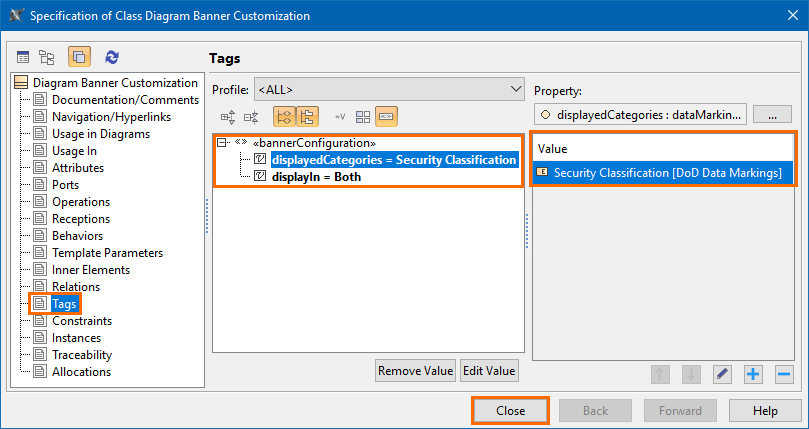
- In the Specification window, select the Tags property group.
- Under «bannerConfiguration» select displayedCategories and click the Create Value button. The Select Data Marking Category dialog opens.
Select the Data Marking Category for which you want to specify the display position. Click OK.
You can use the Multiple Selection option to select multiple Data Marking Categories if you want several Data Marking Categories to have the same display position.
- Under «bannerConfiguration» select displayIn and click the Create Value button.
- In the Value box, select the display position for the specified categories from the drop-down menu.
Click Close.
If you want to have multiple Diagram Banners, create separate Diagram Banner configurations for other categories by repeating steps 2-10.
Adding more categories to the Diagram Banner configuration
To add more categories to the Diagram Banner configuration
- Right-click the Diagram Banner configuration Class element and open its Specification window.
- In the Specification window, select the Tags property group.
- Under «bannerConfiguration» select displayedCategories and on the right side of the window, click the
 button. The Select Data Marking Category dialog opens.
 - Select the Data Marking Category you want to add. Click OK.
- Click Close.
Removing categories from the Diagram Banner configuration
To remove categories from the Diagram Banner configuration
- Right-click the Diagram Banner configuration Class element and open its Specification window.
- In the Specification window, select the Tags property group.
- Under «bannerConfiguration» select displayedCategories.
- On the right side of the window, select the Data Marking Category value you want to remove and click the
 button.
 - Click Close.
Changing the display position in the Diagram Banner configuration
To change the display position in the Diagram Banner configuration
- Right-click the Diagram Banner configuration Class element and open its Specification window.
- In the Specification window, select the Tags property group.
- Under «bannerConfiguration» select displayIn.
- In the Value box, select the display position for the specified categories from the drop-down menu.
- Click Close.