To export elements to Excel or CSV, a class mapping is needed which maps excel file headers to attributes of the class, in this case Requirement. If you have followed the previous chapter, a class mapping can be created by simply importing table headers from an Excel or CSV file.
Once you have the class mapping defined, you can export data to Excel or CSV file.
To export data to Excel or CSV file do the following
- Click File > Export To > Excel/CSV File. The Export Data to Excel wizard will open.
- The first step of this wizard is to Select a mapping.
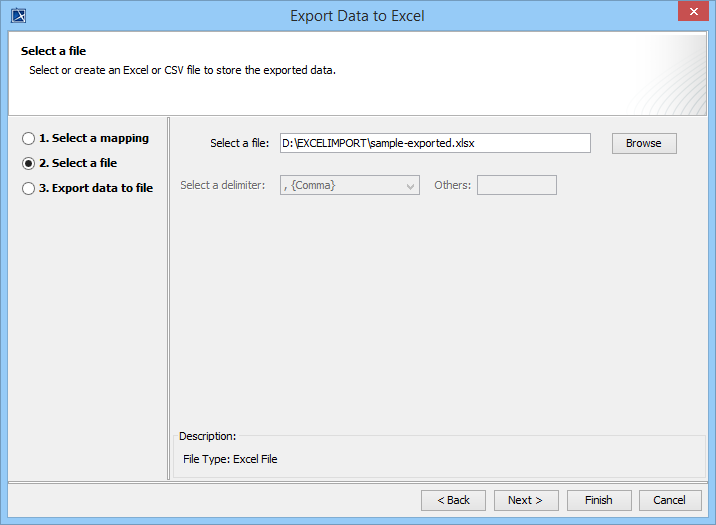
- The second step of this wizard allows you to select an output file and specify a delimiter to use.
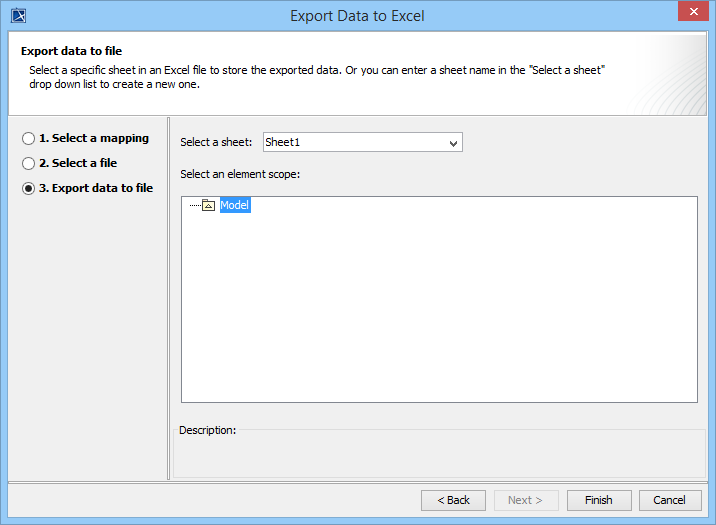
- The third step is the final step where data is exported, i.e. written to the file selected in the second step.
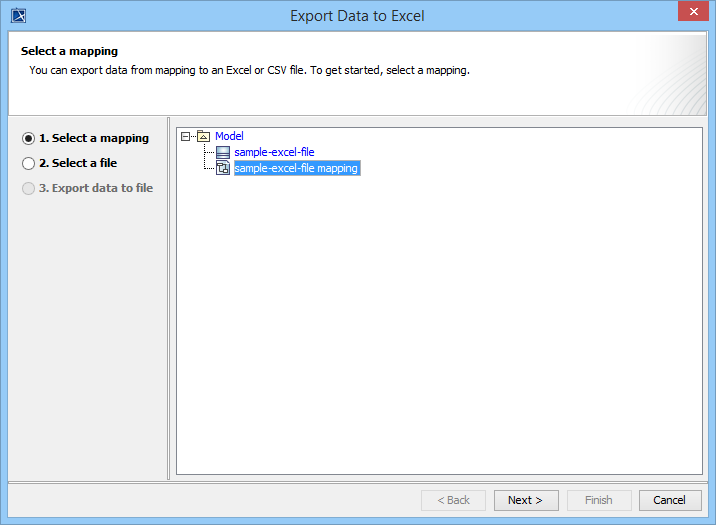

If at the first step, see first figure on this page, you select sample-excel-file instead of sample-excel-file-mapping, then only the heading row will be exported. If you select mapping, then data will be exported along with headers, see last figure above.