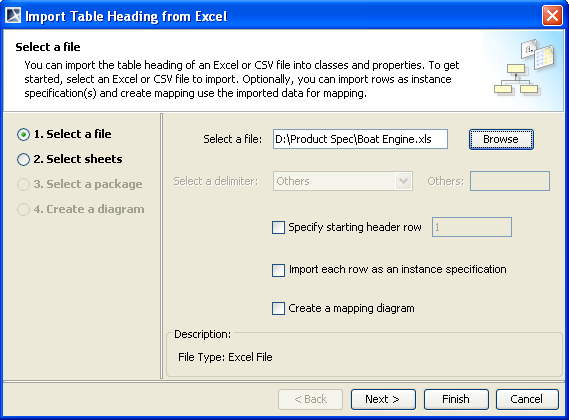
You can open the Import Data from Excel and Create Mapping dialog from the main menu by clicking File > Import From > Excel/CSVFile. The first menu in the dialog, Import Table Heading from Excel, allows you to import table headings as schema classes and/or table rows as instance specifications through the wizard. You can select either one or both to import at the same time. Select the  check box in the wizard, see figure below, if you want to also import table rows as instance specifications of the schema class(es) that you are going to import.
 The ImportTableHeading from Excel Wizard
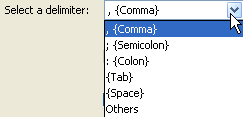
The Excel Import plugin supports several delimiters such as semicolon, colon, tab, and space, see first figure below. If a CSV file that you want to import contains another type of delimiter, you can select Others from the  drop-down list and type the delimiter in the Others box provided in the wizard, see second figure below.
 Supported Delimiters
 SelectingAnotherTypeofDelimiter
The wizard also provides you with some other options. The  check box allows you to select which row to start importing table headings. This option is useful if there are other data, for example, text or paragraphs, preceding the table. If data other than table headings or rows, with the exception of those that come after the table, are imported, an error will occur during import.
You may also select the Create a mapping diagram check box if you want to further map the imported schema class with a target element. The wizard will create a mapping diagram to represent all mapped elements in a class mapping.
When you import an Excel file that has one or several sheets through the wizard, the plugin allows you to select the to-be-imported sheet in the Select sheets step. The plugin will list only the sheets that contain data or table headings. If a file contains only one sheet or has several sheets but only one sheet contains data, the plugin will skip the Select sheets step.