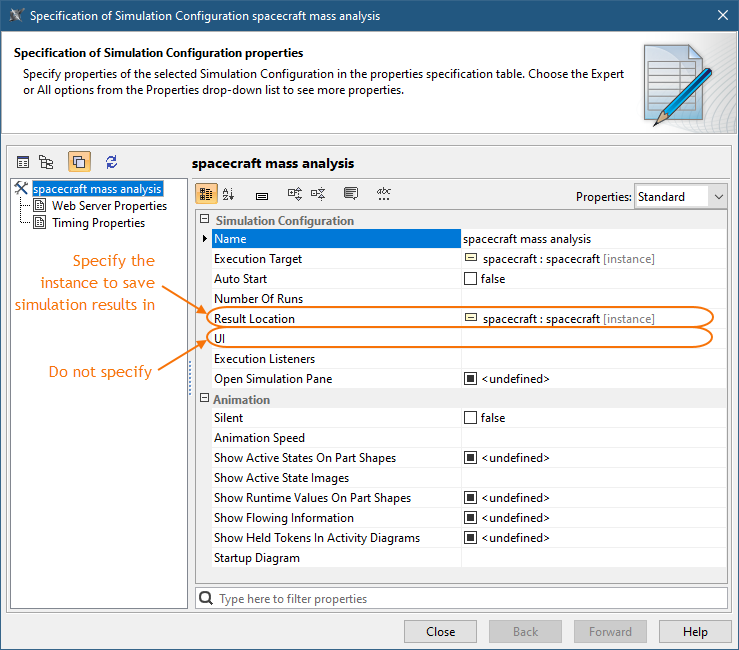
Cameo Collaborator for Teamwork Cloud has a user interface that allows you to simulate a project directly in the Cameo Collaborator document published from that project.


Preparing projects for simulation in Cameo Collaborator for Teamwork Cloud

To simulate a project in Cameo Collaborator, it has to meet the following criteria:

  • The project must have an Instance Table with the instance you want to execute because simulation in Cameo Collaborator is only possible using Instance Tables.
  • For simulation results to be saved, you need to specify the Result Location property of a Simulation Configuration. The value of the Result Location property should be the instance in which you want to save simulation results.
  • The executable model should not require any user input because Cameo Collaborator does not support UI. This means that simulation needs to be performed fully automatically.
  • The executable model must end automatically without any user input.

For more information about preparing projects for simulation in Cameo Collaborator for Teamwork Cloud, analyze the example below. It explains how to modify the SpacecraftMassRollup.mdzip sample, which you can find in the <modeling_tool_installation_directory>\samples\simulation directory.


To prepare the SpacecraftMassRollup.mdzip sample for simulation in Cameo Collaborator for Teamwork Cloud


  1. Go to the <modeling_tool_installation_directory>\samples\simulation directory and open the SpacecraftMassRollup.mdzip sample.
  2. Create an Instance Table with the instance you want to execute. Let's say you want to execute the spacecraft Instance Specification. In this case, the project already has an Instance Table with that instance, so you do not need to do anything.


  3. Open the Specification window of the spacecraft mass analysis Simulation Configuration and specify the Result Location property. Its value should be the instance in which you want to save simulation results. Let's say you want to save the results in the same spacecraft instance which you intend to execute.
  4. In the same window, make sure the UI property is not specified because simulation should not require any user input. If the UI is specified, it will be ignored.


  5. Make sure the executable model with behaviors ends automatically without any user input.

    Tip

    The easiest way to check whether the executable model ends without user input is to run it in a modeling tool.

  6. Save and add the project to Teamwork Cloud (if the project is local).
  7. Publish the project to Cameo Collaborator for Teamwork Cloud.


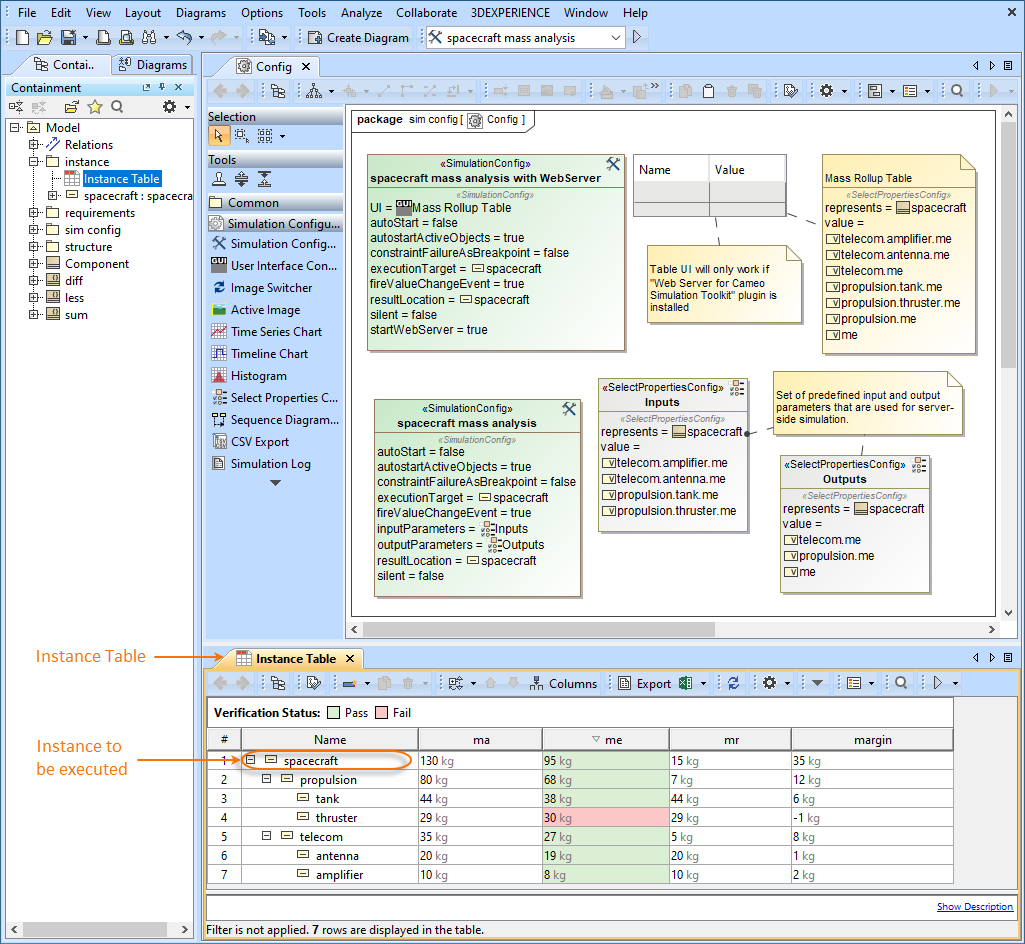
Now you can open the Cameo Collaborator document and simulate the model on the web.


Simulating projects in Cameo Collaborator for Teamwork Cloud

Once you publish your project to Cameo Collaborator for Teamwork Cloud, you can simulate it in a Cameo Collaborator document, as described below.


To simulate a project in Cameo Collaborator for Teamwork Cloud


  1. Open the Cameo Collaborator document published from the project you want to simulate.
  2. Navigate to the Instance Table with the instance you intend to simulate.
  3. Click  on the bottom right corner of the screen.
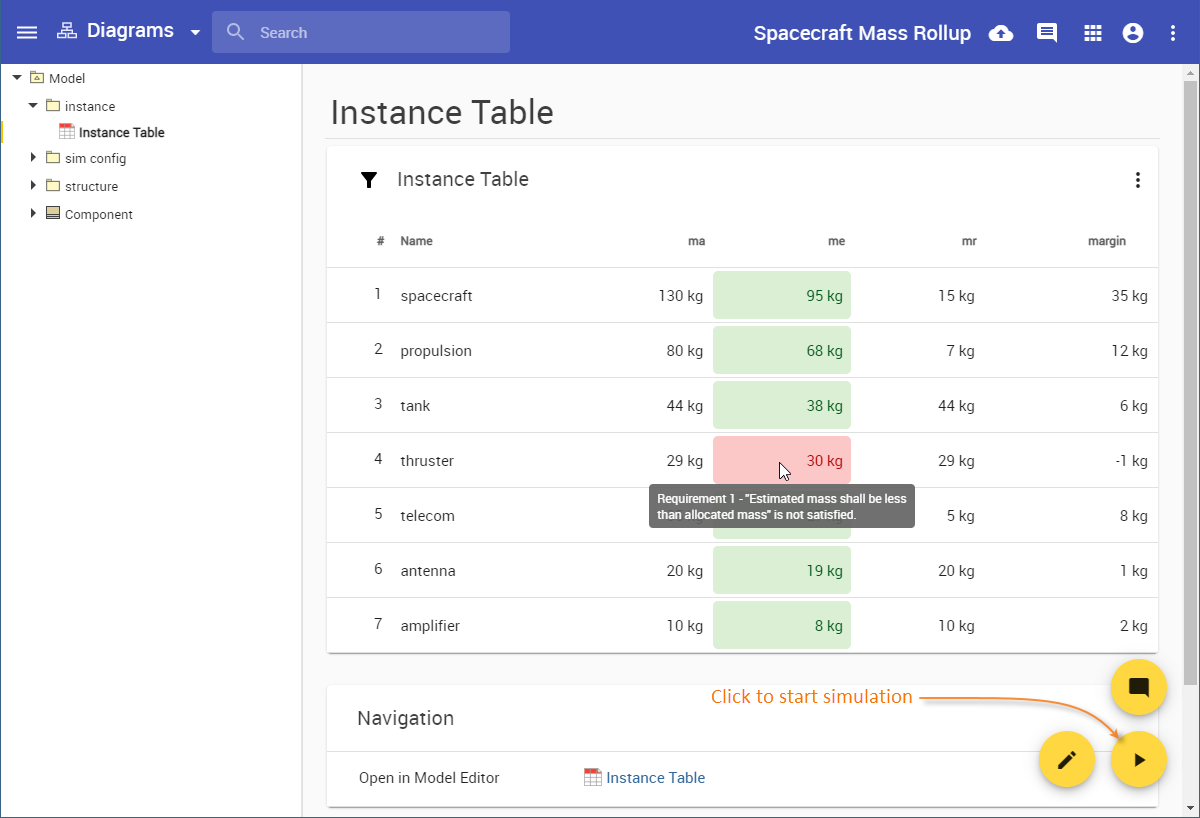


    Requirement or Constraint verification

    As you can see in the figure above, the Instance Table cells are highlighted in green or red according to Requirement or Constraint verification results. To see the tooltip with Requirement or Constraint text, hover the mouse pointer over a highlighted cell.

  4. In the Instance table, select the instance you want to execute.
  5. When the Select configuration and run pane opens on the right side of the screen, select the Simulation Configuration you want to run.
  6. Click  on the top right corner of the pane.
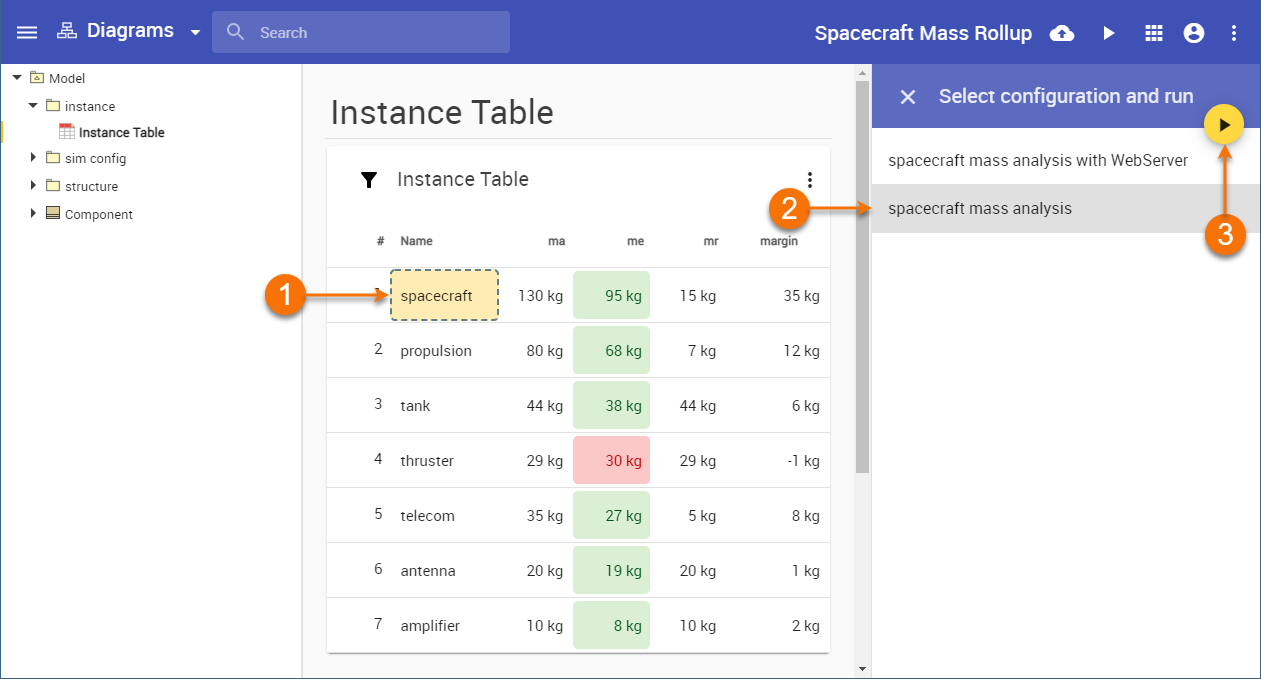


  7. Wait until the simulation is complete and the simulation results are displayed in the updated document.

    Note

    • When you simulate a project in Cameo Collaborator for Teamwork Cloud, a new project version is created with the following commit message: Simulation WebApp: '<Simulation Config Name>' execution results.
    • If the simulation runs longer than 1 min, the right-side panel is closed and you can work with the document as usual while the simulation continues to run in the background. When the simulation is completed, you get a notification with the link to the document location where the simulated instance was selected.