Report Wizard provides predefined report data templates that you can use to generate a report. The built-in report data template consists of several report data variables such as title, author, scope, and purpose that you can modify and adjust to meet your needs. You can also create a new report data template as needed, and manage the variables using the report data management pane.
This section defines report data, and how to use it in your report to represent variables that you want to include. Click the following links to navigate to the content of this page.
Report Data and Variables
A report in Report Wizard has a collection of variables which are called report data. Report Wizard provides a built-in report data for every predefined template. The built-in report data comes with predefined variables and values which you can edit or delete. You can also add more variables to the built-in report data.
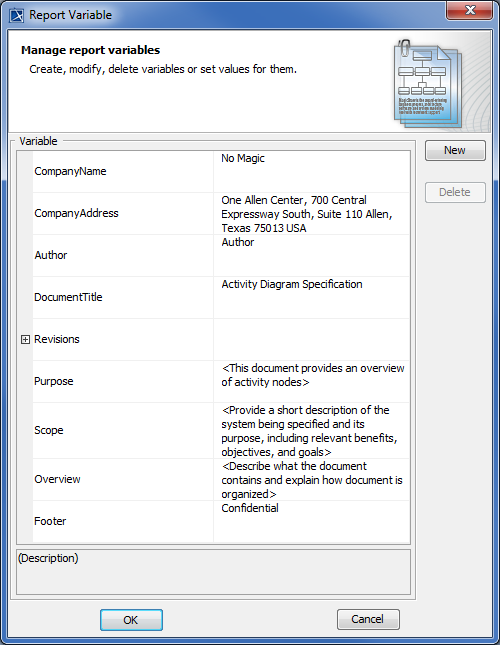
The built-in report data's predefined variables and values in Report Wizard.
You can create your own report data, and add variables and child variables under it if you do not want to use the built-in one. Report Wizard also allows you to create a report data as an element in the Containment tree inside a MagicDraw project by using the Report Profile which allows you to commit the Report Data to Teamwork Server, and share it with other users.
Report Data Management Pane
Report Wizard stores the built-in report data in the Report Data management pane which helps you to organize information into groups , and keep revision history created in a MagicDraw project.
This pane also allows you to:
- Create, edit, delete, or clone a Report Data.
- Create or organize the variables in a Report Data.

Selecting the built-in report data in the Report Data management pane
The following table lists the buttons and their function in the Report Data management pane.
| Button | Function |
|---|---|
 | Creates report data. |
| Edits report data. | |
| Deletes report data. | |
| Clones report data. | |
| Creates a report variable. |

Working with Report Data
You can create report data either in:
- Report Wizard in which all data will be saved into an XML file.
- MagicDraw project, in which case the report data will be saved with the project itself. Saving report data in a project will enable you to commit the report to Teamwork Server.
The following instructions show you how to create and manage your report data in Report Wizard and in a MagicDraw project.
Click Tools > Report Wizard.
Select a template and click
 .
.Click
. The New Report Data dialog will appear.
Creating a Report Data in the New Report Data dialog
- Enter a new report name and description, and then click
 .
.
Before creating a report data in a MagicDraw project, you need to use a report profile, Report Profile.mdzip, which is located in the <install.root>\profiles folder.
How to use a report profile (Report Profile.mdzip)
On the MagicDraw main menu, click File > Use Project > Use Local Project. The Use Project dialog will open, and the project module path <install.root>\profiles will be selected by default.

The Use Local Project menu opens the Use Project dialog that contains a report profile you need before creating a report data in a MagicDraw project.

Selecting a project module path for the report profile and Report Profile.mdzip in the Use Project dialog.Select Report Profile and click
.Specify the usage options.
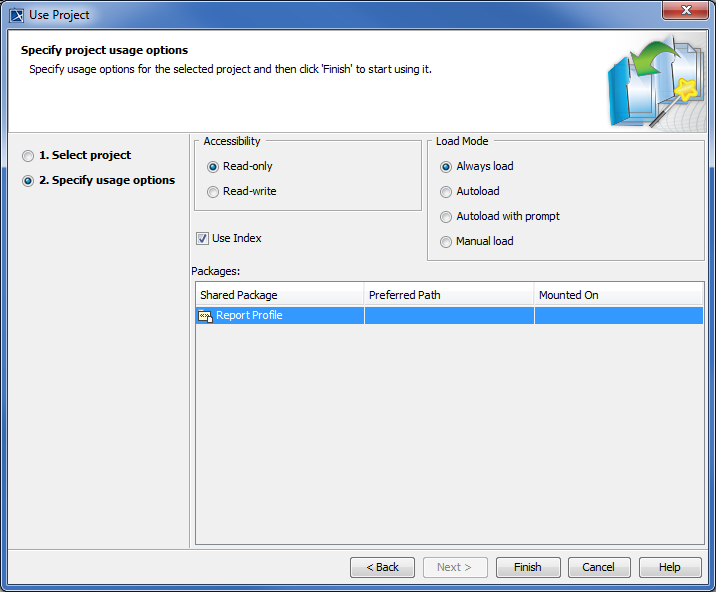
Usage Options.
Click
 . The “Report Profile” profile will open in the Containment tree as a read-only profile. You can now use it in your project.
How to create a Report Data in a MagicDraw project
Use Report Profile.mdzip in your MagicDraw project.
Right-click a data model in the Containment tree and select Create Element.
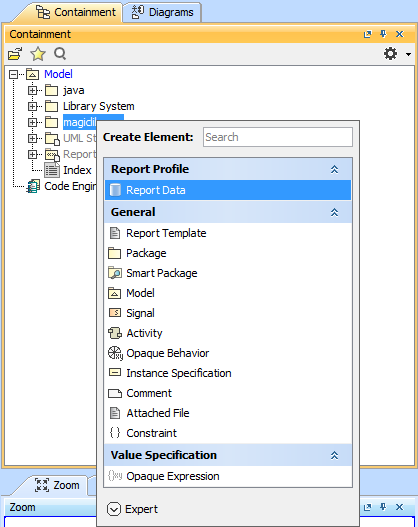
Creating Report Data in the MagicDraw project
Select Report Data from the menu.
- Type the name of the Report Data element in the Containment tree.
You can right-click a data model, a package, or a profile in the Containment tree to create a Report Data.
| Tag Values | Function |
|---|---|
| autoImageSize | Change the image size. |
| imageFormat | Select an image format, either JPEG or PNG. |
| emptyText | Store a string value that will be replaced with an empty variable. |
| data | Contain elements that will be published by Report Wizard. |
| template | Determine which template to use in a particular Report Data. |
| generateRecursively | Determine whether or not a report will be generated recursively. |
Click Tools > Report Wizard.
Select a template and click
.Click
 . The Edit Report Data dialog will appear.
Editing a report data in the Edit Report Data dialog
Edit the report’s name and description, and then click
 .
.
Click Tools > Report Wizard.
Select a template and click
.Click
 . The Confirm delete dialog will appear.
The Confirm delete dialog
- Click either
 to delete the selected data or
  to cancel the operation.
Click Tools > Report Wizard.
Select a template and click
.Click
 . The Clone Report dialog will appear.
Cloning a report data in the Clone Report dialog
Enter the name and description of the report. The name should begin with Copy of (cloned report name).
Click
. The cloned Report Data will then be created.

The Copy of My Report created in the Report Data Management pane
When a cloned Report Data is created, a copy of the Report Data (variable) will also be created.
Working with Report Data Variables
Variables are created because some information is not “naturally” contained in a model, e.g. the company's name, author's name, revisions. Although you can put all of the information in a model's specification (Document/Hyperlinks in the Specification dialog), it is difficult and tedious to get data from the model's specification, as this results in more lines of codes and scripts in the report templates. Therefore, instead of writing lines of codes, you can simply create a variable, give it a name, and call it directly from the template. For example, you can create a variable called “Author” in Report Wizard and write $Author in the template. When you generate the report, you will see the value inside “Author.” Essentially, a variable is used to represent data that you want to include in the report, not in the model.
Variables contain information that you want to store in a project, such as names and dates. You can create a report variable in a MagicDraw project or the Report Wizard dialog.
Right-click a Report Data in the Containment tree and select Create Element > Variable. The variable will appear inside the Report Data.
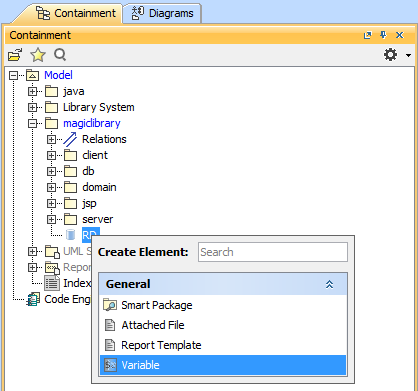
Creating a variable for Report Data in the Containment tree
You can also create, edit, and delete variables through the Report Variable dialog in Report Wizard.
- Open the Report Variable dialog.
- Click . The New Variable dialog will open. Enter the variable name and description. You can create either a parent variable or a child variable in the Owner box.

Creating a new variable in the New Variable dialog
To create a parent variable, type the variable name in the Name box, enter the description, select an empty value in the Owner box, and then click .

Creating MyNewVariableName as a parent variable
To create a child variable, type the variable name in the Name box, enter the description, select Parent in the Owner box, and then click .

Creating a child variable of MyNewVariableName
3. The new variable will appear in the table in the Report Variable dialog.
4. Click  to save the variables in the Report Data.
- Open the Report Variable dialog.
Double-click on the column next to the variable name column and click
 . A dialog will open in which you can edit the variable value.
Editing a variable in the Template Variable dialog
- Click . The new variable value will appear in the column next to the variable name column.
- Open the Report Variable dialog.
Click a variable in the table, and then click Delete. A dialog will open prompting you to confirm before deleting the selected variable.

Dialog to confirm the deletion of a report variable
- Click and the variable will be deleted.
- Open a blank document in Microsoft Word.
Type: $Parent.

Referencing to a parent variable in the template
Save the file as “sampletemplate.rtf”. Choose Rich Text Format (*.rtf) as the file type.
Open the Report Wizard dialog and click
to create a new template. The New Template dialog will open.Type the name and description of the new template. Click
 to select “sampletemplate.rtf” as the template file.
Click
> . The Select Report Data pane will open.Select a report data, in this example, My Report Data and click
 to generate a report. The output of the generated report will be shown as in the following figure.
The resulting RTF fileNote
When you include the variables you have created in a template, each variable value will be included in the generated report. This section will use the following My Report Data as an example.

- Open a blank document in Microsoft Word.
Type any of the following to print a child variable.
(i) $Parent.get(1) to get a child value by index.
(ii) $Parent.get(“Child”) to get a child value by name comparison.
(iii) $Parent.Child to get a child value by referencing its name, in this case “Child”.

Referencing to the child variable in the template
Save the file as “sampletemplate.rtf”. Choose Rich Text Format (*.rtf) as the file type.
Open the Report Wizard dialog and click
to create a new template. The New Template dialog will open.Type the name and description of the new template. Click
to select “sampletemplate.rtf” as the template file.Click
> . The Select Report Data pane will open.Select a report data, in this example, My Report Data and click
to generate a report. The output of the generated report will be shown as in the following figure.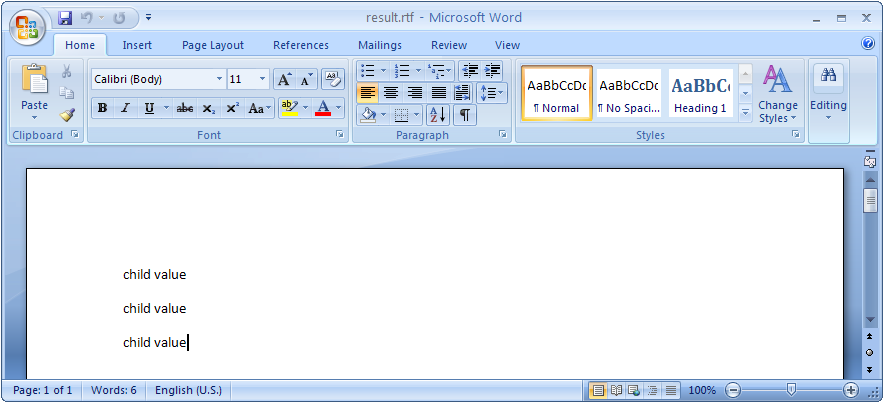
The resulting RTF file
