By default, the Instance Table shows nine columns (including # (row number), Name (instance name), and the columns for instance slot values) that correspond to the first seven Data type attributes of the specified classifier. The rest of the columns are by default hidden, though you can show them if there is a need.
You can show any column that corresponds to one of the following:
- Attribute of the classifier that is specified for the Instance Table.
- Property of the instance of the specified classifier.
- Tag of a stereotype that can be applied on the instance of the specified classifier.
- Nested properties of the classifier that is specified for the Instance Table.

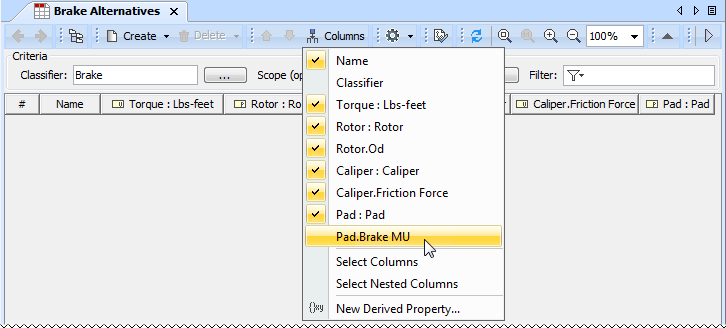
To display attributes of the classifier
- On the table toolbar, click the Columns button and then click to select the check boxes beside the attributes you want to show.
To display properties and tags
On the table toolbar, click Columns > Select Columns. In the Select Columns dialog, choose the columns you want to display in the Instance Table by selecting the appropriate check boxes of the properties and tags.
All columns that you have chosen to display also appears on the menu of the Columns button.

To display nested properties of the classifier
On the table toolbar, click Columns > Select Nested Columns. In the Select Nested Columns dialog, choose the columns you want to display in the Instance Table by selecting the appropriate check boxes of the nested properties.
To specify nested columns, click the Create with Parts button, when creating a new instance with parts.

If you add a new attribute to the classifier and need to display the corresponding column in the Instance Table, open the Select Columns dialog and click to select the appropriate check box.
Keep in mind that columns corresponding to newly created attributes at first are available only in the Select Columns dialog (until you show them).