The preconfigured Eclipse projects for two sample plugins and a batch mode (command-line) tool are provided with a program installation. These projects can be found in <modeling tool installation directory>\openapi\ide\eclipse.zip.
Let's use MagicDraw as an example to describe the following procedures.
Make sure MagicDraw installation directory does not contain spaces.
To setup the Eclipse environment for the modeling tool development
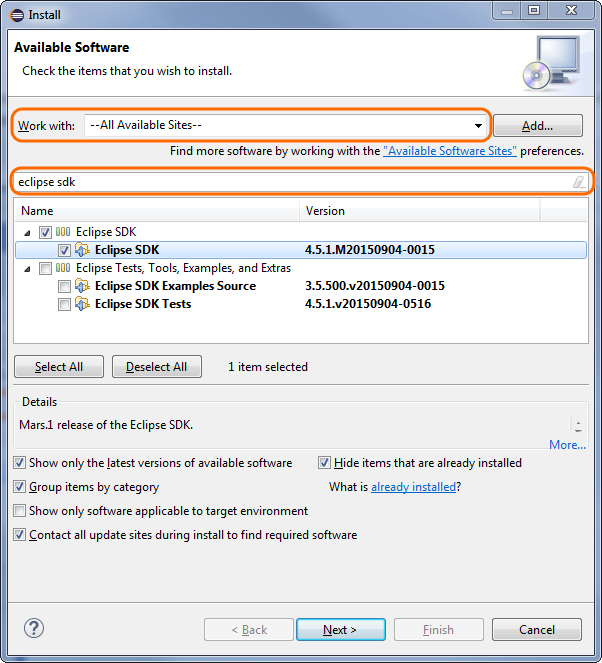
Start Eclipse IDE. To install Eclipse SDK, from the main menu, select Help > Install New Software. The Install dialog opens. In the Work with list, select All Available Sites, and, in the filter box, type eclipse sdk and press Enter. All available Eclipse versions are listed. Click to select Eclipse SDK and go Next. Follow the installation wizard steps to proceed software installation process.
In case you have Eclipse IDE for Eclipse Committers, Eclipse SDK is already available in your IDE and you can skip this step.
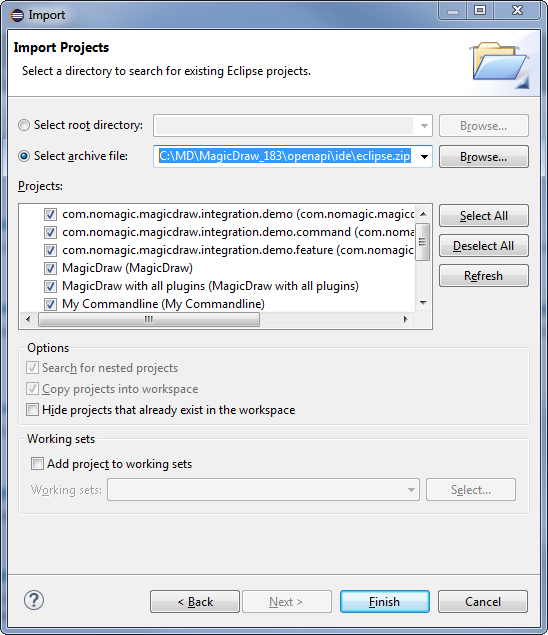
- After the installation completes, import java projects from <modeling tool installation directory>\openapi\ide\eclipse.zip into your Eclipse Workspace. On the main menu, click File > Import. The Import dialog opens. In the Select an import source list, select General > Existing Projects into Workspace and click Next. Copy the java project location to the Select archive file box or browse to the java projects and click Browse. The project list appears in the Projects box. Select projects you need and click Finish.
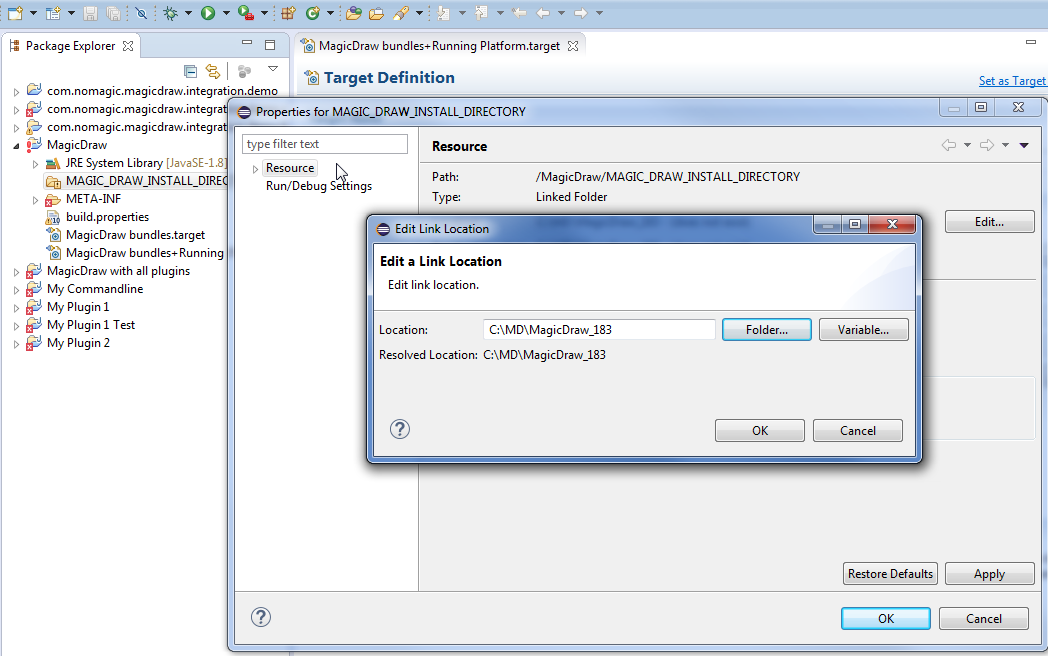
Open the Package Explorer view, expand the MagicDraw project and edit the MAGIC_DRAW_INSTALL_DIRECTORY link:
3.1. Right-click the link and select Properties.
3.2. On the left side of the opened dialog, select Resource and click the Edit button on the right side of the dialog. The Edit Link Location dialog opens.
3.3. Select the location and click OK.Be sure the link points to your MagicDraw (or other according to a modeling tool you are using) installation directory (see the following figure). Installation directory must not contain spaces.
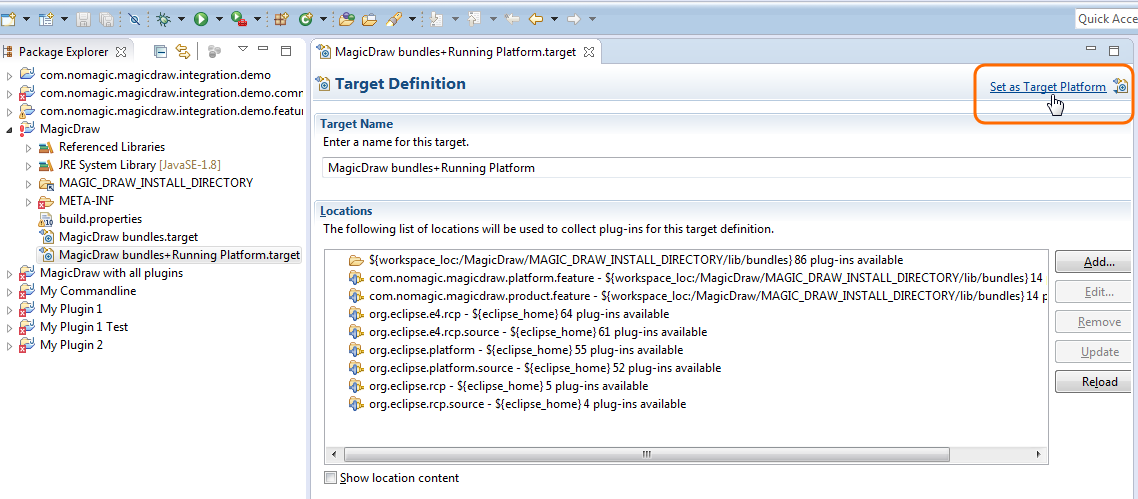
In the Package Explorer, expand the MagicDraw project and open target definition file MagicDraw bundles+Running Platform.target. Click Set as Target Platform.
Locate two exemplary launch configurations in the Package Explorer.
5.1. MagicDraw with all plugins.launch is in the project MagicDraw with all plugins. It launches MagicDraw (or other modeling tool) with plugins available in the IDE workspace namely My Plugin 1 and My Plugin 2.The launch configuration is designed to load plugins from the MagicDraw (or other according to a modeling tool you are using ) installation directory (see step #3) and two plugins from the Eclipse Workspace. Thus, if the md.plugins.dir java system property is not defined (see Plugins directories), developing plugins are not loaded.
5.2. My Commandline.launch is in the project My Commandline. It launches batch mode tool My Commandline.
Eclipse Workspace is ready for the source code development and running/debugging.
The libraries (jar files) of the plugin must be added to the development class path throughout the plugin dependency hierarchy if the developing code depends on that plugin.
For example, if the code depends on plugin A; plugin A depends on plugins B and C; plugin B depends on plugin D, the libraries of all plugins (A, B, C, and D) must be added to the class path.
When you launch your own plugin, you need to add all jar files that are required by your plugin from appropriate plugins. The MagicDraw jar files can be found in MAGIC_DRAW_INSTALL_DIRECTORY/lib and its sub directories, whereas plugins' jar files can be found in MAGIC_DRAW_INSTALL_DIRECTORY/plugins and its sub directories.
Even if the plugin descriptor file contains information about the runtime plugin .jar file, it is not necessary to build and deploy this .jar file to a plugin directory while the plugin is developed under Eclipse.