On this page
You can use the Report Wizard to upload a generated report to a predefined remote location server. Each remote location server has a profile that holds all necessary information, e.g., protocol, URL, username, and password. The Profile Management dialog is used to create, edit, or delete profiles containing the configuration for remote location servers.
In this section, you will learn how to create a new remote location server step by step to upload a generated report to a newly created server, and how to upload a generated report to an existing server.
Uploading reports to a new server
To upload a generated report to a newly created server
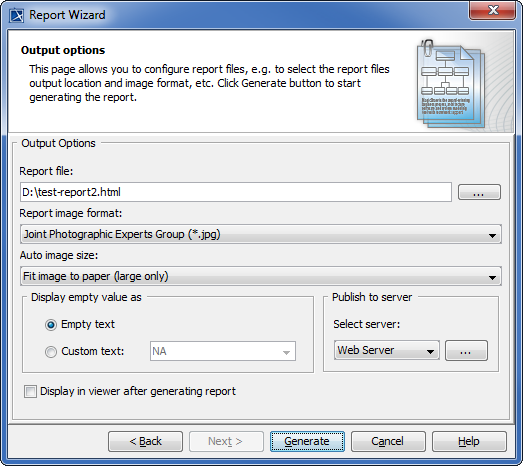
- Open the Report Wizard dialog. On the main menu, click Tools > Report Wizard. Proceed through each step by selecting a report template, report data, and Element scope. You will be at the Output options step. In the Report Wizard dialog, click
 in the Publish to server area.
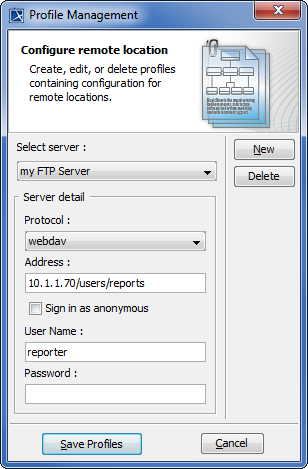
2. The Profile Management dialog opens. Click New to create a new server.

3. The New server profile dialog opens. Enter the name of the server to create. You cannot leave the Name box empty or assign a name that has already been used in an existing set of servers. Click OK.

4. Choose a protocol from the Protocol drop-down list and fill out a URL address in the Address box. You can leave out the User Name and/or Password boxes if desired. Click Save Profiles to save the newly added server, and close the Profile Management dialog.
Note
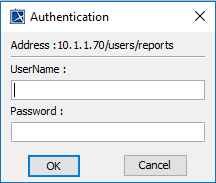
If you leave out the User Name and/or Password boxes in the Profile Management dialog when creating a new server, you must enter the authentication information in the Authentication dialog after the report generation, then click OK to proceed.
5. You are now back to the Report Wizard dialog. Select the newly created server from the Select server drop-down list. Click Generate to generate the report to upload it to the newly created server. Once the report has been generated, it will be uploaded to the server previously created.
6. If the report has been successfully uploaded, a message box informing that the resources have been uploaded successfully opens. Click OK.

Uploading reports to an existing server
To upload a generated report to an existing server
- Open the Report Wizard dialog. On the main menu, click Tools > Report Wizard. Proceed through each step by selecting a report template, report data, and Element scope. You will be at the Output options step. Select an existing server from the Select server drop-down list.

2. Click Generate to generate the report to upload it to the chosen existing server. Once the report has been generated, it will be uploaded to the server previously selected.
Note
If the selected existing server does not have the username and/or password specified in the Profile Management dialog when the server was created, you must enter the authentication information in the Authentication dialog after the report generation, then click OK to proceed.
3. If the report has been successfully uploaded, a message box informing that the resources have been uploaded successfully opens. Click OK.
This feature does not support SharePoint Server.
Related pages