When a project is used in another project, shared elements of the used project become visible and accessible in the Containment tree of the project that uses them as if they were a part of the project.
Using local projects
To start using a project
- Do one of the following:
- From the File menu, select Use Project > Use Local Project.
- From the Options menu select Project Usages and click the Use Project button.
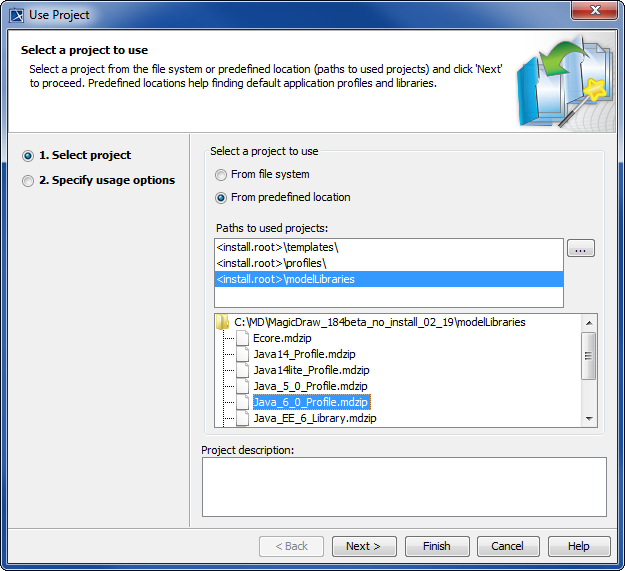
- In the Select project step, select the project you want to use from the file system or from the predefined location:
- If you want to use your custom project from a custom location, select to use a project From file system and click
 next to the Project file box to navigate to the desired file.
 If you want to use the project coming with modeling tool installation, select to use a project From predefined location, then select a path from the Paths to used projects list and the project to use from the list below.
You can customize the Paths to used projects list and add your own paths by creating path variables.
- If you want to use your custom project from a custom location, select to use a project From file system and click
- Click the Next button.
- In the Specify usage options step, specify the project usage options, such as the accessibility mode, load mode, and mounting locations of shared packages.
- Click the Finish button.
After your project starts using another project, the elements of the used project are still stored separately:
- Used project elements — in the used project file.
- Project elements — in the project file.
Modifying project accessibility
The accessibility mode of the used project can be specified in the Used Projects dialog. By default, projects are used in the read-only mode.
To change the accessibility mode of a used project
- From the Options menu, select Project Usages. The Used Projects dialog opens.
- In the tree on the left side of the open dialog, select the used project and click the Read-only or Read-write option in the Accessibility area.
- Click OK.
If you need to change the contents of the project used in the read-only mode, you can open it separately from the project that uses it. For this, click the Open Project button in the same dialog.
Related pages