The Create Element menu in the Model Browser allows you to group elements into categories. You can also use various menus in dialogs and specifications to group elements. Use the Category property of a customization element to create categories.
Case Study
The following example demonstrates how to create a category for a new requirement element within a Package element. This example refers to the project described in Case Study: Creating Your First Customization.
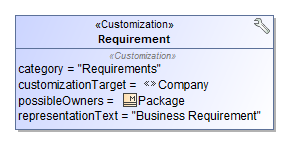
Assign the custom stereotype (in this case the «Company» stereotype) as a Customization Target property in the customization element Specification window. Specify the Package metaclass as a Possible Owners property value. Please see the Case Study: Creating Your First Customization for more details.
In the customization element Specification window:
specify the name of a new category as the Category property value (for example, Requirements).
specify the name of an element to create as the Representation text property value (for example, Business Requirements).
 In this example, we used the stereotype created in the example described in Case Study: Creating Your First Customization.
- Save and reopen your project.
- The Business Requirement element is added to the package shortcut menu, as shown below.
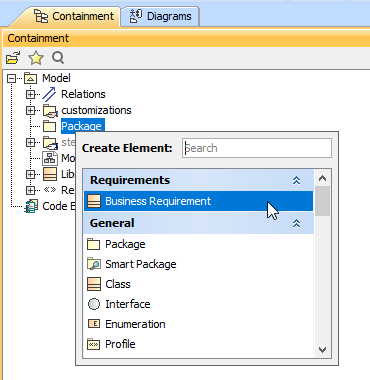
The custom Requirements category in the Create Element menu.
To create several items under the same category, you must create a customization element for each item. Specify the same name of the Category property.