On this page
Using the Spreadsheet Report Designer diagram
In this section, you will learn how to create the Spreadsheet Report Designer diagram and generate it to an XLSX template that you can add in Report Wizard for generating reports later.
To create the Spreadsheet Report Designer diagram and generate it to an XLSX template
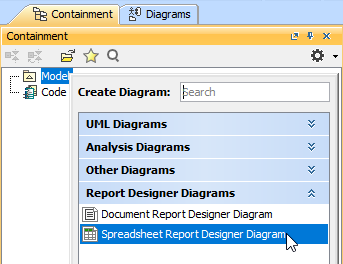
- Right-click a Package in the Containment tree and select Report Designer Diagrams > Spreadsheet Report Designer Diagram.
Create diagram elements in the working area of the diagram and specify values.
Arrange diagram elements as needed.

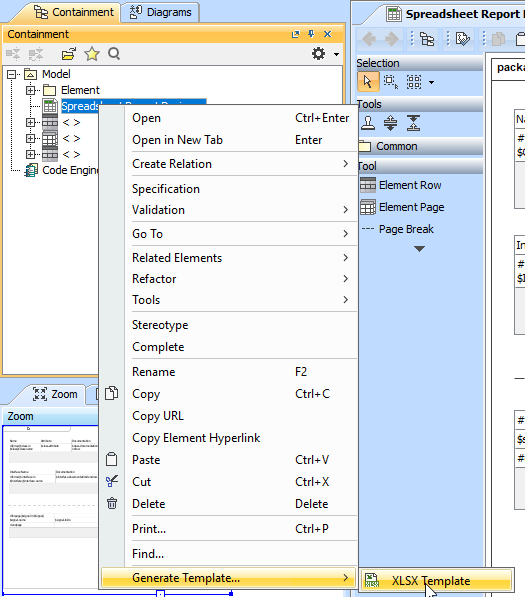
In the Containment tree, right-click Spreadsheet Report Designer Diagram and select Generate Template > XLSX Template to generate the template.
Note
Generated templates get only symbols on the diagram. Elements in the Containment tree are not used to generate templates.
Refine more layouts, style, and code logic in Microsoft Word.
Add the complete template to Report Wizard.
Generate the report from the added template.

Diagram elements
The Spreadsheet Report Designer diagram provides many diagram elements represented in Velocity syntax/directive.
Element Row
An Element Row is represented as the #forrow directive for fetching a collection of elements in rows. After creating the Element Row in the diagram, you need to specify an element type as well as column number and row number in the Element Row wizard dialog. You can also create the header and border for the table.
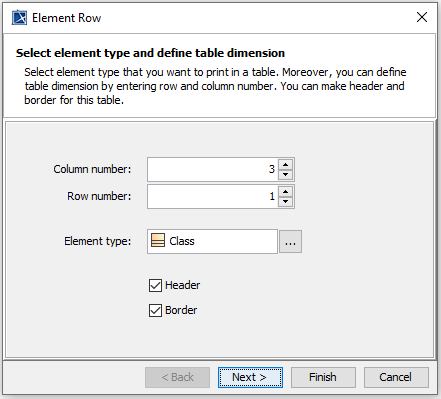
The Element Row wizard dialog.
Note
When you are back to update the element type, column number, or row number in Step 1, the table in Step 2 will be recreated with the blank content.
In Step 2 of the Element Row wizard dialog, the blank table is created where you can directly enter and edit text and Velocity code in the table cell. You can also press CTRL + SPACE to open the Property Guide pop-up dialog. Press CTRL + SPACE again to navigate you to Report Data Variables and Helper Tools. In this dialog, it guides you to available properties that you can select for the cell.
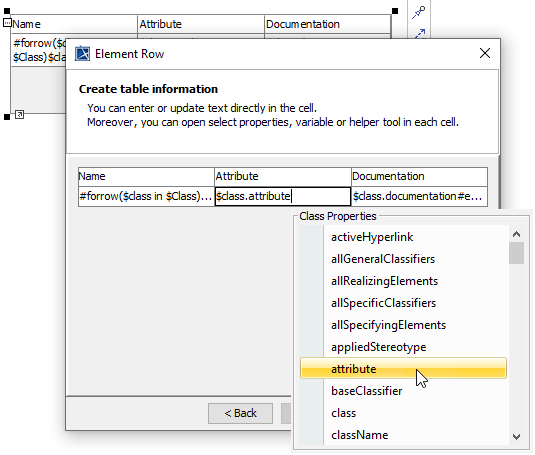
The Property Guide pop-up dialog.
You can insert or delete columns and rows by right-clicking a cell to open the context menu.
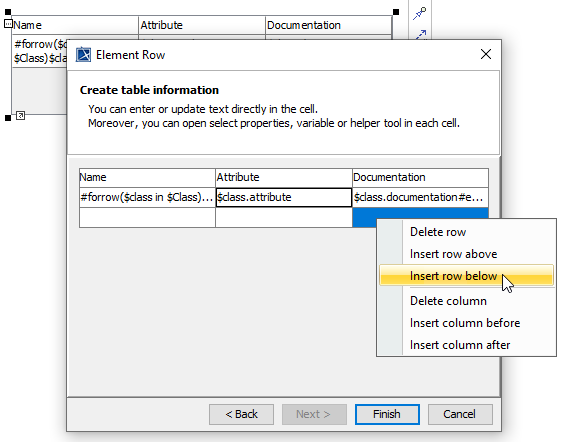
The context menu for inserting and deleting rows and columns.
Updating an Element Row
After creating an Element Row, you can open the Element Row wizard dialog again for updating the Element Row table through the smart manipulator button or the Element Row editing context menu.
Element Page
An Element Page is represented as the #forpage directive for fetching a collection of elements in a table per worksheet. This element uses the Element Row wizard dialog. Only in Step 2, the #forpage directive will be created over the blank table.
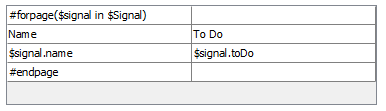
The Element Page.
Page Break
You can place the Page Break element on the diagram to be in the template to start a new worksheet.

The Page Break.
Related pages