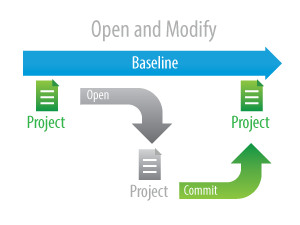
After you finish editing the model, you must commit the changes to the server to enable other team members to see these changes when editing other parts of the model. When you commit the changes, new data from your client application is merged with the project on the server repository. As a result, a new version of that project is created. Other team members must update their projects from the server to see the committed changes.
When committing changes, you can choose to release or keep the locks on the model. If you are going to continue editing after the commit is over, keep the locks.
To commit changes to Teamwork Cloud
- From the Collaborate menu, select Commit Changes To Server, or press Ctrl+K. The Commit Project to the Server dialog opens.
If you need to describe the changes you are going to commit, type a comment in the open dialog.
You can select a comment from the recently used comments list. Click the Choose Comment button
 above the Comment box, and select any comment from the list in the Choose Comment dialog.
Last comment written in the Comment box is saved as draft after user clicks Cancel instead of Commit in a Commit Project To the Server dialog. Next time when user opens Commit Project To the Server dialog, he will be notified about saved comment draft, with Choose Comment button
 . In addition, in the Choose Comment dialog user will see saved comment marked as a draft.
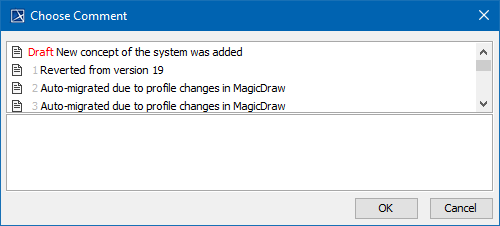
If you want to keep locks on the model and continue editing after the commit is over, select the Keep locks check box.
The Keep locks check box remembers your last choice. Thus, if you want to release the locks every time when committing changes, once you make your choice during the first commit you don't need to unselect this check box each time.
If you want to tag the new project version, such as an Loan final tag, do the following:
Click More. The Version Tags tab appears on the Commit Project to the Server dialog.
Click the Add button.
In the open dialog, type a text and click OK.
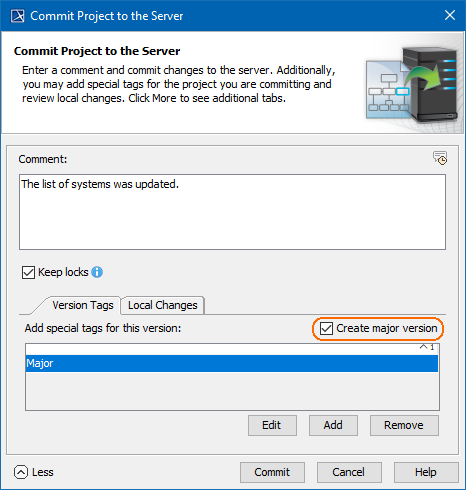
If you want to tag the new project version with a Major tag, do the following
Click More. The Version Tags tab appears on the Commit Project to the Server dialog.
Check the Create major version checkbox. This will create the Major tag.
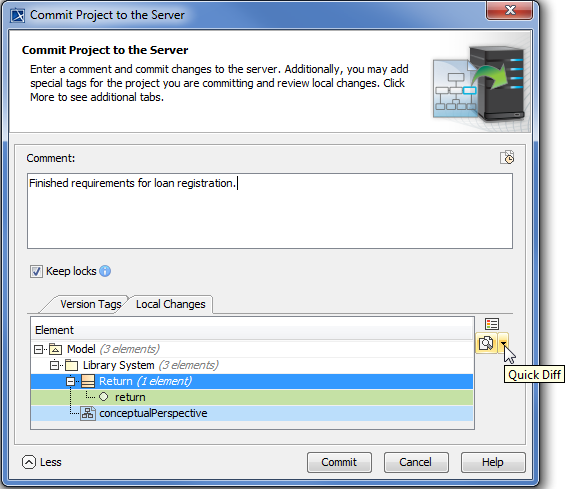
You can also see local changes of the new project version. Click More and the Local Changes tab appears on the Commit Project to the Server dialog. All project elements with changes are listed in this tab. You may do one of the following:
- Click the legend to see changes to elements.
- Click Quick Diff to explore changes to a selected element more deeply.
In the Commit Project to the Server dialog, click Commit.
Wait while a new project version containing the committed changes is sent to the Teamwork Cloud repository.
In case of commit failure commit message and commit tags are saved for next commit attempt, so user does not have to re-type commit information.