On this page
A custom diagram can be exchanged with other users in a .zip file format, as any other resource, for manual import into the modeling tool using the Resource Manager. Alternatively, you can export/import the custom diagram descriptor (the .xml file) using the Customize Diagrams dialog.
Distributing custom diagrams using Resource Manager
You need to build a .zip file containing a diagram descriptor file (e.g., descriptor.xml) and a Resource Manager descriptor file (e.g., MDR_Custom Diagram_MagicDraw_74842_descriptor.xml.) to be able to share your own custom diagram. For this, you need to use the Development Tools plugin. Once you generate and share the file, the diagram customization can then be imported into the modeling tool by another user via the Resource Manager for future use and accessibility.
Warning
You can build a .zip file for custom diagram distribution only after you have created a new diagram type or edited an existing standard diagram.
To create a .zip file using the Development Tools plugin
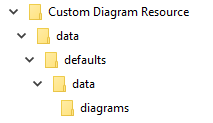
- On your local file system, create the following folders structure: ...\<Custom Diagram Resource>\data\defaults\data\diagrams.
- Launch the modeling tool.
- Do one of the following:
- In the main menu, go to Help > About.
- Next to Configuration Files, click the file location path. The configuration files folder opens.
- Under <configuration files>\data\diagrams, locate your custom diagram folder containing a descriptor.
In the main menu, go to Diagrams > Customize.
In the Customize Diagrams dialog, select the custom diagram whose descriptor file you want to export and click the Export button.
Warning
Before the export operation, create a new folder on your local file system and give it the name of your custom diagram, such as Custom Diagram. The exported descriptor file needs to be renamed to descriptor.xml and saved in this newly-created folder.
Copy and paste the custom diagram folder together with the descriptor file into the folders structure you created in the first step.

Distributing Profiles
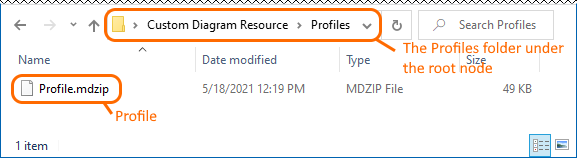
If you have specified Profiles when customizing a diagram, it is highly recommended that you distribute them together with your custom diagram. For this, create the Profiles folder under the custom diagram resource root folder and place all required Profiles in it before generating a .zip archive.
You need to mark each Profile distributed together with a custom resource as Standard/System Profile (File > Project Properties > More > Standard/System Profile) to store it locally. Profiles stored on the server cannot be used for a custom diagram.
- Download and install the Development Tools plugin.
- Restart the modeling tool.
- In the main menu, click Tools > Development Tools > Build Custom Resource.
- In the Custom Resource Building Wizard, set the custom diagram folder as the Resource Folder.
- Click Next to skip the other steps and then click Finish.
The resource (.zip file) is built. It can now be distributed and imported into the modeling tool using the Resource Manager.
Info
A created custom diagram resource (.zip) can be bundled into the resource distribution file (.rdzip) using the Development Tools plugin for distribution alongside other resources. Learn more about building a resource distribution file>>
Distributing custom diagrams using Customize Diagrams dialog
You can export the custom diagram descriptor (.xml) file directly into the Customize Diagrams dialog. The exported file can then be shared with others and imported into the modeling tool by another user via the same Customize Diagrams dialog using the Import command.
Warning
You can export an .xml file for custom diagram distribution only after you have created a new diagram type or edited an existing standard diagram.
To export a custom diagram descriptor
- In the main menu, go to Diagrams > Customize.
- Select a custom diagram from the list and click the Export button.

The .xml file is exported. You can now distribute it.
To import a custom diagram descriptor into the modeling tool
- In the main menu, go to Diagrams > Customize.
Click the Import button and point to a descriptor (.xml) on your local file system.
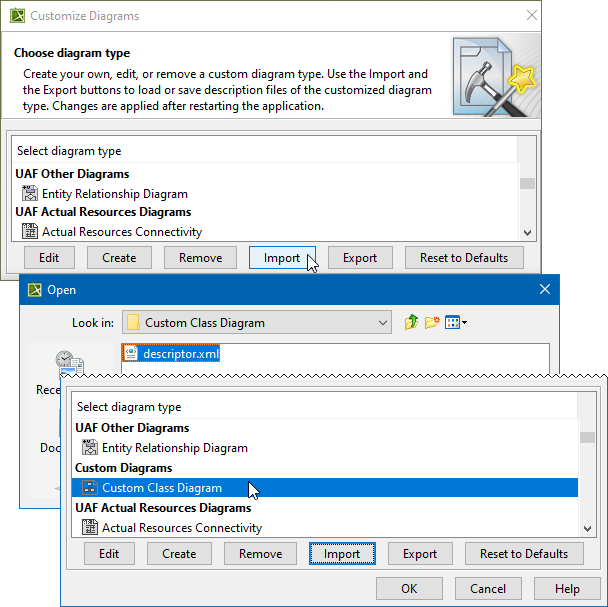
The .xml file is imported, and a new diagram type appears under Custom Diagrams in the Customize Diagrams dialog.