Magic Model Analyst allows you to use the MagicDraw's User Interface (UI) Modeler to create user interface mockups that will be displayed during model execution. This session shows you how to create a user interface for the stopwatch model. The user interface will be in the form of a panel with buttons to send signals to the runtime object of the stopwatch during model execution. A label will be used to show the runtime time value.
To create user a interface mockup
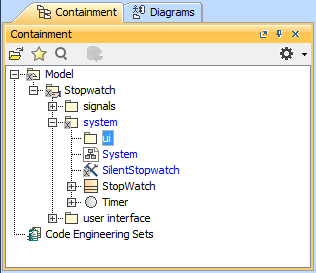
- Right-click the Model node and select New Element > Package to create a new package for the UI Elements.
- Name the created package "ui".
- Click the button on the Custom Diagram toolbar to create a new User Interface Modeling Diagram. The Create Diagram dialog will open.
- Name the diagram "StopWatchUI" and select the ui package as the owner of the diagram.
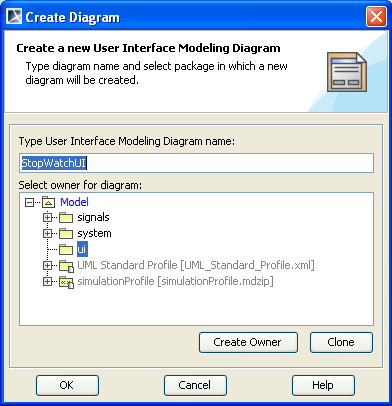
- Click OK.
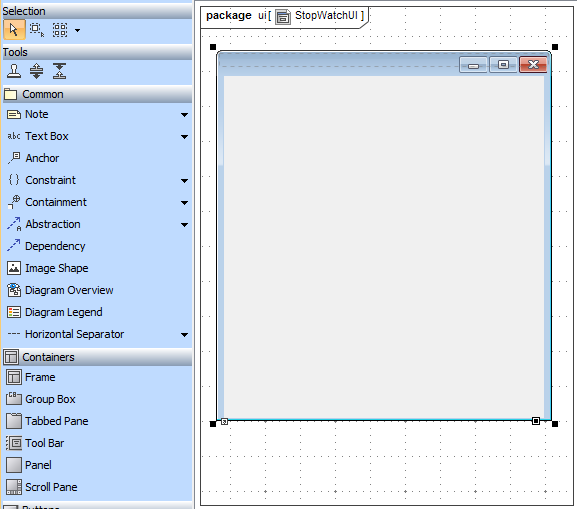
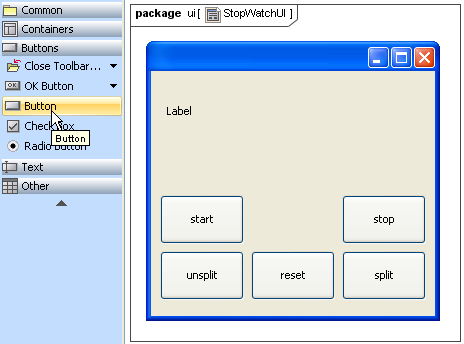
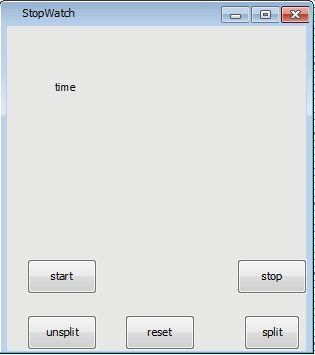
- Create a new frame for the UI mockup by clicking Frame on the User Interface Modeling Diagram toolbar.
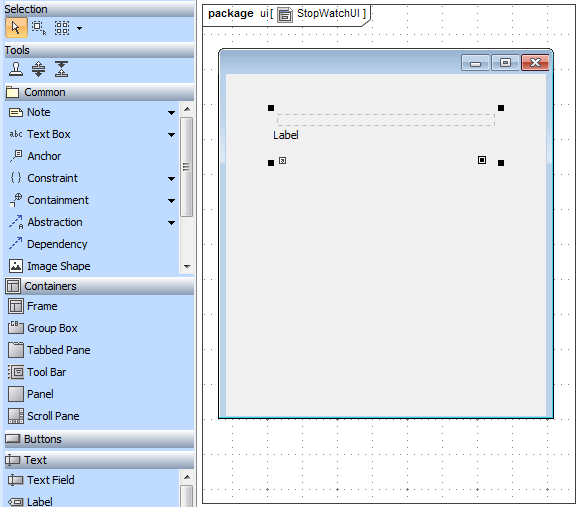
- Create a label to show the runtime time value by clicking Label on the diagram toolbar.
- Create five buttons to send the signals to the runtime object of the stopwatch model by clicking Button on the diagram toolbar.
- Name the buttons: Start, stop, split, unsplit, and reset.
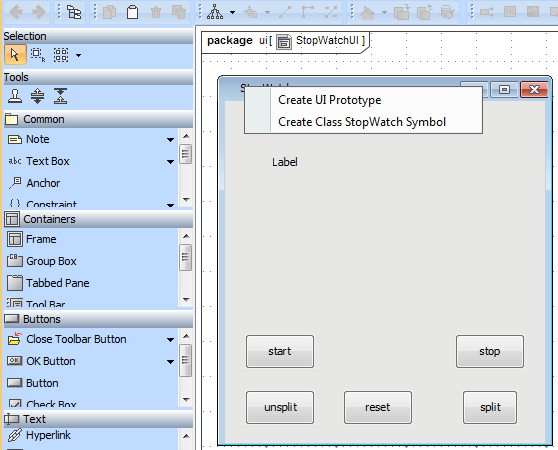
- Create a UI Prototype by dragging the StopWatch Class from the containment browser to the created UI frame on the diagram.
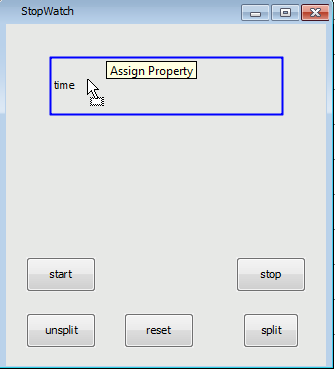
- Create a Runtime Value Prototype by dragging the time property of the StopWatch Class from the containment browser to the created label on the diagram.
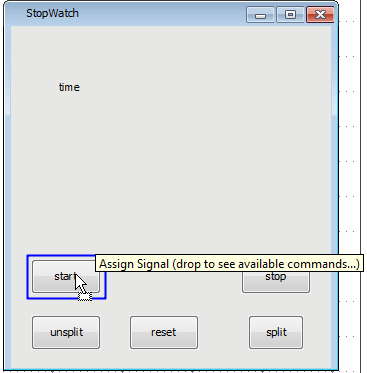
- Create a Signal Instance Prototype by dragging the Signal from the containment browser to each of the buttons. The buttons will send the dragged signals to the runtime object when you click them during the execution. Therefore, each signal in the stopwatch model will be dragged to each button that has a corresponding name. For example, the start signal will be dragged to the start button, and the stop signal will be dragged to the stop button.
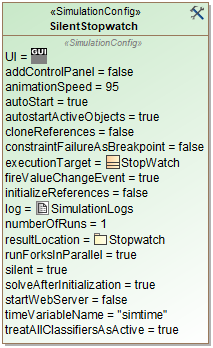
- Open the Specification window of the SilentStopwatch Simulation Configuration to add the ready user interface mockup for the stopwatch to the SimulationConfig for the StopWatch.
- Edit the UI field by clicking the
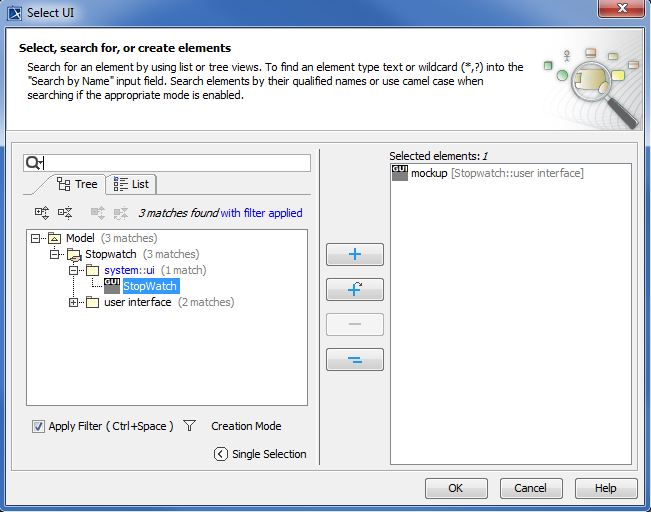
 button. The Select«UI» dialog will open.
 - Select the created Frame in the ui package and click OK.
The modified SilentStopwatch is now ready to run the stopwatch with the UI mockup. Next, you need to run the SilentStopwatch Simulation Configuration.
To run the SilentStopwatch Simulation Configuration
- Right-click the SilentStopwatch Simulation Configuration and select Simulation > Run. A simulation session will be created to execute the StopWatch class.
- Click the RunSimulation button on the Simulation window toolbar. The execution of the StopWatch class will start with the designed UI mockup. The time value displayed in the label is now zero (0).
You can click the start button to start the stopwatch. You can use the buttons on the UI mockup to send the signals to the runtime object of the StopWatch class. The time value displayed on the label of the UI mockup will increment by one every second. 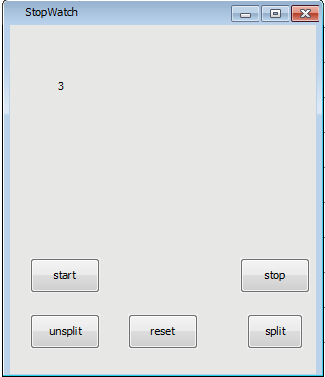
Click the stop button to stop the execution and click it again to go to the final stage, which is the termination of the execution.