On this page
The 3DEXPERIENCE ENOVIA Model Definition Integration plugin is available for your modeling tool (together with the Product Line Engineering plugin). Install this plugin to be able to import the variability data to your modeling tool project directly from the ENOVIA Model Definition application on the 3DEXPERIENCE platform.
You can manage all secure connections, including self-signed certificates, using the Server Certificates tool.
Importing model version variability
There are two ways you can import variability data from the ENOVIA Model Definition application. You can either initiate import through the modeling tool menus or drag the Model Version from the 3DEXPERIENCE platform search results and drop it to the modeling tool's Model Browser.
To import the variability data from the ENOVIA Model Definition application through the modeling tool
- Login to the 3DEXPERIENCE platform.
- In the main menu, click 3DEXPERIENCE > ENOVIA Model Definition > Import Model Version Variability.
If you cannot see this menu item or it is disabled, make sure you have an open project.
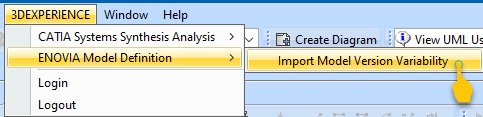
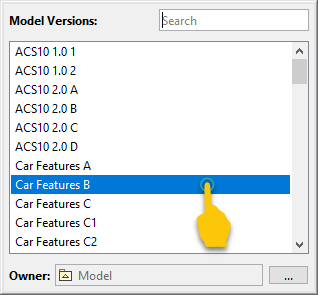
- In the Model Version dialog, choose the model version you want to import.
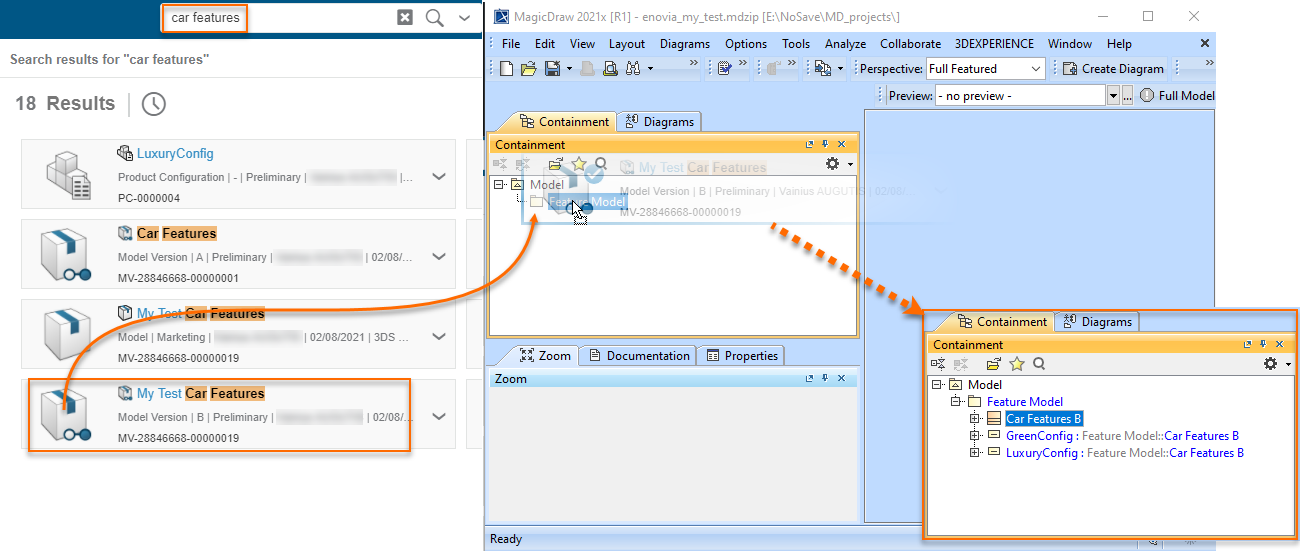
To import the variability data by dragging the Model Version from the 3DEXPERIENCE platform search results
- In the ENOVIA Model Definition application, search for the desired model version.
- From the search results page, choose the desired model version revision and drag it to the modeling tool's Model Browser.
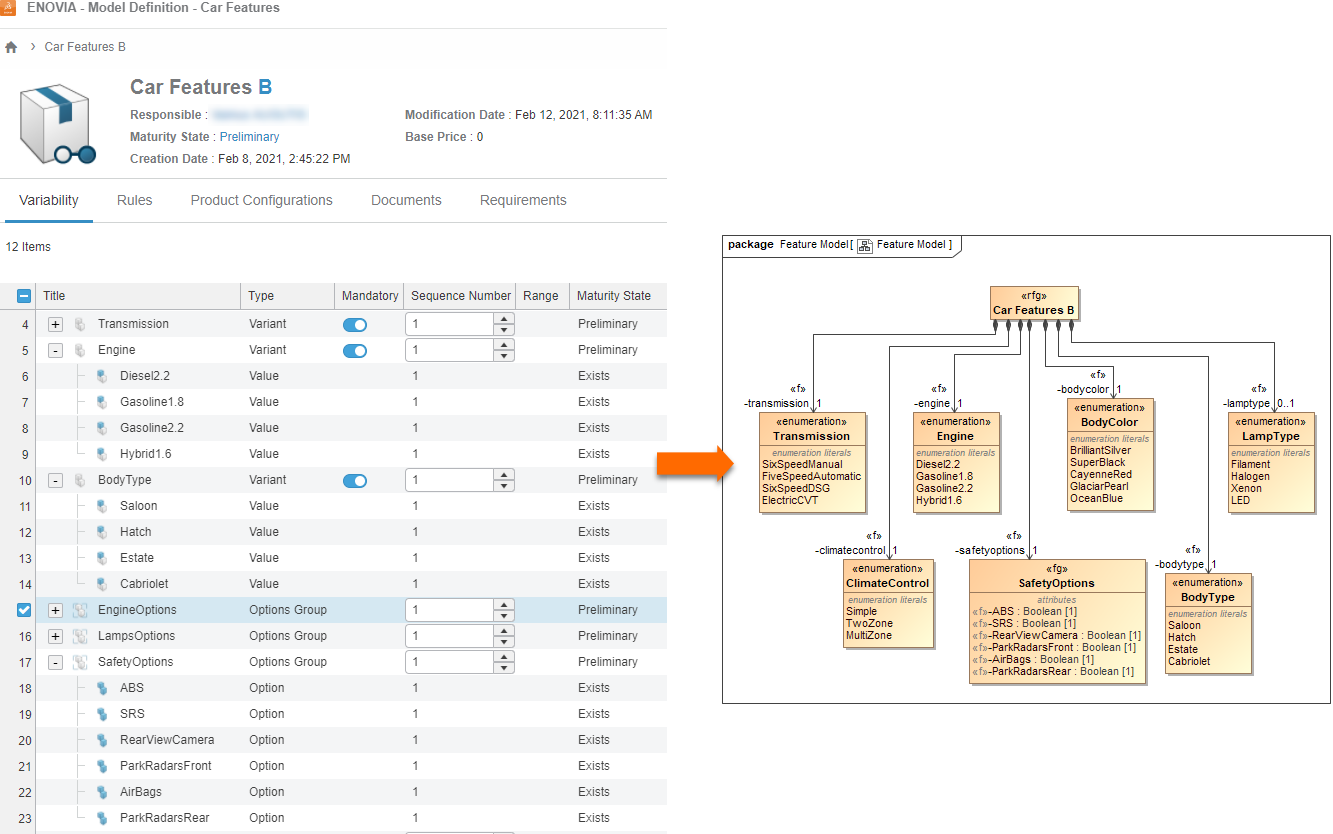
After importing is completed, the variability elements are mapped as follows:
| ENOVIA model version | Modeling tool project |
|---|---|
| Model Version | Feature Model, Root Feature Group |
| Option Group | Feature Group |
| Option | Feature (UML property with Boolean type) |
| Variant | Feature (UML property with Enumeration type) |
| Variant Value | UML Enumeration literal |
| Configuration | Configuration (UML Instance Specification) |
| Chosen criteria | Feature value (UML Slot value) |
| Mandatory (on/off) | Multiplicity. If Mandatory, the multiplicity is 1. Otherwise, the multiplicity is 0..1. |
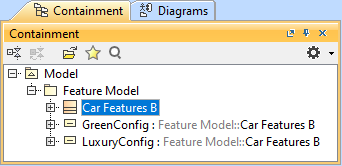
The variability model is imported into your project as a Feature Model (these are just two different terminologies being used on the platform and in the modeling tool). You can see the imported elements in the Containment tree.
You can display the feature model in the Class diagram. Simply drag the Root Feature Group (Class element) from the Containment tree to the diagram pane. Once the Root Feature Group is in the diagram pane, you can display its structure.
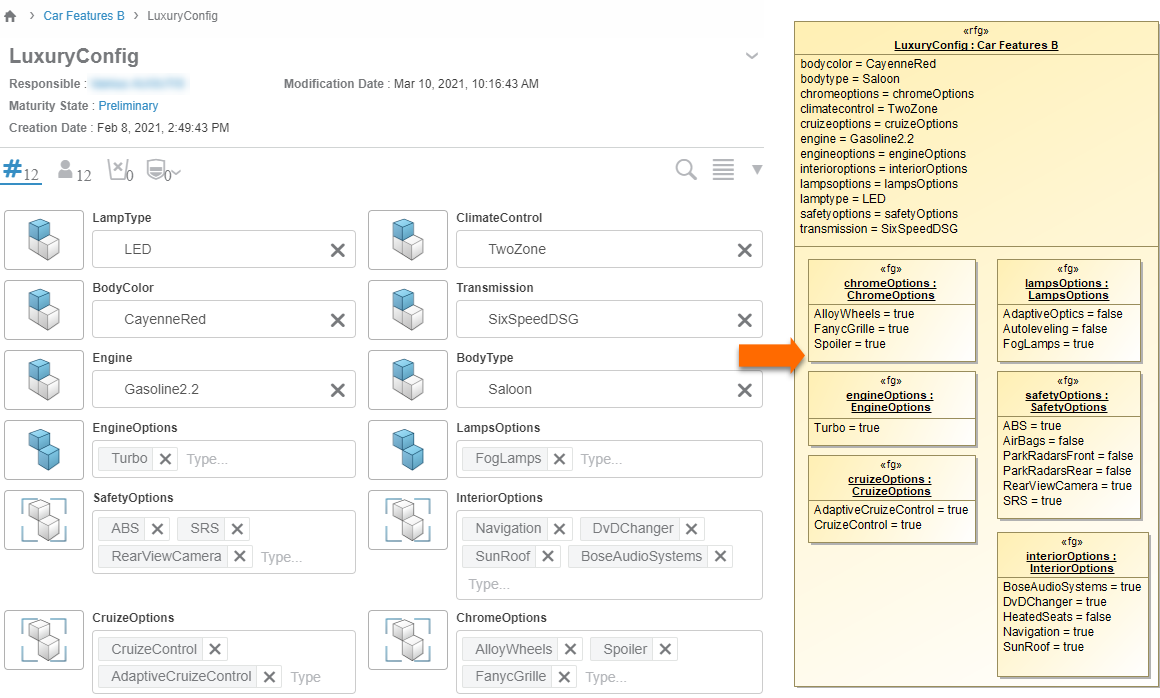
The Product Configurations in the modeling tool project are imported as UML Instance Specifications. You can also display them in the diagrams.
Checking for updates and updating from ENOVIA Model Version
After working with the imported data for some time, you might want to check if the data on ENOVIA has some changes.
To check for the updates
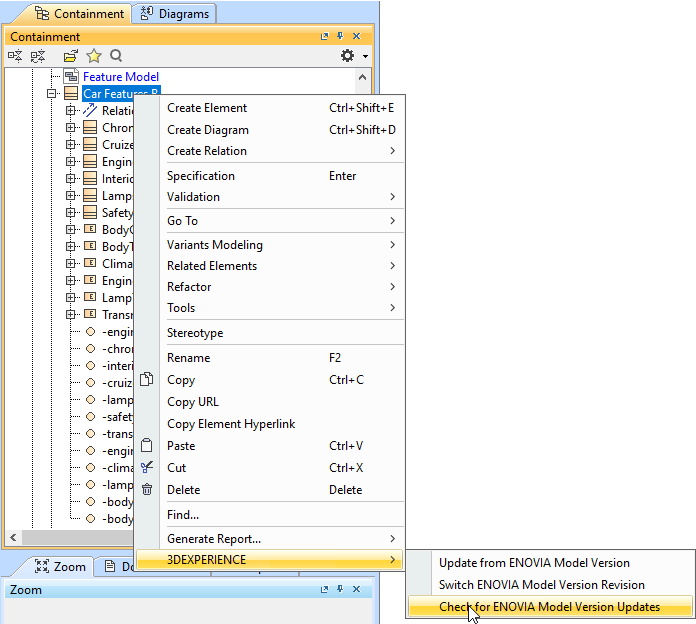
- In the Containment tree, right-click the Root Feature Group element.
- From the open shortcut menu, select 3DEXPERIENCE > Check for ENOVIA Model Version Updates.
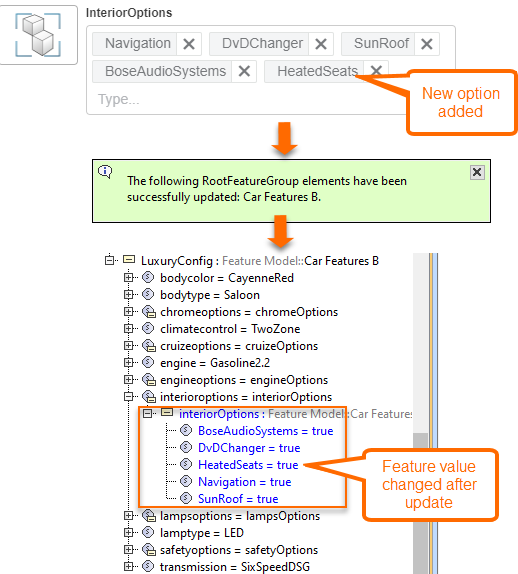
After the checking for updates operation is complete, you will get a notification informing you about the status.
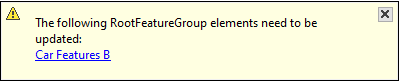
If you get the notification, that there are updates for the listed elements, you can then update the model.
To updates from ENOVIA Model Version
- In the Containment tree, right-click the Root Feature Group element.
- From the open shortcut menu, select 3DEXPERIENCE > Update from ENOVIA Model Version Updates.
Choosing another ENOVIA Model Version revision
When you are importing data from the ENOVIA Model Definition application, you choose a particular revision of the model. At any moment, you can choose to replace the imported revision with the different one.
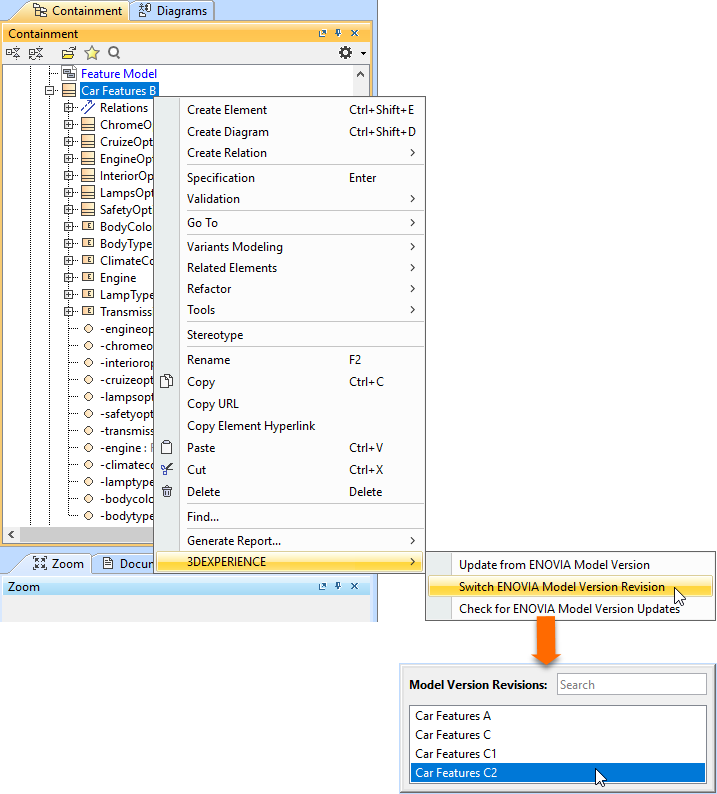
To switch ENOVIA Model Version revision
- In the Containment tree, right-click the Root Feature Group element.
- From the open shortcut menu, select 3DEXPERIENCE > Switch ENOVIA Model Version Revision.
- In the open Model Version Revisions dialog, choose the desired model version.
During the process of switching revision, the main goal is to retain as many of the existing model elements as possible, changing them as necessary instead of deleting and re-creating them. Only the Product Configurations (Instance Specifications) will be added anew.
When you have imported the data from the ENOVIA Model Definition application to your project in the modeling tool, you can start working with it. For more information, refer to Model-Based Product Line Engineering.