Data markings allow you to mark resources, categories, users, and user groups with custom-defined access levels. These levels work hierarchically; i.e., the data marking with the highest level access includes all lower access levels, mid-level data marking includes the lowest levels, and so on. You can employ data markings when listing or accessing resources on the server as an additional security layer together with the Role-Based Access Control (RBAC) mechanism.
The video below explains how the Data markings feature works:
Enabling data markings
To use data markings, you must enable them in the Settings app, where you can also create, reorder, edit, and remove data markings.
To enable data markings
- In the Settings application, go to the Data markings page.
- Choose the Enable data markings option.
Once you enable data markings, you see the data markings configuration page:
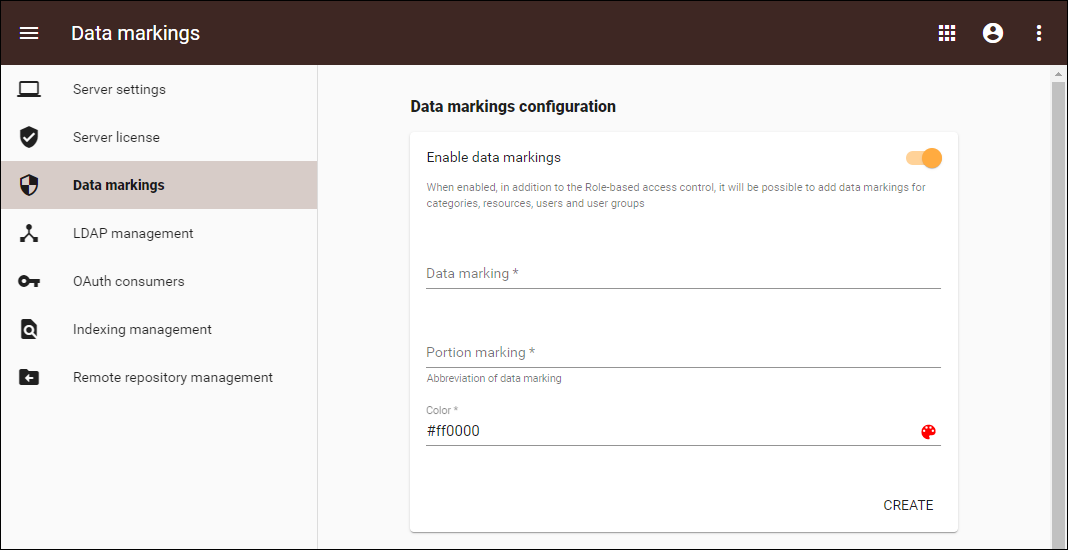
Data markings configuration page
Creating data markings
Once you enable data markings in the Data markings configuration page, no data markings are shown yet. To use data markings, you have to create them.
To create data markings
- In the Data markings configuration page, enter the name for the data marking in the Data marking field.
- Enter the abbreviated portion marking in the Portion marking field.
- To choose the color of the portion marking, click the palette icon.
- Click Create. The created data marking is now visible in the table below the page.
Reordering data markings
Because data markings work hierarchically, their order in the table is important. Thus, the data marking at the very top of the table will have the broadest access rights and will include all of the levels below it. To change the priority of the data markings, reorder them in the table.
To reorder data markings
- Click the menu on the left side of the table:
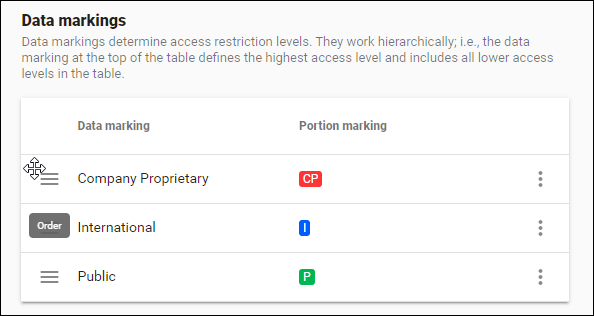
- Once the moving pointer appears, drag the data marking up or down to the preferred position.
Editing data markings
To edit data markings
- In the data markings table select
 .
. - Choose Edit.
- Make your changes in the dialog and select Save.
Removing data markings
To remove data markings
- In the data markings table select
 .
. - Choose Remove.
- Confirm by selecting Remove.