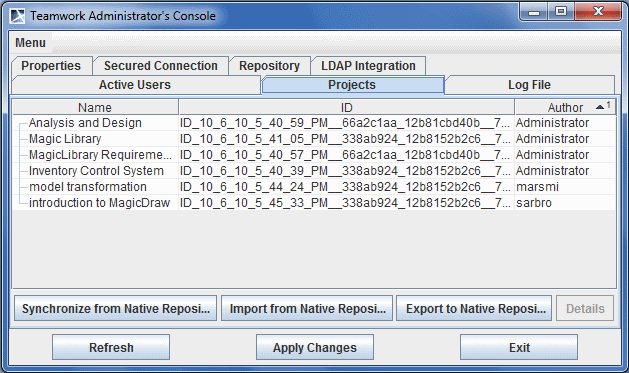
The Projects tab displays the names, authors, and status of all projects stored on the server.
Teamwork Administrator's Console. Projects tab
You can trigger import from and export to the native repository, as well as synchronization, in the Projects tab.
To synchronize projects on the current server with data from a selected location
- Click the Synchronize from Native Repository button. The Select Native Repository dialog opens.
Select the directory where the data to synchronize is stored.
This must be a directory that stores project versions in the Teamwork Server's Native repository format, such as a directory where you have exported the projects or a directory on which the server operated in the past.
- Click Synchronize. The contents of the selected directory are imported into the current server. After synchronization, the server assumes that the synchronized projects are foreign. These projects cannot be modified, but you can repeat the synchronization to update them with new data.
To import projects into the current server
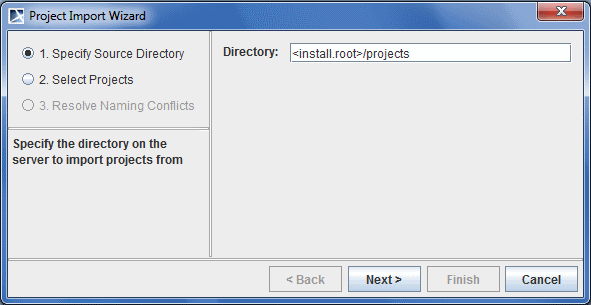
- Click the Import from Native Repository button. The Projects Import Wizard opens.
Select the directory where the projects to import are stored.
This must be a directory that stores project versions in the Teamwork Server's Native repository format, such as a directory where you have exported the projects or a directory on which the server operated in the past.
- Click Next. In the Directory box, type the path to the backup folder to restore files from the backup made while upgrading the server.
- The Projects list displays all the projects stored in the directory. Select specific projects to import from the list or click on the Select All button to import all projects. Click Next.
- The Resolve Naming Conflicts tab appears. The import process will check if the selected projects/used projects/profiles already exist in the selected destination directory server (comparison is done by name). There are two ways to resolve naming conflicts:
- Use destination. The used project will not be imported. All other projects/used projects being imported will be modified to use the existing used project/profile in the current server.
- Overwrite destination. Import selected profiles or used projects and commit them by overwriting the existing ones in the current server.
- Click Finish.
The contents of the selected directory are imported into the current server. After the import, the current sever assumes the ownership of the imported projects. They can be modified, but the import cannot be repeated.
To export projects from the current server
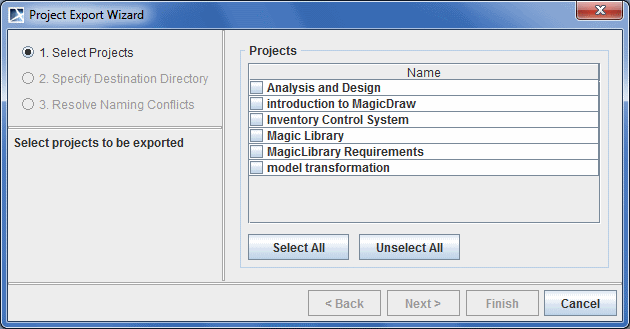
- Click the Export to Native Repository button. The Project Export Wizard opens.
- Select projects/used projects/profiles to export from the list, or click on the Select All button to import all projects/used projects/profiles. Click Next.
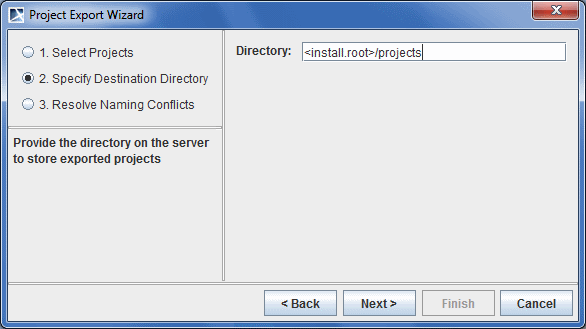
- Select the directory to export the selected project. This can be a new directory or a directory where the Native repository is stored.
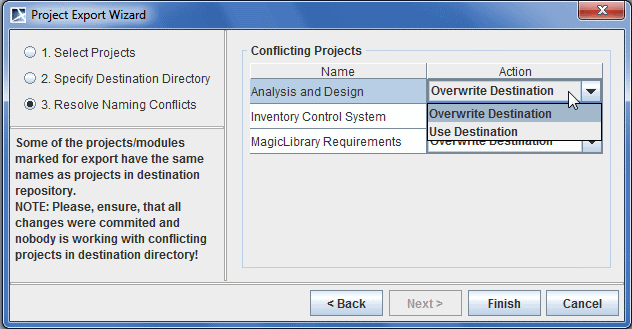
- The resolve naming conflicts in the destination directory opens. If you select a new directory to export the project, there will be no naming conflicts. However, if the projects/used projects/profiles to be export already exist in the selected destination directory (comparison is done by name), naming conflicts will occur.
- There are two methods to resolve naming conflicts:
- Overwrite Destination. Overwrite the projects/used projects/profiles currently existing in the destination directory with the exported projects/used projects/profiles.
- Use Destination. Do not replace the projects/used projects/profiles currently existing in the destination directory.
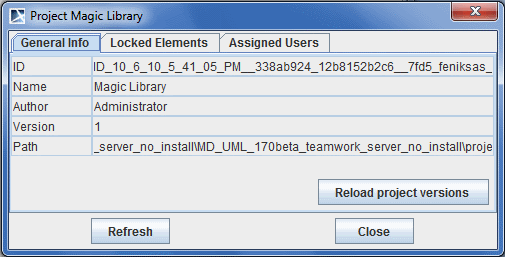
To view the details of a project
- Select a project and from the Teamwork Administrative's Console dialog and click Details.
- The Project dialog opens.
