On this page
Here you can learn how to run Web Application Platform with its plugins by using the no-installer package.
Prerequisites
To run the Web Application Platform with plugins:
- You must have a working instance of Teamwork Cloud.
- Make sure that the FlexNet license server is installed beforehand because Cameo Collaborator for Teamwork Cloud uses a floating license. You will need to specify license server details when installing Web Application Platform.
- You have to download the Web_App_Platform_<version number>_noinstall.zip file.
To run Web Application Platform by using the no-install package
- Extract the Web_App_Platform_<version number>_noinstall.zip file
- Go to the <Web_App_Platform_no-installer_directory>/shared/conf directory.
Open the webappplatform.properties file. The content of the file is shown below.
# General properties


install.root=.


# Web Application Platform properties


wap.context=/webapp
# Specify a guest user name. You can create users using TWC Admin Console.
wap.guest.username=Guest
# Specify the guest user password.
wap.guest.password=Guest


# Authentication server properties


# Specify the Authentication server location. Use http or https depending on the Authentication server setup.
authentication.server.uri=https://<nm_authentication_server_ip>:8555/authentication
# Specify an optional redirect uri if the incoming request does not provide one.
# By default redirect uri is the authentication server location. Remove # for the property to work.
#authentication.redirect.uri=https://<nm_authentication_server_ip>/webapp/
# Specify a unique platform ID.
authentication.client.id=webApplicationPlatform
# Specify the authentication client password that platform will use to secure communication with the authentication server.
authentication.client.secret=CHANGE_ME
# Set to true to ignore Authentication server certificate validation. Otherwise, set to false.
# The value depends on the Authentication server setup.
authentication.server.ignore.certificate=true


# Teamwork Cloud server properties


# Specify the Teamwork Cloud administrator user name.
twc.admin.username=Administrator
# Specify the Teamwork Cloud administrator password.
twc.admin.password=Administrator
# Specify the Teamwork Cloud server address. Use http or https depending on the Teamwork Cloud server setup.
twc.url=https://<teamwork_cloud_ip>:8111
# Specify the maximum total number of connections.
twc.client.max.total.connections=20
# Specify the maximum number of connections for a route.
twc.client.max.connections.per.route=20
# Specify how long (in milliseconds) to wait for establishing the connection with the remote server before a timeout exception occurs.
twc.client.connect.timeout.ms=30000
# Specify how long (in milliseconds) to wait for the server to respond to various calls before a timeout exception occurs.
twc.client.socket.timeout.ms=120000
# Specify how long (in milliseconds) to wait for checking out a connection from the connection pool before an exception occurs.
twc.client.connection.request.timeout.ms=120000
# Set to true to ignore Teamwork Cloud certificate validation. Otherwise, set to false.
twc.client.ignore.certificate=true


# FlexNet server properties


# Specify the FlexNet licence server IP address.
flexnet.server.name=<server_ip>
# Specify the FlexNet license server port.
flexnet.server.port=<server_port>


# Platform mailing engine properties used to send notifications via e-mail


# Specyfy the e-mail server host name.
mail.host=<gate.company.com>
# Specify the e-mail server port.
mail.port=25
# Specify the sender's user name and password.
mail.username=<user_name>
mail.password=<password>
# Specify the e-mail protocol and encoding.
mail.protocol=smtp
mail.encoding=UTF-8
# Specify the sender's e-mail address.
mail.from.default=<info@company.com>
mail.from.enabled=false
mail.smtp.auth=false
mail.smtp.timeout=30000
Read the comments with property descriptions inside the file and specify the following:
- Web Application Platform properties
- Teamwork Cloud server properties
- Authentication server properties
- FlexNet server properties
Specifying property values
- Make sure you replace the placeholders in the angle brackets (<>) with actual values (e.g., Teamwork Cloud and Authentication server addresses)
- Some properties are specified for you. You can leave their values unchanged.
- Platform mailing engine properties are optional. You can specify them later if needed.
Save and close the webappplatform.properties file.
- Go to the <Web App Platform no-install directory>/conf directory.
Open the catalina.properties file and edit the following property value as shown below:
shared.loader="${catalina.base}/shared/conf"- Save and close the catalina.properties file.
In your computer settings, specify the JRE_HOME and CATALINA_HOME_WEBAPP variables as shown below:
CATALINA_HOME_WEBAPP=/<Web_App_Platform_no-installer_directory>
JRE_HOME=/<Java_install_directory>
- Go to the <Web App Platform no-install directory>/bin directory.
- Run the startup.bat file as administrator to start the Web Application platform.
- Apply the Cameo Collaborator for Teamwork Cloud license.
Now you can access Web Application Platform by opening a web browser and going to http(s)://<domain_name>:<port>/webapp/resources. By default, Web Application Platform uses the port 8443. Click here, to learn how to start and stop Web Application Platform.
Specifying JRE_HOME and CATALINA_HOME_WEBAPP variables
In this section, you can learn how to specify the JRE_HOME and CATALINA_HOME_WEBAPP variables in different operating systems.
To specify variables on Windows
- Open Control Panel and go to System and Security > System.
- Select the Advanced system settings option on the left side of the System dialog.
- In the System Properties dialog, click the Environment Variables button.
In the System variables area of the Environment Variables dialog, specify the values for the JRE_HOME and CATALINA_HOME_WEBAPP variables as shown below:
CATALINA_HOME_WEBAPP=/<Web_App_Platform_extracted_no-installer_directory>
JRE_HOME=/<Java_install_directory>
- Click OK.
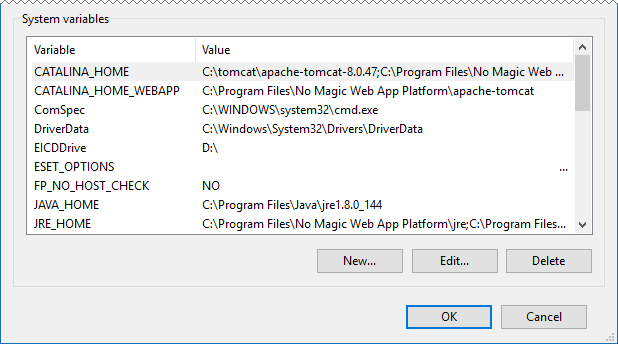
System variables in the Environment Variables dialog on Windows
To specify variables on Linux
- Go to the /etc directory and open the profile file.
Copy the following lines to the profile file and replace the placeholders between angle brackets (<>) with actual paths:
export CATALINA_HOME_WEBAPP=/<path_to_Web_App_Platfrom_extratcted_no-installer_directory>
export JRE_HOME=/<path_to_Java_install_directory>
Variable examples
export CATALINA_HOME_WEBAPP=/Users/admin/Desktop/Web_App_Platform_190_noinstall
export JRE_HOME=/usr/java/jdk1.8.0_172-amd64/
Open the Terminal application and execute the following command:
source /etc/profile