...
In this Quick Start Guide, you will find instructions on how to:
- Work with your Concept Modeling project,
- Import Web Ontology Language (OWL) ontologies into your Concept Modeling project,
- Set up your concept model for export,
- Export your concept model to an OWL ontology, and
- Generate a Natural Language Glossary (NLG) from your concept model.
Concept Modeling ProjectAnchor CMP CMP
...
- Click File > New Project. The New Project dialog appears.
- In the left column, scroll down and select Concept Modeling Project, as shown below.

- Name your project and select your Project Location.

- Click OK.
A default Concept Modeling diagram will open, complete with the Concept Modeling diagram palette.
...
- Right-click a package in the Containment tree.
- Select Concept Modeling.
- Select Create Concept Model.
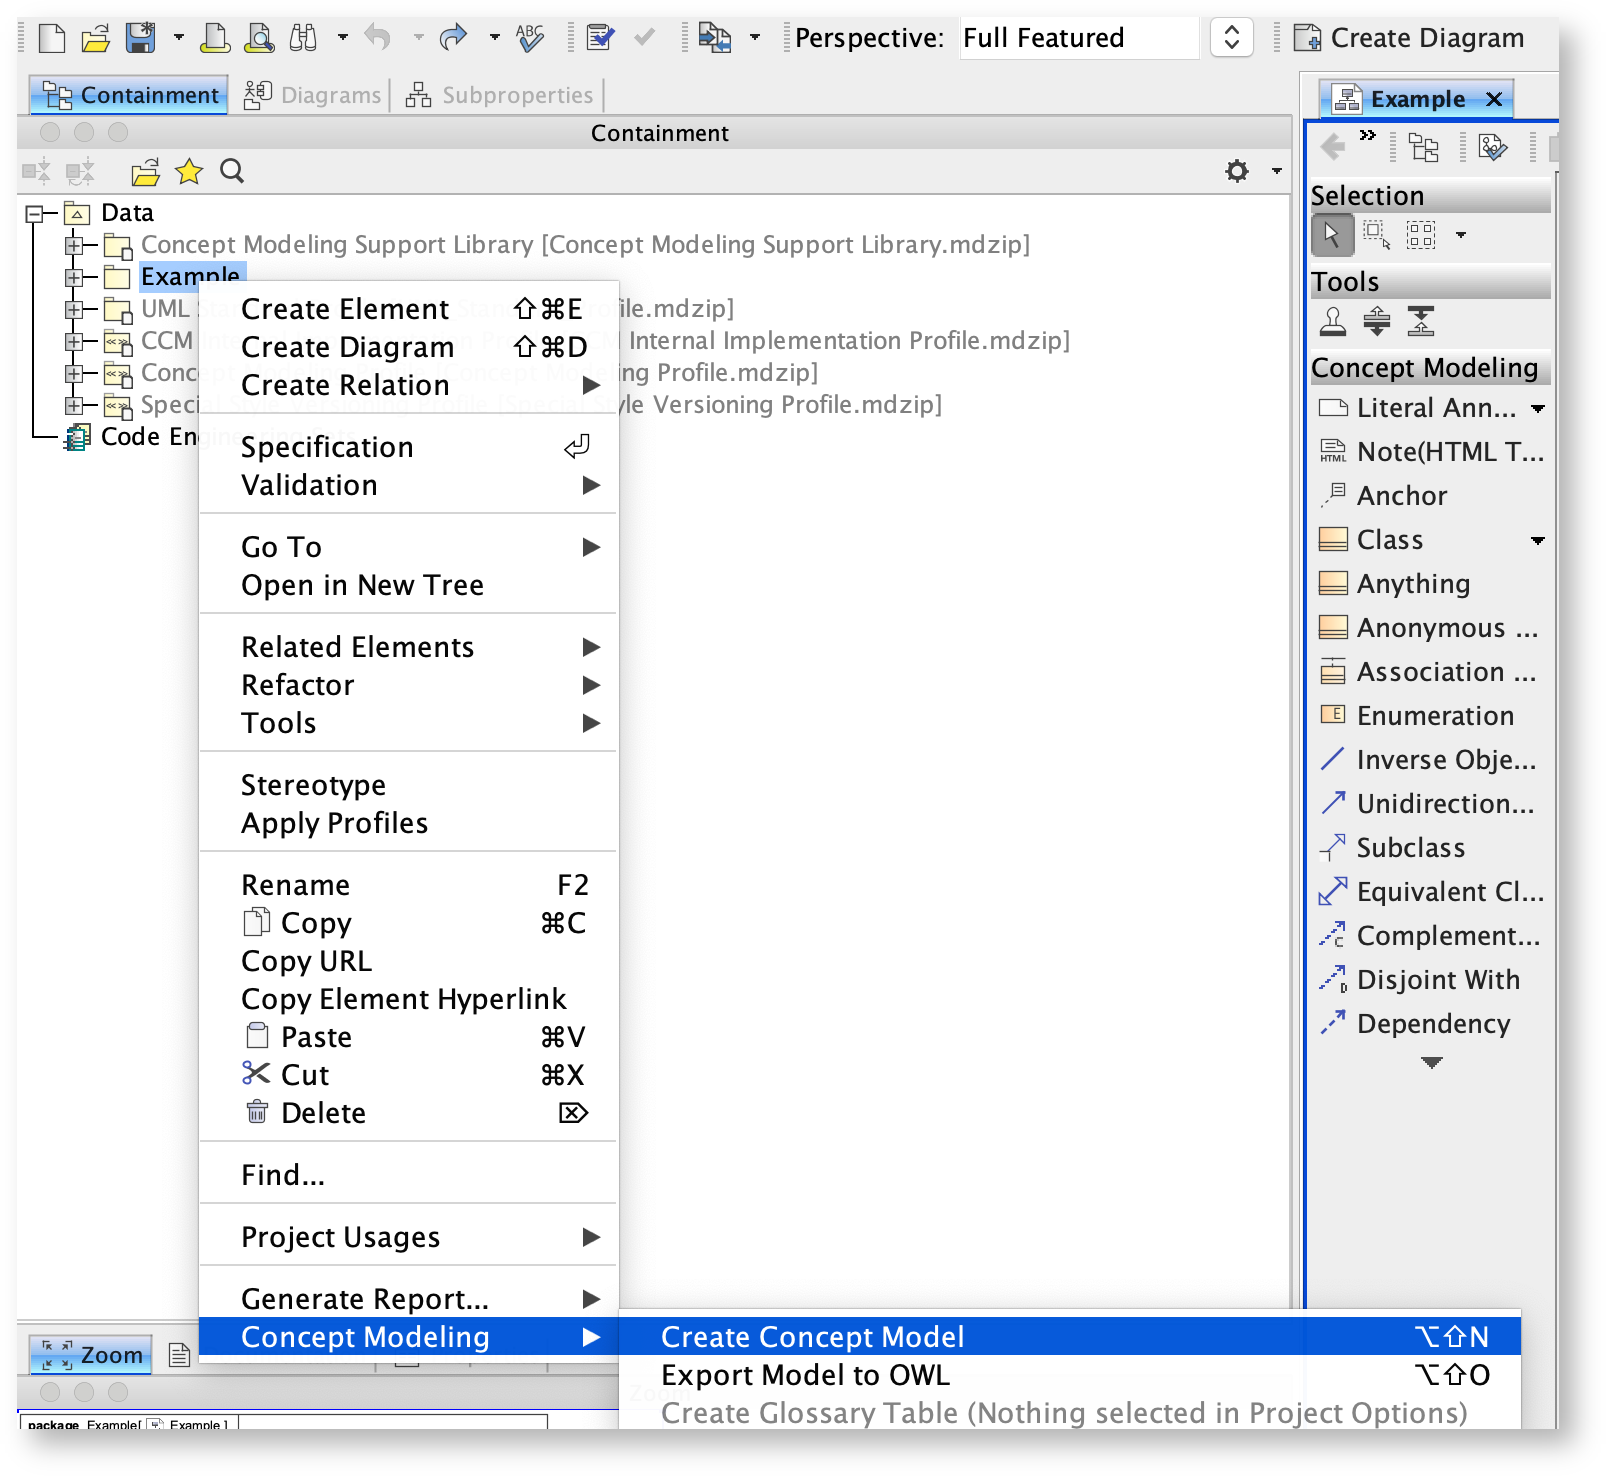
You will see your newly created concept model called Unnamed 1. If you create another concept model in the same way, the second concept model will be called Unnamed 2, and so on.
 New concept model called Unnamed 1.
Importing OWL ontologies into your Concept Modeling ProjectAnchor ontology ontology
...
- On the main menu, click File > Import From. Select OWL Ontology File.
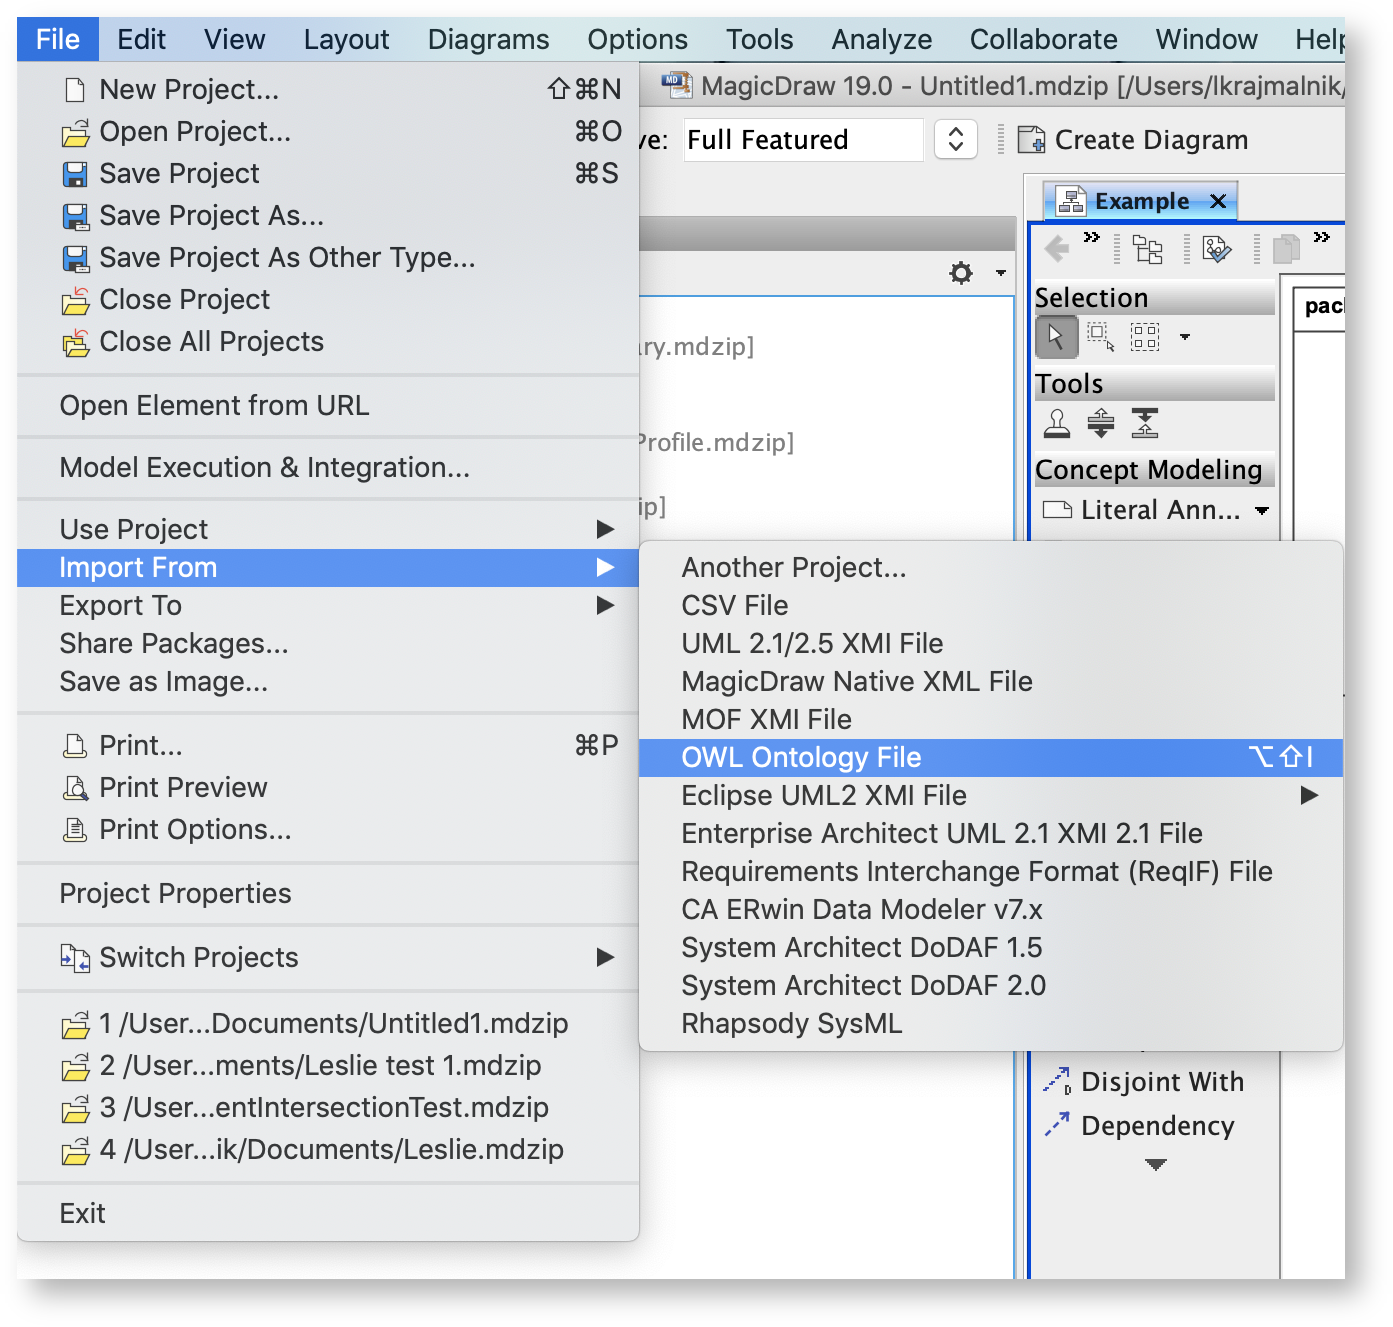
- Browse for your OWL ontology.
- Click Open. The ontology file will be imported into the Concept Modeling project.
- When the OWL ontology file has been successfully imported, an Imported Ontologies package will appear in the Containment tree. This package contains the imported OWL data. Furthermore, this package also contains the concept model corresponding to the ontology you imported.
 The Imported Ontologies package appears in the Containment tree.
...
- Right-click on a package, e.g. Example in the Containment tree, and select Specification.

- In the specification window, find or search for the URI field.
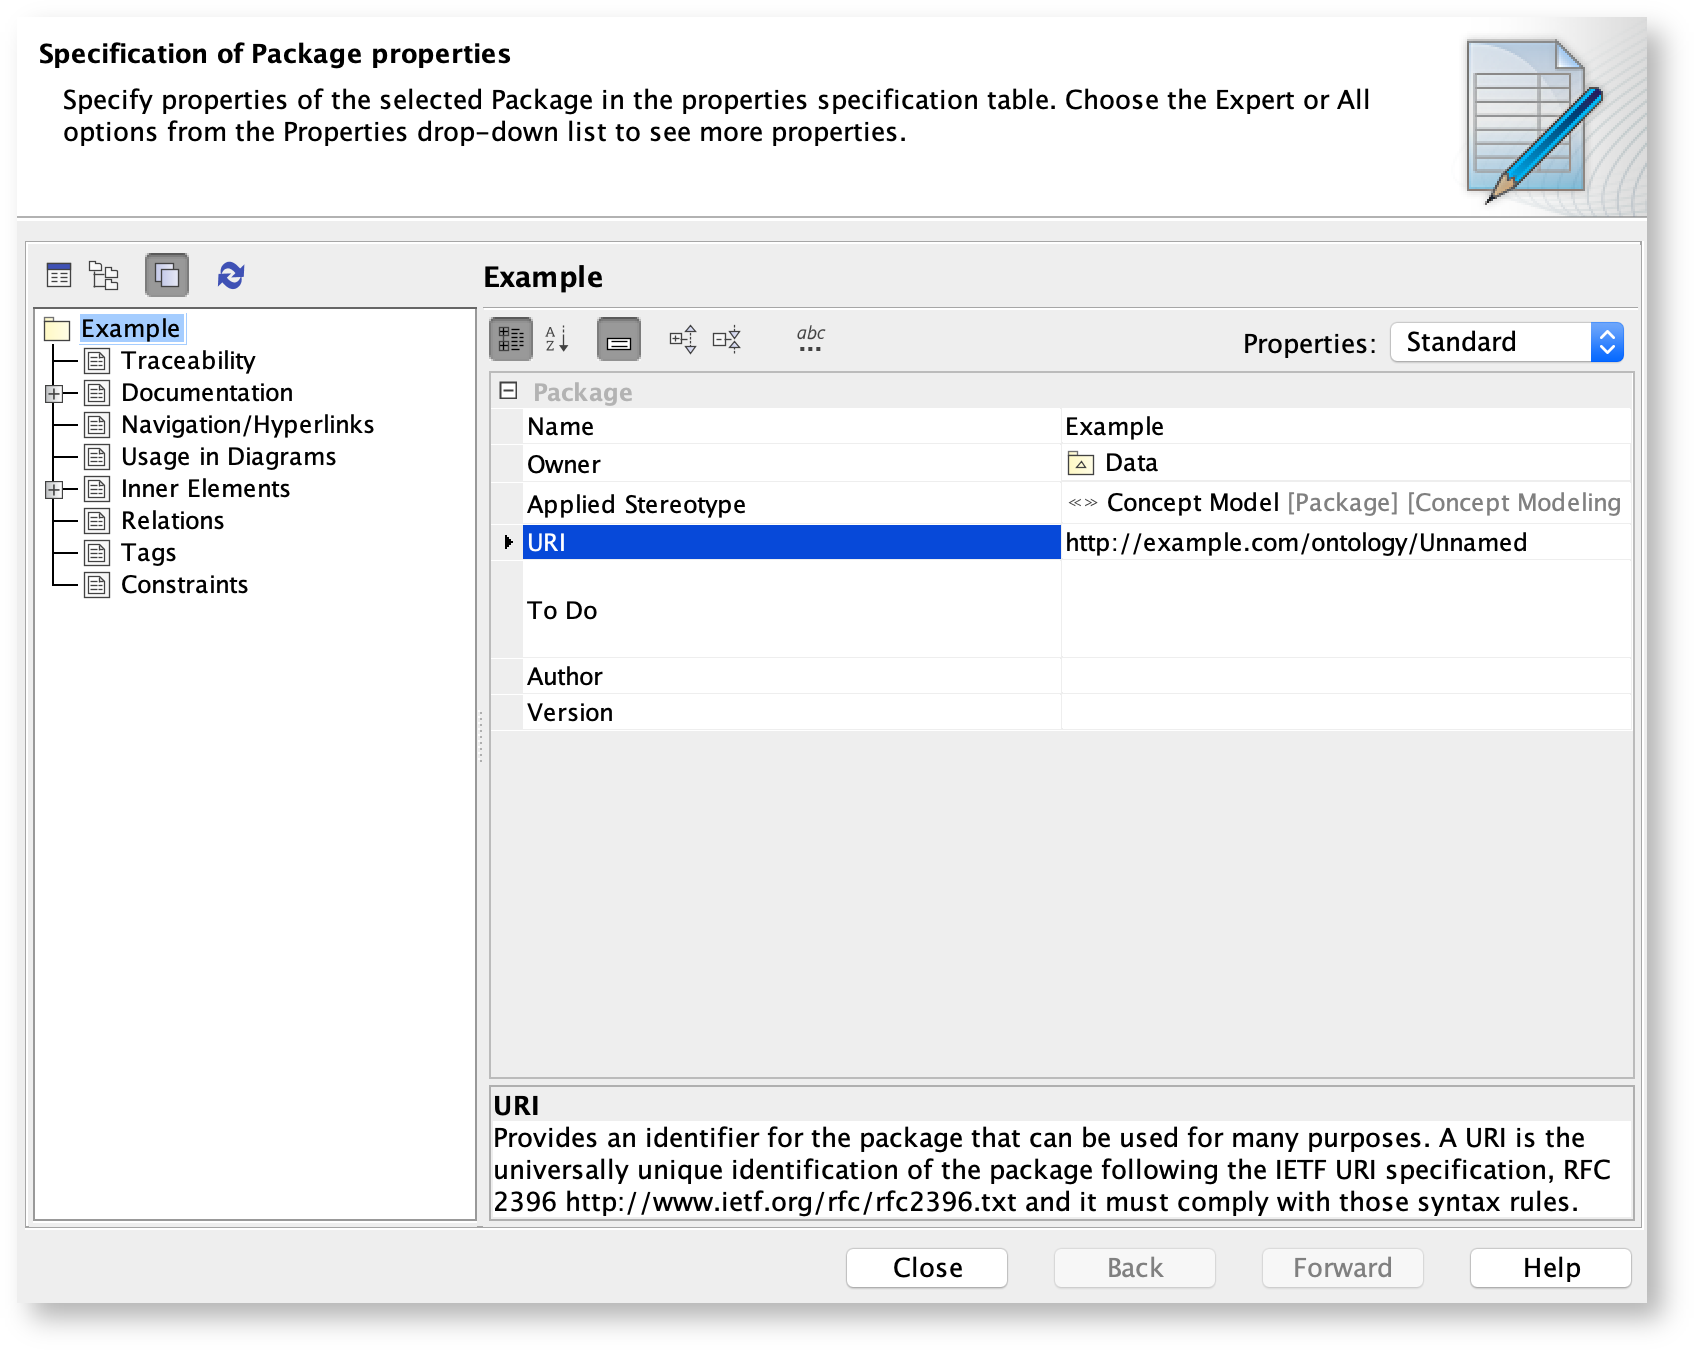
- Click the URI field.
- Update the URI.
- Click OK.
...
- From the main menu, click Options > Project. The Project Options dialog appears.
- In the left column, select General > Concept Modeling.
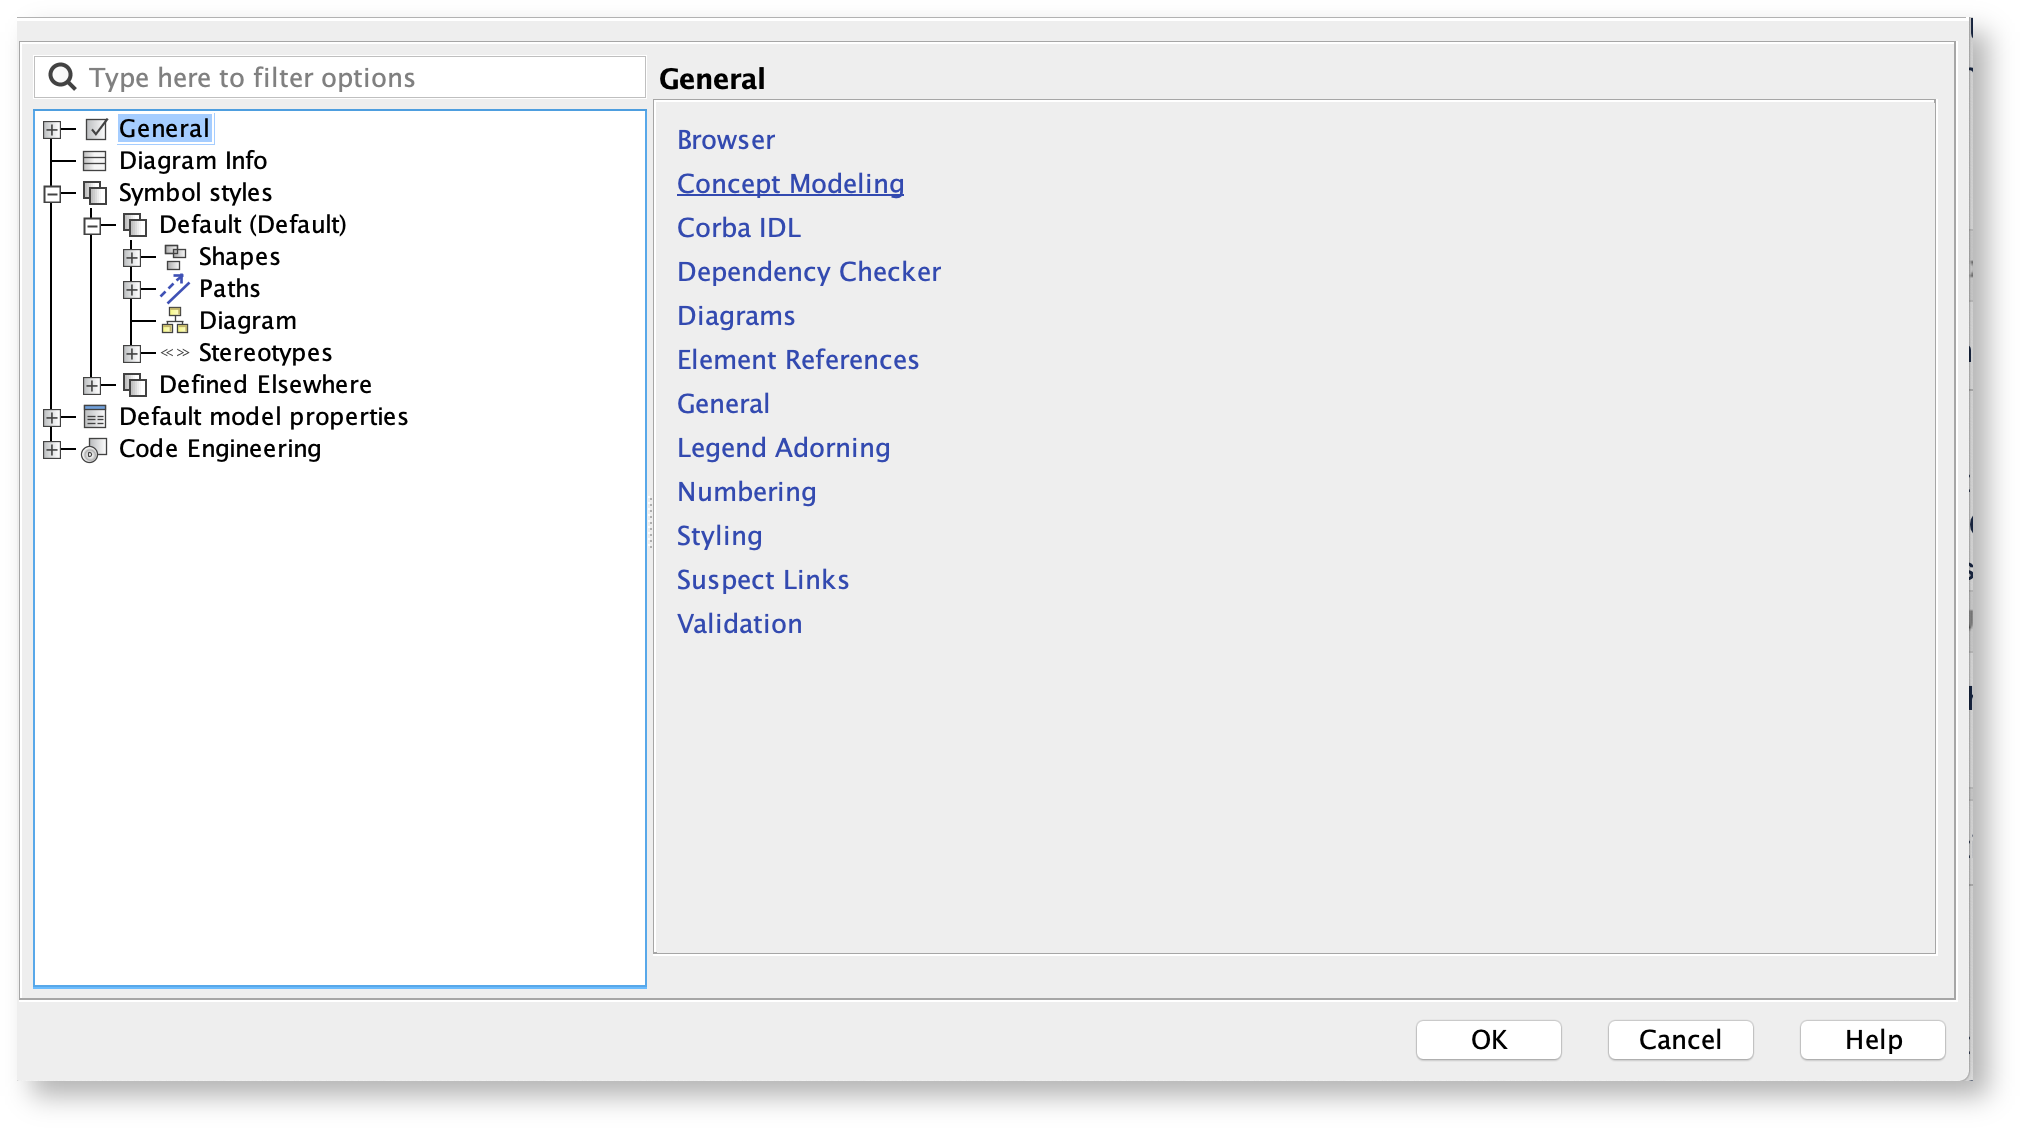
- Click the OWL Export Syntax field.
- Select a syntax to export your concept model.

| Warning | ||
|---|---|---|
| ||
Please note that the documentation uses OWL Functional as its OWL export syntax, but you can use any syntax which you prefer. |
...
- From the main menu, click Options > Project. The Project Options dialog opens.
- In the left column of the dialog, select General > Concept Modeling.
- Select the Always prompt for a file destination when exporting OWL option.

- Click OK.
To export a concept model to an OWL ontology
...
- Right-click on your desired concept model in the Containment tree.
- Select Concept Modeling > Export to OWL.

- A box will appear asking whether or not you want to freeze the elements' IRI.

- If you click No, the notification window shows this message:

- If you click Yes, the notification window shows you which elements' IRI were frozen.

- If you click No, the notification window shows this message:
- A progress bar will appear.
- A dialog will appear asking you to choose the folder into which you want to save the exported model.
- A Path Variables dialog will appear. The default path variable is <project.dir>\OWL. Choose Use Selected.

- Your concept model is now exported into the folder of your choice with the file extension of your choice.
...
- In the main menu, select Tools > Report Wizard.
- Expand the Concept Modeler folder.
- Select Natural Language Glossary.
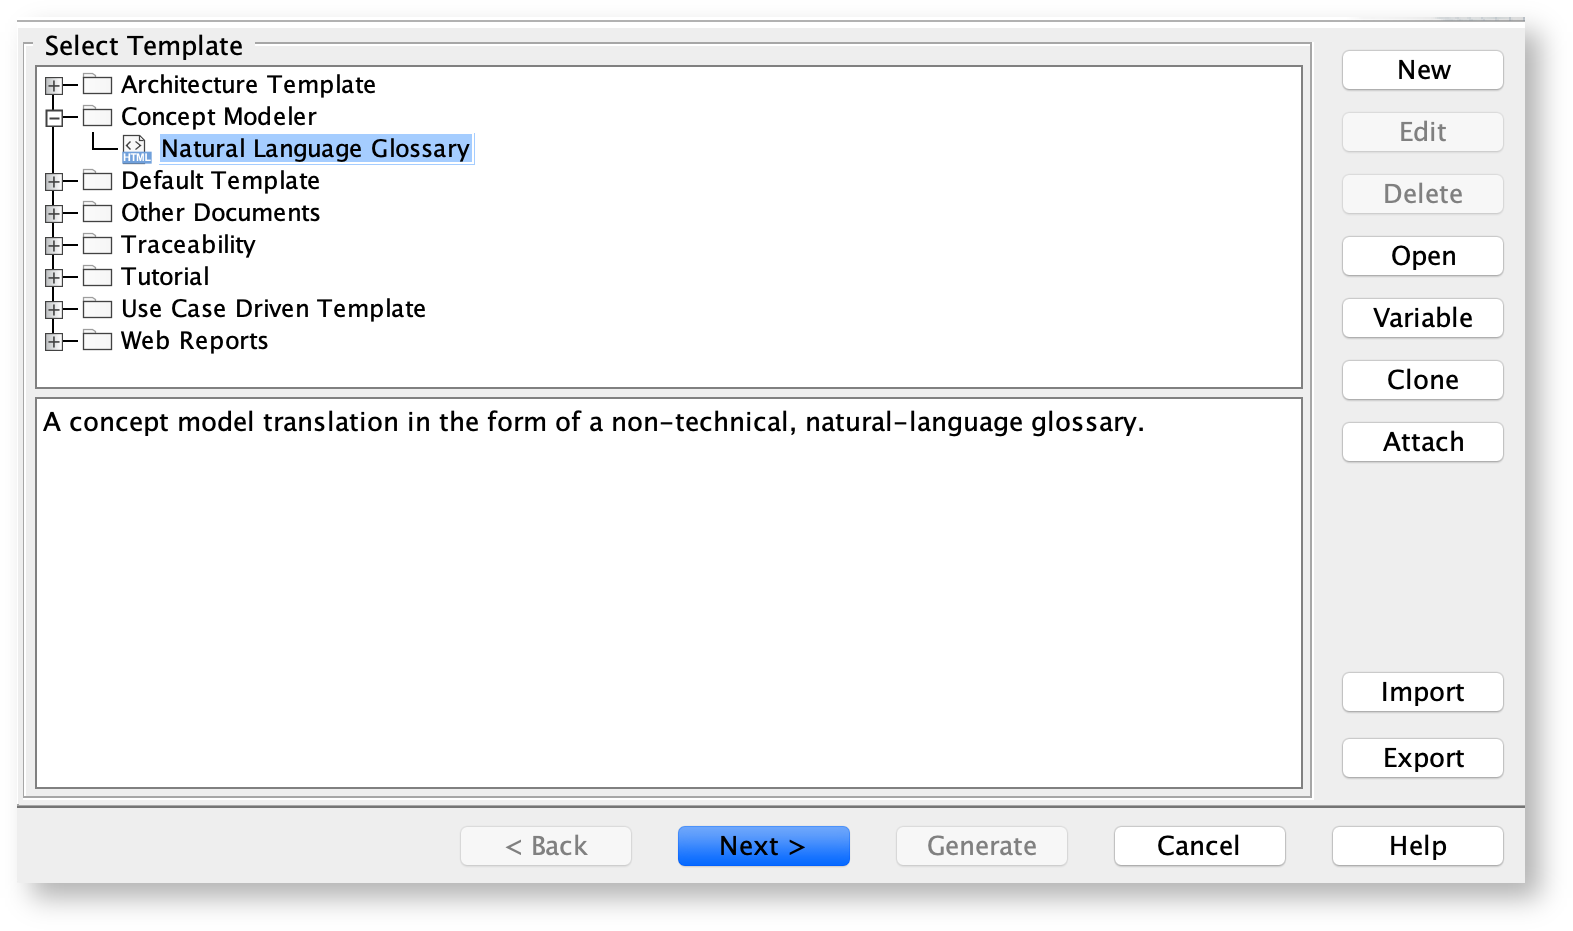
- Click the Next button.
- Select Default.
- Click Next.
- Select the packages for the NLG.
- Click Add + button.

- Click Next.
- Name your file and file location.
- Click Generate.

The Natural Language Glossary is generated
If you would like to learn more about how to style and/or populate your Natural Language Glossary, click here.