On this page
Resource Manager functionality allows you to manage local resources (installed with a modeling tool or downloaded separately) and resources available on the server/shared repository.
With Resource Manager, you can manage different types of resources, such as Profiles, Plugins, Templates, Language resources, Case studies/examples, Custom diagrams, and others.
The Resource Manager functionality allows you to:
- Install the resources
- Update the resources
- Distribute needed resources internally (including the company's developed resources)
- Check dependency of a resource
The Resource/Plugin Manager helps you manage the resources. You can add the resources to your modeling tool from the following locations:
- Local file system
- Network share
Getting started with Resource/Plugin Manager
To open the Resource/Plugin Manager dialog
From the Help menu, select Resource/Plugin Manager.
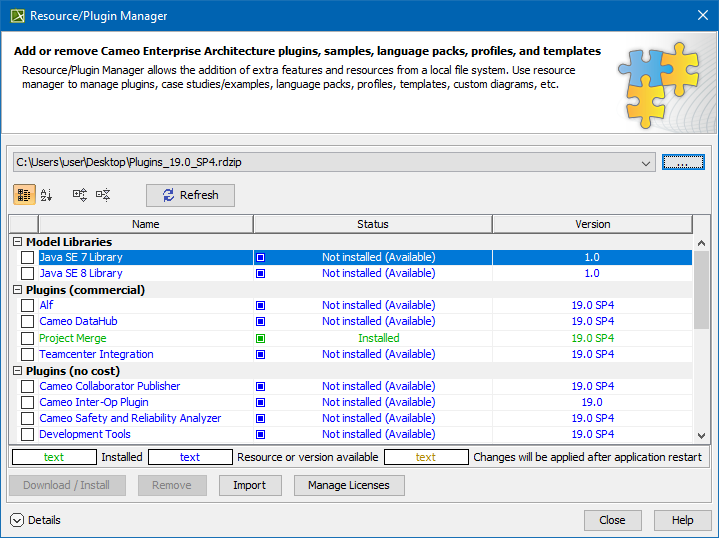
The Resource/Plugin manager dialog.
To see the resource details
- In the Resource/Plugin Manager dialog, select the necessary plugin or other resources.
- Click Details. The dialog expands with the resource description at the bottom.
Importing resources from file
How can I get the latest plugins?
You can download an all plugins bundle (.rdzip file) from nomagic.com (please log in to see the Download area). The obtained .rdzip file can then be shared internally. What is more, you can import archived resources (.zip) from a server/shared local repository your admin gave a link to.
The resource distribution file (.rdzip) is added to a specific folder (<install.root>/data/resourcemanager/distribution>) for the Magic Software Engineer, Magic Systems of Systems Architect, and Magic Cyber Systems Engineer modeling tools. This location is set by default for all the new modeling tools.
There are three ways to install resources using Resource/Plugin Manager:
- installing individual archived resources (.zip).
- importing bundled resources from the resource distribution file (.rdzip) located on a local file system.
- obtaining resources from the server/shared repository pre-populated with the latest resources from the resource distribution file (.rdzip) using a link.
Importing selected resources from a local file system or network share
You can add individual resources in a .zip format using the Import functionality. Separate plugins can be downloaded from nomagic.com or imported from the network share/web server.
To add selected resources
- Open Resource/Plugin Manager.
- Click the Import button at the bottom of the window and then select the resource in the .zip format to add to your modeling tool.
- Click Open. The selected resource is imported.
Importing bundled resources from a local file system or network share
You need to specify a location of the resource distribution file on a local file system/network share or point directly to the .rdzip file in the Manage Resource Locations dialog (used for defining locations from which resources are added) to import bundled resources.
To specify a resource location/file
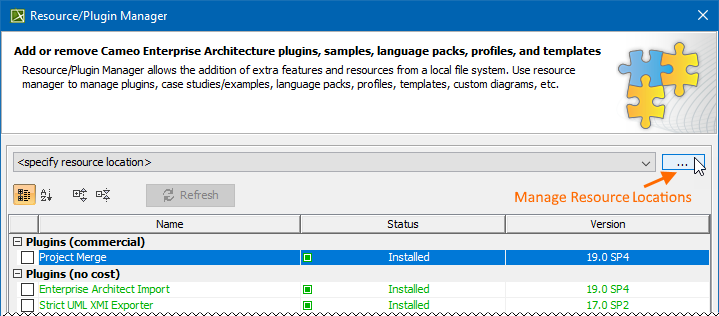
- Open Resource/Plugin Manager and click the button.
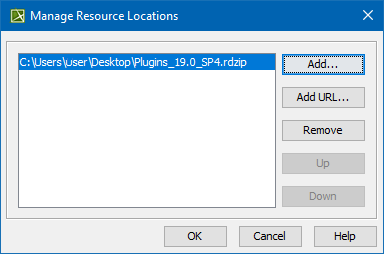
- In the Manage Resource Locations dialog, click Add. The Select Resource Location or Distribution File dialog opens.
- Specify a resource location on your file system/network share or a resource distribution file (.rdzip) and click Open. The resource location is added.
- Click OK to import resources.
You can manage the list displayed in the Manage Resource Locations dialog by adding, removing, or reordering the resource locations.
Importing resources from a server or network share
You can also import resources from a web server or local share if the URL has been provided to you.
To specify the server where the resources and their descriptor file are located
- Open Resource/Plugin Manager and click .
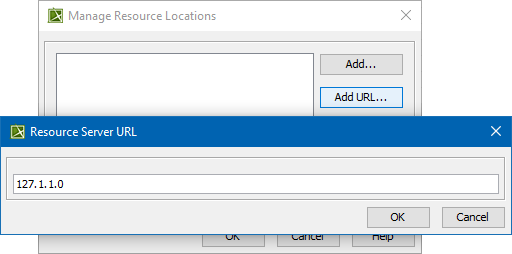
- In the Manage Resource Locations dialog, click Add URL. The Resource Server URL dialog opens.
- In the open Resource Server URL dialog, type or paste the server address.
- Click OK.
The resources from the selected location will be listed in the Resource/Plugin Manager.
Distributing resources using .rdzip
Once you have obtained the resource distribution file (.rdzip) from nomagic.com, you can share resources internally, e.g., on a company level.
Building custom resources file
You can bundle your resources into one .rdzip file and then distribute that file on a local file system, network share, or web server.
To build the resources file, you need to install the Development Tools plugin. The Development Tools plugin can be downloaded from nomagic.com and then installed using Resource/Plugin Manager, or it can be found in the resource distribution file (.rdzip).


