One of the ways you can benefit from editing your model in a Cameo Collaborator for Teamwork Cloud document is reviewing and approving Requirements. The following workflow will give you instructions how to do it:
- In a modeling tool, create a Profile with a custom Requirement subtype. You will need custom Requirements to be able to change their Status (e.g., to Approved).
- Use the Profile with the custom Requirement subtype in the model you intend to publish for review.
In the model, create and define Requirements of the custom Requirement subtype you have created.
Converting default requirements
If you already have default requirements defined in your model, you can convert them to the custom Requirement subtype by refactoring.
- Publish the model (or the part of the model containing Requirements) to Cameo Collaborator for review and share the document link with reviewers.
- Review and approve model requirements.
Creating a custom Requirement subtype
If you want to change Requirement status, you need to create a custom Requirement stereotype with the Status tag, as described below.
To create a custom Requirement subtype
- Create a new SysML project.
- In the project, Create a Profile element and name it Custom Stereotypes.
- In the Custom Stereotypes Profile, create a Profile Diagram.
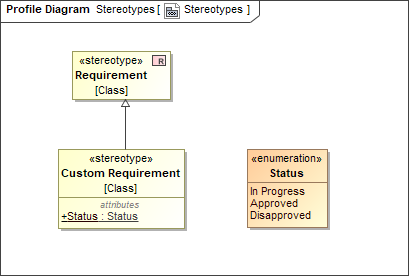
- In the Profile Diagram, create a Stereotype and name it Custom Requirement.
- In the Model Browser, find the Requirement [Class] element (it should be located in the SysML Profile) and drag it to the Profile Diagram.
- Create a Generalization relationship from the Custom Requirement to the Requirement [Class].
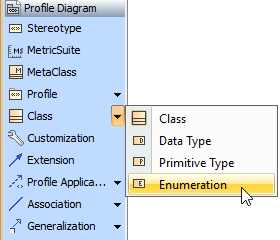
- In the same Profile Diagram, create an Enumeration instance, as displayed below, and name it Status.
- Create three Enumeration Literals for the Status Enumeration instance, as displayed below, and name them In Progress, Approved, and Disapproved.
- Drag the Status Enumeration instance shape to the Custom Requirement Stereotype shape. Your Profile Diagram should look like the one shown below.
Now that you have created a profile with a custom Requirement subtype, you can use it in the model where you want to create custom Requirements.
Approving Requirements
To approve Requirements
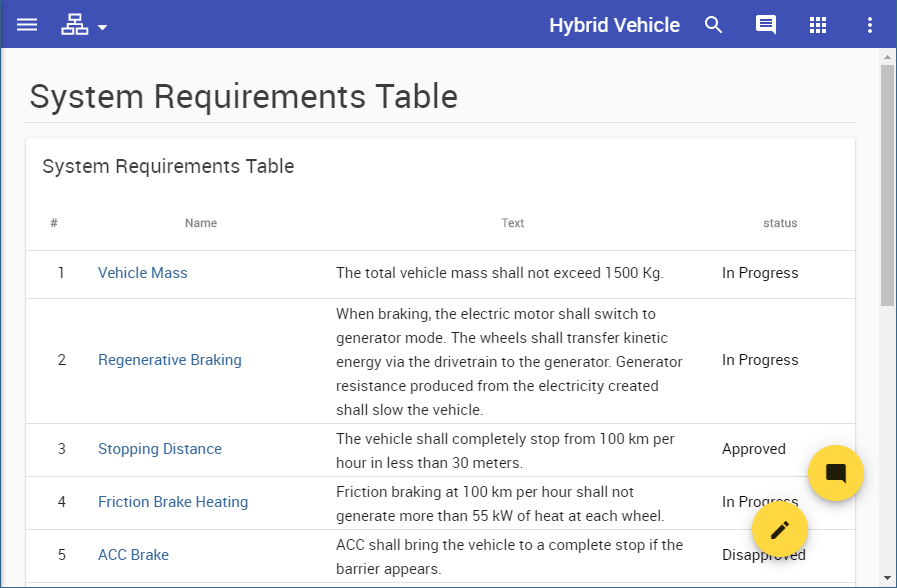
- Open the Cameo Collaborator for Teamwork Cloud document with the Requirements you want to review. See the example of a Requirements table below.
- Review the requirements and do one or several of the following actions:
Change the Status value of the Requirements that do not need any changes to Approved.
Empty values cannot be edited
You can change only existing Status values. Cameo Collaborator does not allow to enter property values that have not been specified. So make sure that certain Status values (e.g., In Progress) are defined before publishing a model for editing.
- Create textual or graphical comments for items that need to be discussed.
- Inform the author that you have finished reviewing the document.


