You can do simple schema mapping and update existing schema maps in the Schema Map Manager dialog between data in the source schema and the target schema. You can also define a target type from the attribute value mappings by selecting the Define Target Type from Attribute Value option.
If your previous mapping mode is  mapping, it is set as the default mapping automatically. You can also change the default mapping back to a simple mapping so that you can use the simple mapping to copy data when the Define Target Type from Attribute Value mapping mode is not selected.
To specify a default mapping
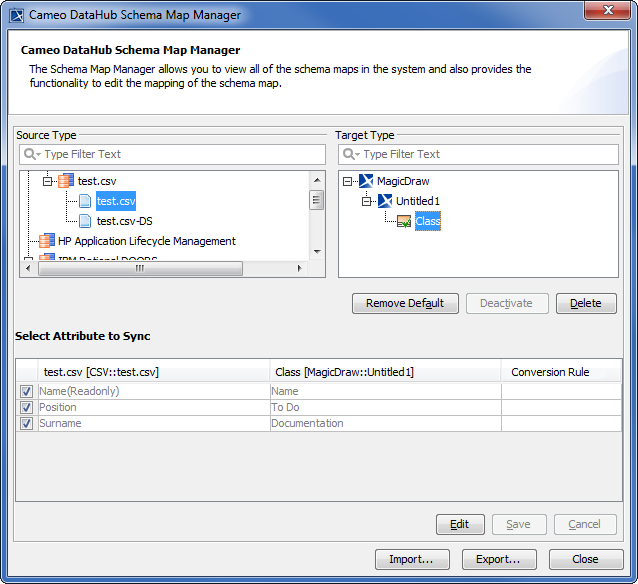
- Open the Cameo DataHub Schema Map Manager dialog. The Cameo DataHub Schema Map Manager dialog opens.

- Select a source type that you want to edit its mapping. The default target type appears in the Target Type section.
- Select a target type in the Target Type section that you want to specify as the default one.
- Click
 . The selected target type is now the default mapping, and the button changes to
  .
.
To remove a default mapping
- Open the Cameo DataHub Schema Map Manager dialog. The Cameo DataHub Schema Map Manager dialog opens.
- Select a source type that you want to edit its mapping. The default target type appears in the Target Type section.
- Select a default target type in the Target Type section that you want to remove.
- Click . The selected target type is no longer the default mapping, and the button changes to .
To edit a schema mapping
- Open the Cameo DataHub Schema Map Manager dialog. The Cameo DataHub Schema Map Manager dialog opens.
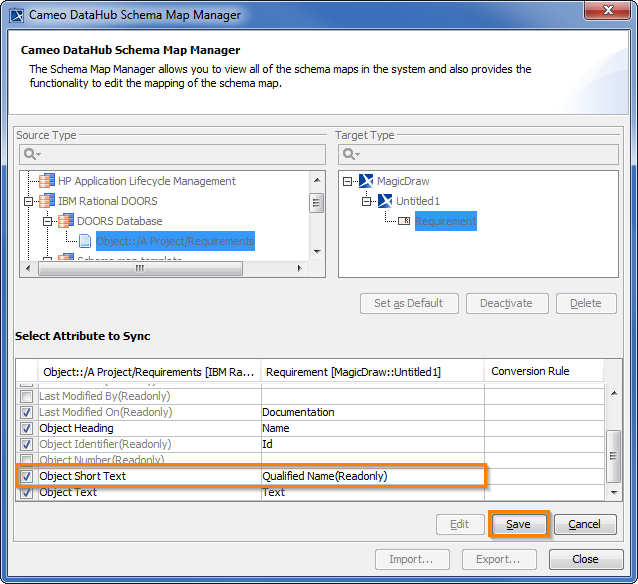
- Select a source type that you want to edit its mapping. The default target type appears in the Target Type section.
- Select a target type in the Target Type section that you want to edit. The Select Attribute to Sync list shows the list of default attributes mapping.
- Click
 to enable editing mode.
 - Change the attributes mapping, and then click
 .
.
Note
If the edited schema mapping affects any elements in the current project, the Edit Schema Map Confirmation dialog opens. Click Yes to confirm that you want to edit the schema, No to cancel the editing, or Details to see the details of all affected nodes.

The Edit Schema Map Confirmation dialog.
Information
After DataHub saves an edited schema map, it will be effective when you perform data synchronization next time.
Related page