To add a new CSV Data Source to the CSV driver
- Click Add Data Source
 on the DataHub Explorer toolbar. The Add Data Source dialog opens.
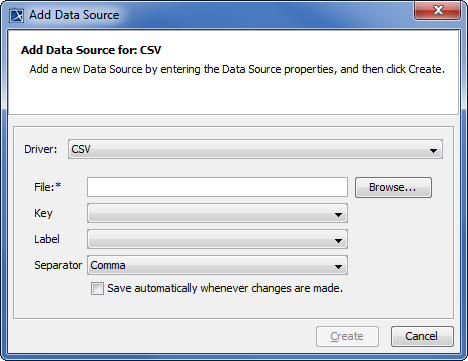
- From the Driver drop-down list, select CSV.
Enter the CSV information in the following fields as shown in the table below
CSV information Function File A CSV file to be added. Key The name of the column header that will be used as the ID of the node.
Note
If you leave the Key field blank, the Data Source will not have any synchronization capability.
Label The name of the column header that will be created as the name of the node (can be omitted). Separator The delimiter for the CSV file. The available delimiters are comma, semi-colon, space, and slash. 
Updates the changes to the CSV file when the CSV Data Source is changed.
4. Click  .
.
Note
- A CSV file must contain the names of attributes in the first row and data in the other rows.
When the CSV Data Source has been created:
- The order of data in the DataHub Explorer tree is the same as the order of data in the CSV file.
- If you edit the data in the DataHub Explorer tree , you need to click Save
 to save the new data to the CSV file, unless you have selected the check box.
 - If the data in the CSV file have been updated, you need to click
 to update the DataHub Explorer tree.
 - For unmapped columns, you can add, edit, or remove the columns.