Importing ReqIF files
You can import ReqIF files from:
- IBM DOORS 9.4, 9.5, and 9.6
- IBM DOORS Next Generation
- PTC Integrity
- Polarion REQUIREMENTS
- Siemens Teamcenter
- Dassault Systemes Reqtify
You can import any ReqIF file – with or without specifications.
To import a ReqIF requirement file
- Open a project wherein you want to import requirements.
- From the File menu, select Import From > Requirement Interchange Format (ReqIF) File.
In the opened Load dialog, browse for your ReqIF file and click Open.
The ReqIF file is imported.
If Requirements in the ReqIF file have ID prefixes, they are set automatically after import only for imported Requirements. Manage ID prefixes when numbering Requirements.
When the ReqIF file is imported, a notification message appears, stating the quantity of imported or updated elements. If you import a ReqIF file without specification, the message doesn't contain the line that indicates new or updated specifications. You also see no option Show imported specification table(s).
If you imported a ReqIF file with the specification, you can view the list of imported elements. To do that, click the Show imported specification table(s) link in the opened notification message. The list is displayed in a generic table format.
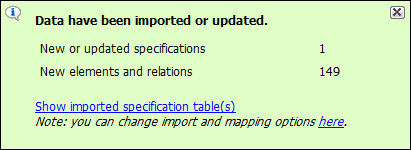
To change import options, click the You can change import and mapping options here link in the opened notification message.
The notification message is displayed for a fixed duration, but you can find all project notification messages in the Notification Window. To open the Notification Window, click Window > Notification Window, or press Ctrl + M.
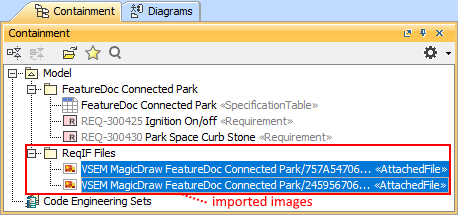
Imported requirements are presented in the Containment tree. The requirement specification is represented as a model package and requirements are represented as model elements. 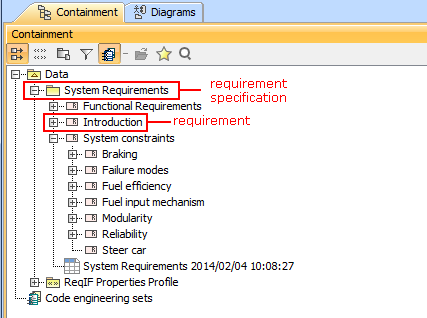
If there are any deleted elements in the source file, they are automatically marked with the «deprecated» stereotype once imported onto the modeling tool.
Changing requirements importing options
Changing requirements importing options is beneficial if you have a custom requirement type defined, or you are importing another type of data instead of requirements, for example, test cases.
A requirement type is limited to class and class extended types.
You can change the following import options:
- Specify an element type to create for the objects you are importing
- Specify a relationship type to create for the relationships you are importing
- Specify a path to the resource location
- Choose whether to import all properties into the model or not and form a list of ignored and not imported properties
To change ReqIF file importing options
We recommend changing importing options before requirements are imported and no changes are made in the project, because after you have changed importing options, you need to remove the requirements you have imported and re-import it.
- Click Options > Project. The Project Options dialog opens.
- In the options group list, select General, then scroll down to the ReqIF options group.
- Click a desired option specification cell to change it's value.
- Click OK after you are finished.
Updating requirements
It is common to modify requirements after importing them. Importing requirements in a ReqIF format allows updating the requirements present in the model without any data loss – all changes are identified.
To update ReqIF file by importing a new file
- Open a project wherein you want to update requirements.
- Import a ReqIF file with updated requirements.
To update requirements from the project
- Open the project containing imported requirements.
- In the Containment tree, select a requirement specification package and open it's shortcut menu.
- Click Tools > ReqIF > Update From Requirements Interchange Format (ReqIF) File.
- In the opened Load dialog, browse for your ReqIF file and click Open. The ReqIF file is updated.
After requirements have been updated, you get a notification message informing about an update status. If you update a ReqIF file without specification, the message doesn't contain the line that indicates new or updated specifications. You also see no option Show imported specification table(s). 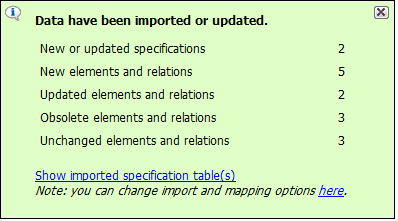
In the change log table, you can see the detailed list of updated elements. 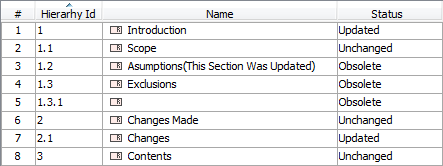
During update, no elements are removed, only new elements are added and statuses of all elements are updated. Elements not present in an updated ReqIF file are marked as obsolete.
Managing obsolete requirement elements
In the model, obsolete elements are marked with an exclamation mark in a yellow triangle. A «deprecated» stereotype is applied to such requirement elements automatically.
Removing Obsolete Elements
In the project, you can choose to remove only the selected obsolete element or all obsolete elements at a time. To remove one selected obsolete element, use the validating procedure that is described in the following section.
To remove all obsolete elements
- In the Containment tree, right-click the requirements specification package.
- From the shortcut menu, select Tools > ReqIF > Remove Obsolete Elements.
Searching for obsolete elements
To search for obsolete elements
- In the Containment tree, right-click the requirements specification package.
- From the shortcut menu, select Validation > Obsolete Elements and one of the following:
- Remove Obsolete Elements – removes the selected obsolete elements from a project
- Ignore – ignores obsolescence from the element and leaves it in the model
- Select in Validation Results – opens the Active Validation Results panel wherein you can perform appropriate validation actions.